How Are Face and Touch Recognition Changing iCloud Access?

facial recognition Software

facial recognition Software

How Are Face and Touch Recognition Changing iCloud Access?

Apple may be testing new security procedures for iCloud.com with its next OS release. 9to5mac has reported that the beta for iPadOS 13, iOS 13, and macOS Catalina can use Touch ID and Face ID to secure and access their devices.

When Will the Change Take Place?

Beta users can already access the features on beta.icloud.com or a beta device or their regular desktop. A popup asks if users want to use Face ID or Touch ID. Many consider this logical and convenient since both systems are already available to lock and unlock devices and or to authorize Apple Pay transactions.

These features could end up in the company’s Sign in with Apple tool. With this tool, users can utilize one sign-on button to access websites — this resembles Google and Facebook partnerships with companies across the internet, where users can log in to certain sites with their Facebook or Google credentials. Apple believes itself to be a bastion of privacy for its users. By positioning Touch ID and Face ID as reliable tools, the company could be making a strategic move. This is especially critical following a major breach on iCloud a few years ago.

What is Touch ID?

You can use fingerprint recognition as a security feature with Touch ID. Apple designed and implemented the system, which unlocks and locks Apple devices. Apple users can also make iTunes and App Store purchases using their fingerprint as a credential.

What is Face ID?

With Face ID, facial recognition is used instead of a fingerprint to lock and unlock devices. This tool is also the brainchild of Apple Inc. and a feature of iPhone and iPad Pro devices. Biometric authentication can also be used to make payments, access personal data and endow Animoji’s with realistic facial expressions.

How Does it Work?

If you’re a beta tester for iPadOS 13, iOS 13 or macOS Catalina, you can help Apple test the new iCloud sign-in process. This gives you access to Touch ID and Face ID. Users also encounter the technology in iCloud when using Safari devices equipped with iPadOS, iOS or macOS or beta versions.

For those visiting iCloud.com on a beta device, the system will redirect you to beta.icloud.com. Even if you aren’t re-routed, you can go to beta.icloud.com manually to take the new feature for a test run. Make sure you are running a compatible operating system — iPadOS 13, iOS 13 or macOS Catalina. Otherwise, you won’t get the new sign-in option or two-factor authentication.

This feature protects users from compromised data and privacy concerns if their device is lost or stolen. Any measure users can take to proactively protect themselves online is a welcome addition. Apple is expected to make the Sign in tools available ahead of the feature’s launch in September.

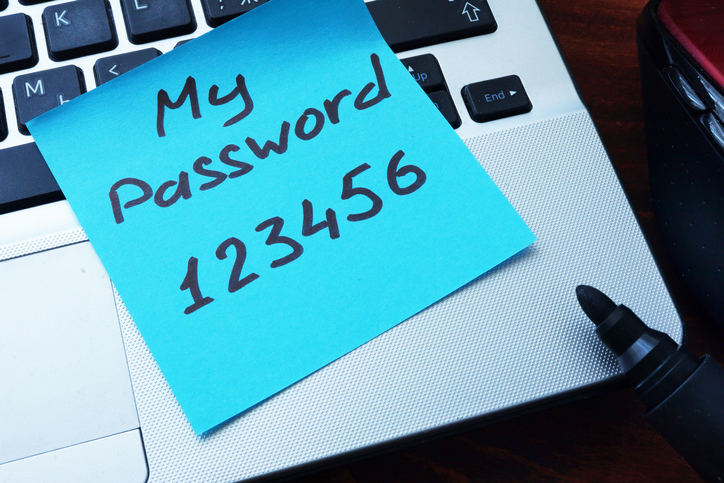
Touch ID and Face ID on iCloud.com make signing in easy and more secure than typing in sign-in information. Plus, the experience will be familiar to those who’ve used it in the App Store or iTunes.

How Secure Are These Technologies?

Face ID and Touch ID are secure. According to Apple, there’s a 1 in 50,000 risk that someone else’s fingerprint will unlock your devices and 1 in 1,000,000 risk someone else’s face will grant them access to your device.

Google’s New Chrome Extension Gives Your Passwords a Checkup

Google Chrome Password

Google Chrome Password

In early 2019, white-hat security expert Troy Hunt and other researchers shared a massive database of breached passwords and usernames. The stolen data constitutes 25 billion records and 845 gigabytes of stolen data.

While many of the collected records are from previously reported thefts, there are new records there, too. It’s a clear indication of regularity, scope and potential damage caused by poor password management.

That news coincided with Google’s announcement of its new Password Checkup extension for Chrome browsers. The extension is designed to alert and protect users who may have compromised credentials.

What is the Password Checkup Extension?

Password Checkup allows users to check if their Google account, and any other account you check into while using Chrome, has been potentially compromised during a previous data breach. Developed in partnership with Stanford University cryptographers, the extension is designed to give you critical information while safeguarding your data.

How Does Password Checkup Work?

After installing the extension, Google will alert users if they find potentially compromised passwords. The passwords are checked against a database of 4 billion known compromised credentials. Warnings are issued automatically, along with a recommendation to change the potentially compromised credential.

It’s important to note that the extension will not alert you to any outdated passwords or weak passwords. While those other factors can also lead to your account information being hacked, the Password Checkup only identifies known hacked passwords contained in databases.

What Does It Look Like When Password Checkup Is Activated?

The Password Checkup icon appears in your browser bar as a green security shield. The extension app will monitor your account whenever you use Chrome to log into a website or a service.

If it detects that the password is potentially compromised, a bright red warning box pops onto your screen. It features a warning sign and urges you to change your password. The box allows you to ignore the alert for the designated site. There’s also a link to learn more information via a page with more details about Password Checkup and how to change a potentially compromised password.

If for some reason you miss the red pop-up box, the browser extension icon turns from green to red.

Can Google See My Passwords if I use Password Checkup?

No. None of the passwords that the app uses are stored and personal information is not collected. The checked passwords are anonymized using hashes and encryption. Password Checkup was designed to prevent hackers from attacking it.

What Are the Risks of Compromised Passwords?

News stories are constantly reporting on the latest corporate data breach, revealing the thousands of records that were exposed and how that company is responding. The story behind the story is what happens to those stolen credentials.

In some cases, hackers sell information on the dark web. For users that do not know about the hack or aware but choose to do nothing, the consequences can be dire. Bad actors now can access accounts, make purchases, steal money or gain other personal information that can help to steal one’s identity.

People affected by stolen credentials can spend months or years resolving the issues related to compromised accounts. This work is time-consuming, costly and stressful.

Are There Other Tools to Check Compromised Credentials?

There are many other services that help monitor and detect stolen passwords, including websites such as Have I Been Pwned? and Watchtower and password managers like Dashlane and Keeper.

How Prevalent Are Data Breaches?

According to the 2019 Verizon Data Breach Investigations Report, stolen credentials are also an increasingly popular approach for hackers looking to gain access to cloud-based email servers. Stolen credentials are a particular issue for businesses in the accommodations and food services, financial and insurance, educational services, manufacturing and professional services industries.

What Can Be Done to Prevent Compromised Credentials?

For businesses, there are several steps that can mitigate the risks of data breaches that result in compromised credentials:

  • Develop and enforce rigorous password policies, including password complexity, reuse and expiration dates
  • Implement two-factor or multi-factor authentication that uses both known information, such as a stored password, and new information, such as a texted or emailed credential, (e.g. a one-time access code)
  • Centralized identity access management
  • Centrally managed single sign-on protocols

Google’s new extension is an excellent way to provide individual Chrome users with information that will protect themselves and their personal information. When combined with broader business rules, the extension should reduce the rate and severity of compromised credentials.

4 Strategies For Super Strong Passwords

Password Security

Password Security

Some days it seems like everything in our lives requires a password: banks, apps, debit and credit cards, online banking, business applications, healthcare accounts . . . the list is literally endless. Technology professionals recommend that you use a different and highly secure password for each site — but how is it even possible for humans to associate that many unique and unusual passwords with the correct website or application? You continually hear cautions from security professionals that simple passwords or those that are reused make it all too easy for hackers to break into your accounts and steal your sensitive personal, health or financial information. Even your social media accounts and business websites are being used to glean information about your life that can potentially be used as details to build a complete biography in hopes of breaking into your confidential data. With all these challenges, these four strategies will help you create the super strong passwords that you need to stay protected online.

1. Avoid Simple Concepts and Terms

Few people enjoy creating unique and individualized passwords for each application or website, but it’s crucial that you avoid these Top 100 terrible passwords, as compiled by SplashData. The list includes everything from the expected “123456”, “password”, “sunshine”, “princess”, “football” and “monkey”. From the list, it looks like men and women are equal opportunity offenders when it comes to poor password selection, and SplashData estimates that approximately 10% of people have selected at least one of the Top 100 worst passwords in the prior year. Think of it like this: if the password seems simple for you to remember, it’s probably going to be simple to hack as well. This includes the standard dictionary of user names, birthplaces or birthdays, favorite colors or foods, pets and the names of relatives.

2. Long, Random Words Are Tough to Guess

The days of a hacker sitting in a basement in the dark trying to guess a complex password are long over. Today’s attempts to breach your account are through sophisticated computer programs that can try millions of word and number combinations very quickly. Previously, the government’s cryptography expert recommended that you create a phrase that you can easily remember and simply replace some of the letters with numbers or other letters to make it more difficult to read (and remember!). Bill Burr’s 2003 password creation recommendations are no longer considered valid, and he has since rescinded those recommendations in favor of creating a long string of random words. Well-known Bible verses, famous movie lines and other phrases that are common to the American vernacular are not ideal — nor is the phrase on your favorite coffee mug.

3. Don’t Reuse Passwords

We get it. It’s tough to remember a bunch of different long, complex and rambling phrases. Wouldn’t it be a lot easier to simply create a single phrase that you could use everywhere? It would be easier for you — and also for anyone attempting to gain access to several of your accounts at once. Reusing passwords is a major no-no, but one error that many people commit. If you ever need to share a password with a service provider, you need to be sure to change it so you don’t have that information floating around anywhere. Would you rather have hackers gain access to a single system, or have to cancel every credit card and account that you own due to having a shared password?

4. Use a Password Manager or Random Password Generator

Keeping track of your highly complex and secure passwords is something that can be difficult for humans, making password lockboxes a necessity. Instead of getting a small notebook that you lock up in your purse or pocket, consider using a password manager. These secure online solutions allow you to create a single, memorable password to a platform that automatically creates passwords for each new application or system that you need to access. When your computer is creating and memorizing these passwords for you, you’re much less likely to make simple mistakes when creating your password. The best programs also provide feedback on how secure your password is and when you should make a change. Avast, a leader in online security, offers a free random password generator that you may want to check out, too.

Creating and remembering secure passwords could either be a full-time job, and you could still end up with vulnerabilities due to the common nature of the words that you choose to make up your passwords. When you follow these four password strategies, you are more likely to protect your important business and personal accounts from both humans and computers.

How to Get the Most From Your Android Battery

Android Battery

Battery technology has come a long way in the past several decades. Today’s lithium-ion batteries are a pretty amazing feat of engineering, offering high capacity, low power leakage, and comparatively long life. That said, they aren’t perfect, and they don’t last forever.

Getting the most use out of your phone’s battery requires a little effort and a little know-how. Follow these tips to get the most from your Android battery.

Android Battery

Understand the Limitations

Even when well maintained, smartphone batteries will degrade over time. This is simply a result of use. After two or three years of moderate use, the battery in your phone won’t last as long as it did when it was new. This is normal.

Check for Defects and Damage

One big drawback to lithium-ion technology is that damaged batteries can become a fire hazard due to an electrolyte chemical reactions. You may remember the exploding Galaxy Note 7 debacle from a few years ago. If you notice your phone feeling swollen or bulging, chances are your battery is damaged and could be on its way to catching fire.

If the back casing comes off your phone, remove it and inspect the battery itself for leakage, cracking, or bulging. If you see any, replace the battery immediately. If you can’t access the battery on your Android phone but you see swelling or bulging in the phone itself, take your phone in for service immediately.

Calibrate the Battery

Sometimes a phone’s software can get confused about the battery’s true charge level. If your phone is dying at 25% charge or if the battery indicator swings wildly, you may need to recalibrate.

Note that calibrating the battery requires completely draining the battery to zero, something that itself can weaken your battery. Take this step when necessary, but try to avoid doing it frequently.

Step 1: Full Drain

Use your phone until it shuts itself off because of low battery. Android doesn’t wait until the battery is truly dead to do this, because it’s trying to help you avoid the full drain. In this case, we want to override it. Power your phone back up and let it die. Keep doing this until it won’t power on at all.

Step 2: Plug It In

While your phone is off, plug it in. Don’t power it up. Let it charge uninterrupted until it reads 100%. Unplug and power up. If the phone now indicates something less than 100%, plug it back in until it reads 100%.

Step 3: Restart

Unplug and then restart the phone. If it still doesn’t read 100%, plug it back in until it does. Repeat step 3 until you get a 100% reading right after reboot.

Step 4: Repeat

Drain your phone to zero again and then charge to 100%. At this point, your battery should be completely recalibrated.

How to Copy Cell Formatting in Microsoft Excel

Copy Cell Formating Excel

Excel is a powerful application, but because it can do so much it can be easy to miss certain features that could make your life much simpler. Today’s quick tech blog shows you one of these features. We’ll look at how to copy cell formatting in Microsoft Excel without disturbing the contents of the cells you want to format.

Learn how to copy cell formatting in Excel. Click Here or watch the video below.


Step 1: Format One Cell How You Want It

(Note: If your Excel sheet has already been formatted or if you’re working from a template, you may be able to skip directly to Step 2.)

Before you can use the format painter to copy cell formatting, you need to have at least one cell formatted the way you want. Select a cell and begin formatting. The easiest way to format a cell is to apply a style using the Styles tool. If you don’t see a style that works for you, you can manually adjust the elements in the cell using the buttons in the Font and Alignment tools. Change the font or font size, add color to the cell, or add borders to the cell.

Step 2: Select the Model Cell

Select the cell that looks the way you want others to look. You’ll see a green border around it. Now click the Format Painter button in the Clipboard area (upper left). Your selected cell will now have a rotating box surrounding it. As long as the box is rotating, you know the format painter is using this cell as your model.

Step 3: Click (or Click and Drag) Other Cells

If you want to apply the style to just one cell, click on that cell. It should instantly take on the formatting of the model box. If you want to apply the style to multiple cells in a row, column, or region, then click and drag until you’ve selected all the cells you want to format. When you release your mouse click, all those cells will take on the formatting of the model cell.

Note that using this method won’t affect the contents of the cells or the formulas associated with them. As long as you’re using the format painter, only formatting and styles are affected.

This Method Works Everywhere

Another great thing about using Format Painter to apply formatting and styles is that it works on any content in Excel. It doesn’t matter if you’re using Excel mostly to organize text or if you have pages upon pages of financial data. The Format Painter doesn’t care about any of that. You can use this method to apply number styles to rows or columns of numeric content and general styles to text.

Copy Cell Formating Excel

How to RSVP to Invites With Outlook Mobile

Outlook Mobile Tech Tip


Outlook Mobile is a powerful mobile version of Microsoft’s popular Outlook application. Microsoft has provided users a standalone email app that’s packed with a real depth of features. Today we’re looking at how to quickly RSVP to meeting invites using Outlook Mobile. The best and quickest way to do this uses an Outlook Mobile feature called Quick Action, so we’ll start by explaining what Quick Actions are and how to do them.

Understanding Quick Actions

In Outlook Mobile, Quick Actions are those actions you can take from the main email screen without taking the time to open the corresponding messages. Outlook Mobile intelligently understands the nature of certain types of messages (like calendar requests). The app will offer you a quick action that it thinks may be appropriate based on the context of the message. RSVP, Remove, and Modify are a few of the quick actions you may encounter.

In the current version of the Outlook Mobile app, Quick Actions appear as a lightly shaded bubble directly underneath an item. The lightly shaded bubble displays a summary, and on the right side, there is a blue button with the suggested Quick Action.

Using Quick Action to RSVP to Invites

To use Quick Action to RSVP to an Outlook invite, find an invite in your Outlook Mobile inbox that shows you a quick action as described above. Tap on the blue bubble that says “RSVP”. Doing so pops up a window with quick-response actions.

In this window, you’ll see a snapshot of your Outlook calendar, reminding you whether you’re free. Add a message to the organizer if you like. This is especially useful if you need to explain why you’re tentative or declining the meeting outright. Next, tap one of the three available options: “Accept”, “Tentative”, or “Decline”.

Tapping this option will drop you suddenly back to the main app window, but don’t fear. The meeting organizer received your notification, and the meeting is now on your calendar. Not sure if it worked? Navigate over to the calendar tab and double check. You should see the meeting listed there along with all attendees and their responses (if you have the rights to see them).

Other Quick Action Scenarios

There are two other Quick Actions worth mentioning. First, Remove: If someone cancels a meeting that you were scheduled to attend, that cancellation comes through as an email calendar update. Outlook Mobile recognizes this kind of message and offers a “Remove” quick action. Clicking this quick action removes the entry from your calendar without having to fully open the message.

The other Quick Action is Modify, which may show up on certain types of messages, such as dinner reservation confirmations.

Conclusion

Quick Actions are speedy, powerful ways to interact with certain messages in Outlook Mobile, but they are just the tip of the iceberg. Contact us today to learn more about maximizing your use of Outlook Mobile.

Outlook Mobile Tech Tip

Enable Do Not Disturb on Your Android Device

Do Not Disturb Android

Do Not Disturb on Android can do more than you might expect. Here’s how to enable and customize Do Not Disturb on your Android device.  

Do Not Disturb AndroidToday’s quick tech blog explains how to enable Do Not Disturb on Android devices. We’ll also give a basic explanation of how to customize this feature, making it even more powerful. Note that terminology and locations vary on Android devices. If you don’t see exactly what I describe, look for something similar.

What Is Do Not Disturb on Android?

Do Not Disturb on Android does what you’d expect based on its name: when enabled in its default mode, it silences all notifications. It’s a good choice while you’re sleeping (or want to be), while you’re presenting at work or displaying content from your device, or while driving.

Default mode has its usefulness, of course, but sometimes it’s a little too…nuclear. You might want to cut down on the notification madness, but you still want to be alerted if your significant other (or boss, or VIP client) calls. This includes calls, texts, news alerts, and any other app notifications. Good news: Do Not Disturb can be customized, making it a powerful feature for tailoring which people and which apps are allowed to reach you. We’ll get to that, but first, here’s how to enable Do Not Disturb.

Enabling Do Not Disturb on Android

To enable Do Not Disturb, open your settings. Navigate to the Notifications menu. In most Android versions, you’ll see an option for “Do not disturb.” You can toggle this on right from this menu, or you can click on the widget for further options. “Turn on as scheduled” (or some variation of that) is a useful way to automatically toggle off notifications from, say, 11pm until 7am.

A few things to note about the default mode: first, toggling on Do Not Disturb essentially disables Android’s notifications system. You won’t receive any from anywhere. If it’s critical that someone be able to contact you anytime, day or night, you need to customize your Do Not Disturb (see below).

Second, you can always manually disable your scheduled Do Not Disturb. This is useful if you’re out late and still want to be notified about incoming calls or texts. Just come back to the main Notifications page and toggle it off. It will remain off until the next scheduled window.

Customizing Do Not Disturb on Android

Most people can’t get away with default Do Not Disturb. If you want to allow certain people or apps access to you even during Do Not Disturb sessions, go back to the notifications menu in settings and click the widget for Do Not Disturb. Click “Allow exceptions” and start customizing. There are tons of options here. You can enable notification from specific contacts or from repeat callers. You can choose to allow event/task alerts (think work calendar notifications), too.

From there, options vary depending on your phone’s manufacturer and the version of Android that you’re using. Use the principles described with whatever options your phone gives you.

5 Must-Know Microsoft Outlook Hacks

5 OUTLOOK HACKS!

5 OUTLOOK HACKS!

Take a minute to pull out your phone. How many email notifications are staring at you? 100? 3,000? More? Drowning in email is no way to live—or to conduct business. An out-of-control personal email account can cause plenty of problems, like missed bill payments. Even worse, an out-of-control business email account can be disastrous.

No matter who you are or what your business does, email is a big part of your work. Unless you’re one of those productivity gurus who’s already achieved inbox zero, managing your inbox can be a frustrating, overwhelming task. If you’re using Microsoft Outlook to manage your work email, you might not be using this powerful program to its fullest potential. Here are 5 must-know Microsoft Office hacks that will help you gain control over your email.

1. Use Rules to Automatically Organize and File Emails

Microsoft Outlook has a powerful tool called Rules that can prevent many emails from ever landing directly in your inbox. If your business is like most, you receive many messages that fall into categories. Dealing with similar emails all at once can save time. Use rules to automatically route emails to specific destinations. Here’s how:

First, create a new folder (say, Admin Updates for all those company-specific emails you don’t need to read right away) by right-clicking on your inbox folder. Next, right-click on a message that you want to apply a rule to and select “Rules.” Outlook will try to figure out what kind of rule you want. If it doesn’t get it right, you can click “Create Rule…” or “Edit Rules…” and customize to your liking.

Try this for all sorts of email categories. Create folders for clients you interact with often, for “cold call” sales emails, and for newsletters you’re subscribed to. Reserve your main inbox for the unexpected.

2. Keep Customizing Rules, But Don’t Overdo It

Once you have a few basic rules in place, you’ll start to see the value. Keep customizing and adding rules to enhance your efficiency. The options included in the Rules menu are pretty deep. That said, don’t overdo it. It’s possible to set up so many folders you start to lose track of what goes where. We recommend starting out with 2 or 3 folders. Depending on your comfort level and the complexity of your role, you may eventually want to scale up to 5 to 10 folders, each with rules associated with it.

3. Use OneNote and Teams to Reduce Email Volume

As great a tool as email is, it’s not very good for real collaboration. That doesn’t stop groups of employees from trying to collaborate over email. Take a simple task—say, filling in an Excel chart. Over email, you’ll end up with multiple versions of the file being attached to emails, all in various states of completeness. Your team will eventually get the job done, but it’s laborious, distracting, and inefficient.

Microsoft has two main collaboration apps: OneNote and Teams. Both can help reduce email clutter.

OneNote

OneNote started out as a high-powered note-taking software, and it’s evolved into a powerful collaboration tool. Share a tab or a notebook with a working group, and your team can collaborate on a document or a chart within OneNote. Another use is creating a notebook that’s a shared note-taking space. Creative or knowledge-based teams can benefit from this kind of central repository of knowledge.

Outlook integrates directly with OneNote with both “Move to OneNote” and “Open in OneNote” buttons. Use these to turn those pesky email threads into OneNote pages.

Teams

One of Microsoft’s newest additions to Office, Teams is Microsoft’s competitor to Slack. Each time you create a Team, you give a specific group of people (say, a project team) access to a dedicated space to collaboratively chat. You can post updates for your department, and they can ask department-wide questions in real time. Teams users can also use one-to-one and group chat within the application.

All that is just scratching the surface, though. When properly integrated with SharePoint, Teams gains the ability to open just about any Office program—Word, Excel, you name it—within the app, in a collaborative format. Five users can edit a Word doc simultaneously, right within teams. It’s an incredibly powerful tool for hacking your inbox.

4. Use Send Options Like Delayed Send

When composing an email, click “File” and then “Properties” in the menu of the email itself. You have a host of options available here, like setting importance and sensitivity levels or enabling voting and tracking. The best one, though, is delayed send. Check the box for “Do not deliver before” and set the time that makes sense, and you’ll appear to be an email wizard. Use this whenever you want a planned email to send when you’re not at your desk, such as scheduling an email to arrive just after a meeting ends.

5. Hack Scheduling: Use Calendar and Reply with Meeting Request

If you’ve ever attempted to schedule a meeting with multiple people over email, it’s a mess. It turns into a reply-all fest, eating up time and attention. Instead, use Outlook’s powerful Calendar feature. Click on the Calendar tab, then create a new Meeting. Use the Scheduling Assistant to view all participants’ availability. Click “Add Rooms” to see which rooms are free.

That’s already far better than the reply-all mess, but it gets better. The latest versions of Outlook will attempt to read all this and show you the best options automatically, assuming your company’s IT department has the proper settings enabled. Also, you can cut off the reply-all fest by using the “Reply with Meeting Request” button. Doing this will automatically jump into the scheduling assistant tool, saving you even more time.

Four Amazing Tips on Using iPhones and iPads in Your Business

Ipad in Business

Ipad in Business

Coordinating interactions between office staff and remote workers can be challenging. One way you can cut through a lot of the confusion that arises when trying to keep everything in sync is by leveraging your worker’s iPad and iPhone devices. It is a way of using something that is already in their arsenal at a minimal cost to your business.

There will not be a focus on any specific device versions, mainly because it may already be yesterday’s news by the time this article reaches your eyes. You can execute these suggestions successfully even if you have some employees who still cling to their iPhone 7 or iPad Air 2. One thing Apple has always offered powerful devices capable of being used in a variety of ways for business. If they are well-maintained and functional, you can implement the ideas that best suit your work culture.

1. Synchronize Accounting

Having a reliable means of tracking financial transactions related to business functions is a crucial component of any enterprise. The App Store provides access to a variety of accounting apps that can be synced to your company software to send invoices and track payments from suppliers and vendors. All workers can see the changes in real-time and keep all ledgers in sync.

The apps also have features allowing management of multiple business accounts and any related transactions between them all. Some provide reports with visuals giving you a quick overview of your current liabilities, and where the company may be making heavier-than-needed expenditures. Workers are not bound to their laptops when it comes time to issue an invoice or product documents needed for tax purposes.

2. Maintain Documents and Scheduling

Your employees can create memos or document the details of a significant business transaction using a variety of document creation tools. Their iPad or iPhone can be synced with popular Microsoft Office applications like Excel or any of your favorite G-Suite tools.

Workers would only need to log into a OneDrive business account to open a Word document created earlier on a MacBook or add the settings of the company’s business Google account to their device.

Their iPad or iPhone can also be coordinated with a calendar to send notifications about upcoming events. Imagine having all your staff show up on time to a meeting or continuously meeting project deadlines despite being in different locations.

3. Create On-The-Go Presentations

An iPad can be used to create a visual presentation showcase anywhere outside of the office. Apps like Keynote let workers share ideas with you and other executives in a creative and organized fashion. Their iPhone can also be transformed into a hand-held digital brochure to show off at conventions and other business events.

Instead of lugging around a ton of paper brochures that can easily be lost, staff can show off a digital version to a business contact that can be forwarded as they collect their information for follow-up. Other iOS apps like CamCard can be used to keep up with all the names and emails of potential future clients at trade shows and expos.

4. Stay Connected and Engaged

Are you concerned that your remote workers might be feeling a little disconnected from the office staff? There are iOS apps available for platforms like Trello and Slack that make communication and project coordination a smoother process.

The apps provide you with the same functionality that peers in the office have on their laptop or desktop. That means you can easily synchronize workflows and maintain communication about upcoming deadlines for tasks related to various projects. Their iPad or iPhone devices become conduits for hosting online video chats with co-workers.

Recommended Support Tools

You may decide that investing in iPhone or iPad devices for your workers would be a sound investment. We suggest investing in the following tools to effectively leverage them for your company.

  1. Stylus — Look for devices like the Apple Pencil that enhances note-taking ability during online meetings. Workers can add comments to PDFs, create charts and graphs, and more.
  2. Keyboard — Investing in a sound keyboard gives employees more comfort when they need to do a lot of typing.
  3. Case — Many cases can protect devices from accidental damage and let workers adjust them to a more comfortable angle for heavy keying.

Do your research into apps and other support devices that will enhance iPhone and iPad business usage. We think you’ll be happy at your decision to turn them into one of your company’s most potent occupational tools.

Inside The New Microsoft Edge Browser

Microsoft Edge Browser

Microsoft Edge Browser

Microsoft’s first version of the Edge browser fell far behind other options, gaining only a 4.4 percent market share compared to Chrome’s 65.5 percent, Internet Explorer’s 9.83 percent, and Firefox’s 9.62 percent. The company went back to the drawing board and created a new Edge that is based on the Chromium engine. Here are a few of the highlights that this new browser has to offer.

Better Compatibility

The original Microsoft Edge, based on EdgeHTML technology, ran into occasional problems with rendering HTML 5 elements. The new version has comparable compatibility to Google Chrome. Even in this early stage, most websites were rendered without any significant problems.

Changing Menus

The dockable pane is getting booted in favor of cascading menus. The options aren’t changing a lot, but the navigation feels more intuitive with this update.

Improved Data Privacy

One sticking point that some people have with Google Chrome is that the company collects a wide range of information about online activities from its users. You can use the latest version of Microsoft Edge to reduce the data that Google collects. Only the time you spend using Google properties such as Gmail get tracked, but your activity outside of that would not go to the search engine giant.

Supports Chrome Extensions

Microsoft Edge Insider Add-on selection has always paled compared to Chrome’s, but that’s not going to be a problem anymore. The new browser makes it straightforward to add Chrome apps, which is a huge upgrade to the user experience. Instead of only having 120 extensions to choose from, you have access to more than one hundred thousand. The Add to Chrome button will also work with Edge.

Synced Tabs

This feature isn’t in the new Edge yet, but you’ll eventually have all of your open tabs synced between your devices that have Edge open. It promotes seamlessly going back and forth between desktops, laptops and mobile devices.

Getting Microsoft Edge

This browser is currently under development so hasn’t reached the shippable stage yet. Microsoft will add more of the user-friendly features as the browser progresses. The early release performs well and comes in a daily and weekly updated version. It has a surprising amount of polish for software that’s relatively early in its development process. You can access the browser through the Microsoft Edge Insider program.

More Default Search Engine Option

Microsoft promoted Bing as the default, and only, search engine for Edge. The Chromium version is adding Google, DuckDuckGo and Yahoo to the roster. This is a welcome change, as having to go directly to the other search engines to use them made the user experience feel clunky.

Microsoft is taking a lot of steps in the right direction with the Edge Chromium version. It addresses many common complaints about Edge, and the disconnection from Google services limits the amount of data being collected. Following its development and seeing whether it can improve its foothold in the browser market will be exciting to watch.