Microsoft Excel Tip: How To Copy Cells In Microsoft Excel

Copy Cells Microsoft Excel

Microsoft Excel is a staple program in Microsoft’s Office suite. It’s a powerful spreadsheet program that allows users to organize data and calculate results using a wide range of formulas. Let’s look at one basic element to this program: how to copy cells in Microsoft Excel.

Basic Cell Copying Technique

Before we move on to some advanced techniques, let’s cover the basics.

1. Select the Cell or Cells You Want to Copy

If you want to copy just one cell, simply click once on that cell. IF you want to copy multiple cells, click and drag until all the cells you intend to copy are selected.

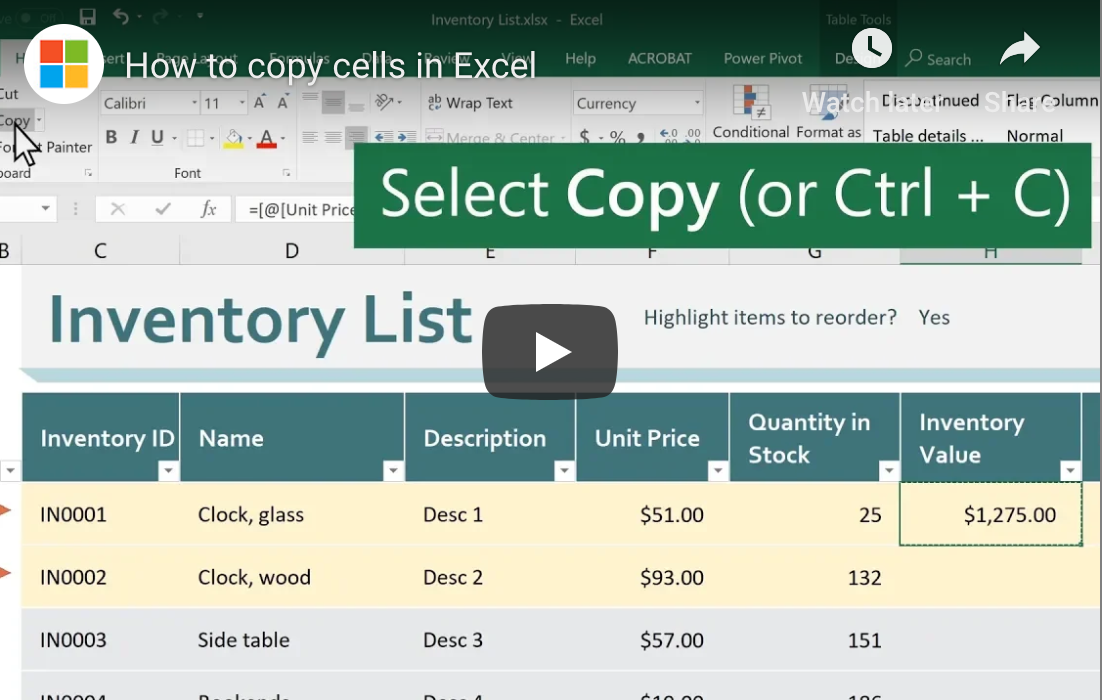
2. Copy the Cell or Cells

The next step is to actually copy the cells. You can do this by pressing control+C on a PC (command+C on a Mac), or by clicking the Copy button in the ribbon at the top of the Excel window. You’ll know you’ve copied a cell or cells when you see a spinning dotted line surrounding the copied area.

3. Choose Where You Want the Copied Cells to Go

Next, click once on the cell where you want the copied cells to go. If you’ve copied multiple cells, click the cell where you want the top left cell in your selection to go.

4. Paste the Copied Content into the New Location

Now that you’ve selected the cell where you want your copied content to appear, use the paste function to place the copied content in the new location. To do this, click on the Paste button in the ribbon (near the Copy button), or press control+V (command+V on a Mac). The material you had copied will now appear in the new location. If the copied material was in a cell that contained a formula, the formula will be copied, too.

Please note that if you’ve selected a location that already has content in it, the old content will be overwritten by the new content. Usually, that’s exactly what people are intending to do, but it’s important to note how this works.

Advanced Techniques

Now that you understand the basics, check out these two advanced techniques.

Paste Options

If your copy and pasting doesn’t work as planned, try this. Click on the clipboard next to the cell you just pasted into. Hover over the buttons and choose the one that sounds like what you’re trying to do.

Smart Fill

Select some data. See the green square at the bottom right? Try dragging that square down or sideways. With some data, Excel can intelligently populate either data or formulas to help you work more quickly.

This quick tech tip will help you get started using Microsoft Excel. For more help, give us a call!

Copy Cells Microsoft Excel

Are You Good at Saying No & Setting Priorities?

Just say NO


There are never enough hours in a day, but how you spend the hours that you do have can make all the difference in the world. Just think: business leaders such as Steve Jobs and Bill Gates have exactly the same 24 hours available to them as you do! All good business leaders have to determine the best way to be productive, but this can be a challenging lesson to learn. Here’s a quick hack that will help you be more productive without adding to your stress level.

Just Say No!

Ask yourself this question multiple times each day: “Am I adding unique value to this conversation, or could someone else do (nearly) as well?”. You have to be honest with yourself, but when you rigorously apply this rule you might find that you can skip some meetings, delegate decisions and allow others to take the lead on smaller projects or tasks so you can focus on leveraging your core competencies. Getting rid of the smaller annoyances leaves you more time to focus on what’s truly important — moving your organization forward.

Effective Prioritization

Did you know that the word “priority” was never meant to be plural? That’s right, we talk about “priorities” all the time, but for more than 500 years it strictly meant the very first thing. When you think about it, it’s impossible to have multiple “first” things, there’s only one first. When everything is a priority, nothing’s a priority, but how can you make decisions about where to focus without freezing yourself or your team in a circle of indecision?

Multitasking is a Myth

Your brain can truly only handle one task at a time. When you’re jumping back and forth between several tasks, your brain takes a minute to adjust each time you make that leap. This mental price is time taken out of your day that could otherwise be spent on a single productive task, allowing your brain to work at peak performance. Even if you’re only wasting 60 seconds between each task, that can easily add up to more than an hour each day. This performance disruption reduces your focus and makes your delivery less consistent.

If you can’t help with a particular project, or don’t need to be involved in a decision, don’t be afraid to step away and let others handle it. You need to be able to trust that your team can take care of the rest. There’s no need to add what is essentially busywork to your day when you can harness the power of your mind to create value in your little corner of the universe.

Just say NO

Set Reminders to Stay on Track with Important Tasks

Productivity Tip


Raise your hand if you’re one of the millions of Americans who are overworked and don’t have enough hours in the day — isn’t that everyone? When you do manage to get into the groove of getting something done, it’s easy to forget everything else in the work or play. You may not even realize exactly how long you’ve been spending on a particular task, and perhaps spend more time than you can afford. This leads to a spiral of stress that can be damaging to your productivity. Productivity experts recommend a simple hack that will keep you on track. Leverage the tools that you already have at hand to stay on track with these time-sensitive tasks.

Use All the Tools You Have

When you’re in the thick of a project, you don’t want to completely stop and think about using several mouse clicks or taps to set a reminder to do another task in the future. Fortunately, today’s smart speakers have everything that you need to set a timer or a reminder for a later date and time. Simply let your smart devices do the work for you! Be sure that you’re using a task reminder or timer that will work across all of your devices. That will save you from setting a reminder on your desktop that doesn’t sync to your phone after you’ve left the office for the day.

Be Specific When Setting Reminders

Jotting a quick note is great, but do you always understand what it was you needed to do at a later time? If you’re viewing a reminder that is out of context with the project, it might take you a few minutes to get back up to speed. Reduce that problem by being very specific when you’re setting your reminders. At a minimum, each reminder should include:

  • Specific time and date for the reminder
  • Projects your reminder relates to
  • Tag any individuals you need to consult

You’ll find that your reminders are most helpful if you quickly state the specific actions that you need to take and why they’re important.

Keeping your life organized doesn’t have to be difficult. When you’re using the tools that are around you and reminding your future self about specific tasks, you’re already taking several steps in the right direction. Microsoft Office 365 productivity suite includes everything that you need to keep your projects rolling smoothly regardless of whether you’re in the office or on the road.


Productivity Tip

Reduce Travel Costs & Expense With Video Calling Apps

Video Conferencing

Endless airline terminals. Overpriced airport food. Overly-close seating on packed planes. What’s there to love about business travel? Sure, there are some road warriors who appreciate never having to clean a room or make a bed as they spend all their time in hotels, but for most people, business travel is simply something to be endured. Even 10 years ago, it would have been challenging to have the kind of high-speed access and seamless experience that you need for video conferencing, but today’s a different story. See how you can save time and money by utilizing some of these next-gen video calling apps.

Business Happens Everywhere

Workers want to be able to be productive anytime, anywhere — and that could include while watching their child’s baseball game, stepping out of a client meeting for a few minutes or even from home on the weekends. This is especially true of small business owners who are never truly off duty. Fortunately, video conferencing software and apps have come a long way from the fuzzy, slow-moving images and poor sound quality of the past to provide crystal-clear images and sound with no noticeable lag. If you haven’t tried it lately, video calling apps are now quite seamless to use and work equally well from your desktop, laptop, tablet or mobile phone.

Benefits of Video Calling

Let’s face it: travel is expensive, and the cost is not always justified for the value that you provide. There are certainly times when business travel will still be required, but many negotiations and conversations can happen equally well over a high-speed video call. Phone calls without video are not enough to provide you with the nuanced information that you receive when you’re able to see someone directly in front of you, and video calling fits that bill nicely. Business is increasingly global in nature, making video calls one of the few cost-effective ways to work with teams that are scattered throughout the region — or the world. Until the last few years, it was a bit more difficult to ensure that both individuals or teams had access to the right software and hardware to make video calling truly viable. With the majority of laptops being shipped with high-resolution video conferencing hardware already installed and the prevalence of smartphones, that is no longer the case.

Top Video Calling Apps

While certainly not an exhaustive list, here are a few of the top video conferencing apps that are used in business today:

  • Skype — consistently one of the top-rated apps by technology professionals and users
  • Zoom — free video calling that allows you to instantly share information from your phone
  • Cisco WebEx — businesses professionals love it, and there are extensive shared workplaces available in the platform
  • GoToMeeting — quickly and easily collaborate with partners and clients in real time
  • Slack— cross between a chat platform and video conferencing, built specifically for team communication

No matter what your video calling needs are, there’s probably a platform on the market today that will fulfill your needs — and cost far less than relying on expensive business travel.

Video Conferencing

How To Create Information Gathering Forms With Microsoft Office 365

Microsoft Forms

It may surprise you, but Microsoft Office 365 has a fantastic solution for creating simple quizzes, polls and surveys — and you already have access to this functionality! Microsoft Forms is relatively new, as it was only launched in June 2016, but this lightweight web app is an excellent way to gather feedback or plan activities. You can even use the information offline, which makes it handy for reviewing information that was submitted even if you’re not physically at your desk.

How Can I Create Forms and Surveys with Office 365?

The steps required to create surveys are straightforward and don’t require a great deal of technical knowledge. You can find the full instructions on Microsoft’s support website, but this quick snapshot should be enough to get most people started. Since the forms use Microsoft Office 365, each cloud-based form or quiz saves automatically as you move through the questions.

  • Log into your Office 365 account by going to forms.office.com.
  • Select the option to create a new form or quiz.
  • Enter a title for your new form and the optional subtitle — be specific enough that the name will make sense out of context for others!
  • From here, you can add questions and include a variety of options for answers such as Choice, Text, Rating, Ranking or Date questions. You can even create Net Promoter Score questions when you click the More *** option.
  • Complete your form or quiz by adding as many questions and types of answers as you would like.
  • You can even add Other options that allow users to input additional text
  • As you’re moving through your questions, be sure to select Required on any questions that you want to force users to answer before stepping to the next question. If you do not select Required, users will be able to advance through the survey without making a selection.

The user interface is very simple, but quite intuitive for most users. There are several thoughtful additions to the form setup that will help you stay productive and quickly create your forms. For instance, when you create a question such as Which day of the week should we go? the artificial intelligence in the form will automatically suggest all seven days. You can then select which days you’d like to add as answers.

User-Friendly Options to Automate Your Form

Creating a form is pretty easy, but what about organizing the various questions? The Office 365 Form module allows you to shift the order of the questions once you’ve created the quiz or survey, smoothing the process for form creators and for users. You can also copy questions to reduce the amount of typing required during the form creation process. Need to have someone enter an answer only in numbers? No problem! You can restrict responses to only accept numbers, and even limit the range of numbers that you will accept in the form. That means less time on the back end as you’re interpreting survey or form results. You can even select a theme for your form or add some graphics to make it more fun and engaging for users.

How Can I Send My Form or Survey to Users?

Once you have finalized your form, the only thing left to do is send it out to your users! Fortunately, this is just as intuitive as the form creation process since everything is fully integrated into Microsoft Office 365′s cloud-based platform. You’ll simply choose whether to share the survey to others in your organization or if you want to open the form for those outside your Office 365 ecosystem. Once you’ve determined your sharing options, copy the link to the survey and include it an email, SMS text or instant message to your selected audience. You can even create and download QR codes or embed the form on a landing page.

How Do I get Responses to Microsoft Office 365 Forms or Surveys?

The Microsoft team has made it extremely easy to gain access to the form or survey responses. Each survey has a Responses tab, where you will find everything that you need to know, including;

  • Number of responses
  • Average time it took respondents to complete the survey
  • The current status of the survey (Active or Inactive)

You can also download the results of the survey to Microsoft Excel or even flow the data to Microsoft’s analytics platform: Power BI.

While the Microsoft Office 365 Forms option doesn’t have quite as many options for branching as you would find in a dedicated survey tool such as SurveyMonkey or Typeform, it is a fast and intuitive way to quickly get responses from your audience. What makes it even more attractive is that it’s included for free in your Office 365 license.

Microsoft Forms

Never Lose A Receipt Ever Again

Tired of Not Getting Reimbursed for Business Expenses? Never Lose Your Receipts Ever Again!


Maintaining receipts is a fact of life for many people, but it can be extremely frustrating. Tiny pieces of paper that have to be maintained and categorized long enough to submit your expenses for reimbursement — who has time for that?!? It’s not uncommon to lose receipts and then spend additional time struggling to rebuild them once you have to submit an expense report or turn them in to get your money back. This quick life hack will help you stay organized and keep your receipts and other items under control.

Tracking Your Spending

Even if you’re not getting reimbursed by your business for purchases, it’s a smart idea to keep track of receipts so you have an idea where your money is going on a monthly basis. Every year, there’s a wonderful day (for the government) called Tax Day. Capturing your personal and business receipts in a way that you can find them again makes it that much easier to be ready to organize your taxes and get the best possible return. Plus, you’re more likely to stay on budget if you are closely watching your expenses.

Quick Hacks for Receipts

Are you using a cloud-based storage system for your photos? If not, this might be reason enough to look into it! One of the best ways to maintain your receipts and ensure that you have easy access to them regardless of whether you’re in front of your computer is to save all of your receipts to the cloud. Quick and easy — as soon as you receive a receipt from a purchase, snap a picture! If you want to get really fancy, you could create a specific folder for all of your work-related or home-related receipts and save the images appropriately. Dropbox or Box are excellent options for cloud storage that are inexpensive yet provide cross-platform functionality so you can grab your receipts digitally and match them up to your expense report or budget.

Use Receipt Tracking Software

If you have a few extra moments to process your receipts, there is an interesting new trend in mobile apps around receipt management. Not only will the apps handle the issue of annoying pieces of paper, but they’ll also pay you for capturing your receipts! Some of these apps include:

Each app provides a slightly different take on the same concept: capture your purchase and receive money back. This next-gen way of couponing is being used by millions of individuals in the U.S. to earn back a small percentage of their total purchases.

Not every hack has to be difficult; sometimes the easiest ones are already in your hand — like your phone!

How Advanced eDiscovery In Microsoft 365 Helps Manage Data

Microsoft Office 365 eDiscovery


Do you have a lot of data?

Are you able to organize your data in a convenient logical way and then search for it with ease and/or with advanced search criteria so that the results are not in the hundreds but in the tens or less?

Is managing it or finding specific data at any given time proving time-consuming? Does that consumption of time eat into your budget?

If any of this is true, you may need an advanced program, something like Advanced eDiscovery that you can use via your Microsoft 365 subscription. It’s great for lawyers and it’s great for just about anyone else in any other industry who needs a better way of managing data.

Here’s how

Advanced eDiscovery helps people like you manage data.

What is Advanced eDiscovery?

First, what is Advanced eDiscovery? You may already be familiar with eDiscovery. eDiscovery is software that helps you process and collect information in a digital form or from digital sources. Examples include:

  • Emails
  • SMS
  • File Shares
  • Web pages
  • Social media
  • Other online documentation

eDiscovery allows you to search and put together information and unstructured data with relative ease. You can also search, tag, review, organize, analyze, and/or export it whenever necessary.

Office 365 Advanced eDiscovery is the next level — it fills many of the gaps left by eDiscovery and incorporates Equivio Zoom technology — Microsoft acquired Equivio in January 2015. Advanced eDiscovery, by optimizing the powerful tools provided by Equivio technology, makes managing data and gathering things like evidence much more efficient and intuitive.

What features does it offer?

The powerful features presented by Advanced eDiscovery include some of the following capabilities:

  • Powerful search capabilities that allow you to:
    • search documents stored within Office 365 as well as information and data outside of Office 365,
    • search using keywords and/or specific conditions defined by the program or added by the user,
    • identify information that is redundant or duplicative,
    • determine the relevance of using advanced predictive coding, and
    • apply tags to in effect label certain documents under one theme.
  • Intuitive organizational capabilities that allow you to:
    • cluster or group information from relevant topics,
    • define who has access to the data or allow only certain persons to view information, and
    • set up notifications.
  • Extensive analysis, reporting, and exporting capabilities that allow you to:
    • analyze data using different criteria,
    • filter information into a specific package using tags or labels that the user created, and
    • generate reports that can be submitted to government agencies or other legal institutions.

How does Microsoft Office 365 Advanced eDiscovery help manage your data?

Managing data is all about the above-mentioned features. Using these features, you can prepare a case, process it, analyze information and data, determine and save what is relevant, create reports, and export information, data, and/or reports.

The following is a breakdown of steps you would typically take when using Microsoft Office 365 Advanced eDiscovery to manage a new set of data:

  • Step 1: Conduct a search and pair down the information by about 60%. You can use different modes and themes to narrow the search.
  • Step 2: Click on the Relevance tab to mark each entry as R (relevant), NR (not relevant), or Skip (for later determination).
  • Step 3: Decide if you should move forward by clicking on the Decide tab.
  • Step 4: If you want to create a package to send to another party, you click on the export tab.

Microsoft Office 365 eDiscovery

Advanced eDiscovery is all about helping users assess their position, protect data and information, and respond to requests for data, information, or compliance issues, among many other uses. There’s a lot to learn about Office 365 programs. It offers a lot of tools, but you can’t build if you do not know how to use the tools. Return to this blog regularly to learn more about these tools to make your professional life more efficient and productive.

Business Insights With Visio and Power BI

Business Insights

Microsoft’s Visio Visual and Power BI are two extremely useful software tools that help business owners store, organize, and interpret data with easy-to-understand visual representations.


Using these tools can take your business to the next level. Still, many business owners don’t know about Visio Visual or Power BI. Moreover, many are skeptical as to why data interpretation is important at all.

Why is data interpretation so crucial to your business?

As a business owner, it is vital that you understand the “big picture” of your company’s data. Any given company will have a plethora of diverse data at any given time. This may include:

  • Sales records, recorded by the hour, day, week, month, and year
  • Sales records by location
  • Sales records by department
  • Floor plans of stores, warehouses, offices, and more
  • Employee information
  • Subscriber or client information
  • Inventory data
  • And more

Storing all of this data and never looking at it will inevitably hurt your business. Doing this almost certainly means missing the “big picture” and subsequent opportunities for growth and improvement.

How can Visio Visual and Power BI help?

Here are the biggest reasons companies don’t examine, analyze, and interpret their data more often (or at all):

1. They have too much of it.

2. It’s difficult to organize and understand.

This is where tools like Visio Visual and Power BI step in. Both tools create easy-to-see and understand visual representations of your data, with the goal of targeting what’s working and what’s not.

What is Microsoft Visio?

From flow charts and 3D graphs to network schemas and floorplans, Microsoft Visio Visual is one of the most capable pieces of software for creating and manipulating diagrams of all kinds.

What is Microsoft Power BI?

Power BI is another indispensable Microsoft tool that allows businesses to analyze their data in a variety of ways and see and share insights via the dashboard. Everything on Power BI is updated in real time and can be accessed from anywhere in the world via the cloud. This software includes a myriad of invaluable features for analyzing, fixing, and understanding data.

What can you learn from your data with Visio Visual and Power BI?

We know that Visio Visual and Power BI allow you to see your data clearly and concisely. This starts with using Visio Visual creating the necessary charts and diagrams that pertain to your industry.

From this data, the goal is to learn what’s going wrong and why, what’s going right and why, and where you need improvement. For example:

  • If you own a retail establishment, what’s selling and what’s not?
  • If you own a restaurant, what ingredients are you constantly running out of?
  • If you own a transportation business, why are your trucks stocked to the brim one month and empty the next?

This is largely Power BI’s job.

Business Insights

Power BI layers the base data organized by Visio Visual with analytic tools that share insights about how your business is doing across numerous benchmarks.

Empowered with the information and data-based insights both Microsoft Visio Visual and Power BI provide, you can make impactful changes in how you run your business. Try these tools today and see what you think for yourself!

How Can I Enter and Analyze Data via a Data Entry Form in Microsoft Excel?

Microsoft Excel Data

You can create a data entry form in Microsoft Excel without using VBA or even recording a macro. If those terms don’t mean anything to you, don’t worry. You won’t need to learn them. Excel has a hidden tool you can use to make dreaded data entry fast and easy. Using a data entry form lets you view one record at a time while entering the data, but also makes it easy to analyze multiple records in a tabular format.

1. Open an Excel file.

2. Place the Form tool in your Quick Access Toolbar.

3. Click the Form command to bring up the data entry form view (no other step is needed for this).

4. Use the Find Prev and Find Next buttons to analyze your data one row at a time.

How do I Format the Data for the Data Entry Form?

To use the data entry form, simply put the data in the following format:

  1. One record of data goes in each row in Excel.
  2. Include column headings above the data.
  3. You need at least one record prior to activating a data entry form.

How Do I Add the Forms Toolbar to Excel’s Quick Access Menu?

You can add the Forms… command to Excel’s Quick Access Menu for convenient usage. Here’s how to do that:

  1. Press the options icon that lies to the right of your quick access toolbar.
  2. Choose More Commands when the drop-down list appears.
  3. Add the Form command to the quick access toolbar.
  4. Go to the Choose commands drop-down list. Select Commands Not in the Ribbon from the list.
  5. Scroll down until you come to Form… and click on it to highlight it.
  6. Press Add.
  7. This brings the Form… command in the rightmost box.
  8. Press OK.

Microsoft Excel Data

How Can You Analyze the Data?

Here are some quick tips for navigating the data block created by your entries.

  1. Place the cursor anywhere inside your data block.
  2. Each row has a single record.
  3. Each column has a column heading.
  4. Press the Form button in the quick access toolbar.
  5. The data entry form activates, allowing you to view data or add records one at a time.
  6. Use the Find Prev or Find Next button to surf through the records.
  7. Add a record using the New button or delete existing records with the Delete button.

How To Set Up Your Microsoft Office 365 Email On Your Smartphone

Office 365 Email smartphone

Office 365 Email smartphone

Do you want to have the ability to stay on top of your emails from anywhere without the need to learn a new email system? Then enjoy the convenience of using your Microsoft Office 365 email and calendar directly on your smartphone. The Microsoft Outlook app is available for both iPhone and Android devices, it is free to use, and only takes a few minutes to get it up and running.

A Quick Guide to Installing the Outlook Office 365 Mobile App on an iPhone

  1. The first step is to download Microsoft Outlook from the App Store. Be sure to search for and download the latest version of the “Microsoft Outlook – Email and Calendar” available from Microsoft Corporation.
  2. Once the Microsoft Outlook app finishes downloading, open the app and select “Get Started” from the menu. Choose “Get Notifications” if you want to receive email alerts. Remember, you can always adjust your notification setting in the future.
  3. To connect with your Microsoft Office 365 account, input your email address and click “Add Account.”
  4. This will take you to a login screen with the email portion of the form already filled. Enter your email’s password and select “Sign in.”
  5. If you want to add additional work or personal accounts, you now have the option. If you don’t want to add more accounts at this time, click on “Maybe Later.”
  6. Go through the tutorial to learn how to use the app to write, read, and respond to emails or access your calendar. Now, whether you access your Microsoft Office 365 account using your phone or computer, everything will remain perfectly synched.

A Quick Guide to Installing the Outlook Office 365 Mobile App on an Android Phone

  1. First, go to the Play Store and search for the latest version of Microsoft Outlook. Once you find it, click on “Install.”
  2. When Microsoft Outlook finishes downloading, open it and choose “Get Started.”
  3. Type in your Microsoft Office 365 email, and select “CONTINUE.”
  4. Now you need to log in using your Microsoft Office 365 credentials. The email portion of the form is already complete, so just enter your password and select “Sign in.”
  5. At this point, you can either add additional accounts by clicking on “CONTINUE,” or skip this step for now by tapping “SKIP.” You can easily add additional accounts in the future.
  6. Learn how to use the app to write, read, and respond to emails or access your calendar by going through the short online tutorial. Now your Microsoft Office 365 account will remain synched whether you access it through your computer or smartphone.

Once you have on-the-go access to your Microsoft Office 365 email and calendar, you will find yourself being more productive no matter if you are in or out of the office.