Australian Businesses Closed Due to Phishing Freight Scam

Australian Phishing Scam

Australian Businesses Closed Due to Phishing Freight Scam

Several Australian businesses have become the targets of a phishing freight scam losing an average of $30,000 to $100,000.  

Australian Phishing Scam

Phishing is on the rise as a method of online criminal activity focused on businesses. Victims are being scammed out of tens of thousands of dollars via this email phishing scheme. Right now, scammers are directing their fraudulent activity at IT and electrical businesses. Several Australian companies have shut down after becoming victim to a freight forwarding email according to the Australian Cyber Security Centre (ACSC). These victims are losing an average of $30,000 to $100,000 after sending their products to the scammers who request delayed payment credit terms from the victims.

How Does The Freight Scam Work?

The scammers trick victims into participating by spoofing internet emails, domains and signatures of executives of large Australian companies and universities to legitimise their communications. An example of how they work is they send their email from lendleases.com.au instead of the actual website lendlease.com.au. One of the fraudulent emails that the ACSC released is supposedly from a Chief Procurement Officer at the University of Sydney.

On each purchase order, the scammers request laptops, hard drives, cosmetics, defibrillators and environmental monitoring equipment, all items that can be easily resold. The targets are asked to ship the orders to a freight forwarding company which in turn, then sends them on to another fraudulent entity who acts as a middleman. Then the freight forwarding company becomes a second victim when their bill is paid using stolen credit cards or using an established credit line.

How are Fraudulent Orders Identified?

In this case, the scammers are requesting shipments to many locations including Singapore, Dubai, Dagenham, Kuala Lumpur, Malaysia and Deira according to the ACSC. Businesses should never automatically trust any unsolicited order of goods with credit without further investigation. However, it’s possible for these orders to slip through the cracks if you don’t have a strict policy for your approval process on every transaction. The ACSC requests that all organisations should do due diligence on any new customers or unusual orders, and investigate any customer before granting credit. They also suggest that businesses should check the domain of websites and emails that are referenced on a purchase order. A good follow up is to contact customers by phone to confirm that they are a legitimate company, and have placed the recent order. Lastly, it’s important to verify the shipping address over the phone.
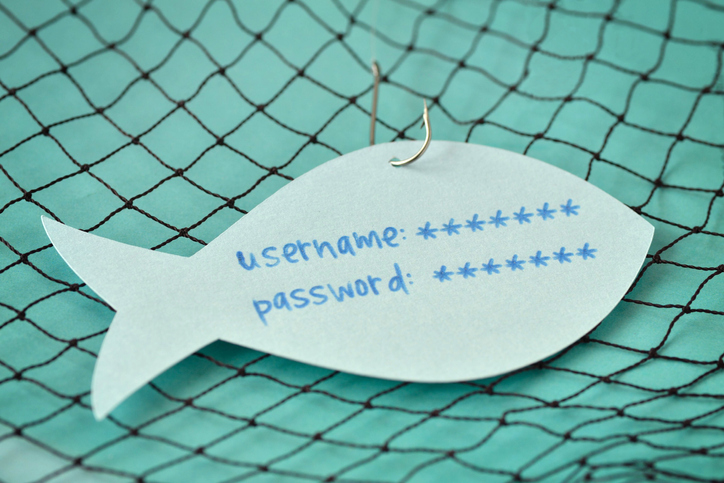
What is Phishing?

Phishing is one of the most commonly-used cyber attacks in Australia. Statistics from the Office of the Australian Information Commissioner show that phishing accounts for 39 percent of all breaches reported. Therefore, it’s important to be aware of how to protect yourself at home and at work from phishing.

How Does Phishing Work?

The victim receives an email that is simple in format and generally personalised and potentially from a known sender. It may look like an official email from a known organisation or company, and it invites the victim to click on an embedded link. Wording varies, but it may say, “click to learn more” or “click to see the image.” After clicking, the victim is redirected to a web page and asked to enter their user name and password or for other personal information. Once the personal information is filled in the attacker then sends emails to everyone in the victim’s address book and the cycle repeats.

What are the Dangers?

While having spam email issued from your own email account is annoying and a problem, the larger issue is that the victim has given the attacker their user name and password. With an email and password, the attacker can easily hack into anything the victim uses that email and password for. Most people repeat email and password data for multiple accounts. In the world of cloud storage, this can be several accounts including email, CRM, file storage, banking, and proprietary applications.

Protect Yourself From Ransomware In Windows 10

Windows 10 Security Tips

Protect Yourself From Ransomware In Windows 10

You may have been using Windows 10 for some time now, but it’s likely that you haven’t mastered all of its features just yet.

You’ve heard about ransomware, right?

It’s a type of malware that encrypts your data so you can’t access it and holds it for ransom. Usually, this malware makes its way into your systems by posing as a file or program you think you want. Even if you don’t end up having to pay the ransom, it’s a lot of trouble that you should try to avoid.

Did you know that you can enable Controlled Folder Access in Windows 10 to protect against ransomware?

Enabling Controlled Folder Access protects the default Windows data storage locations in your profile from access by unknown applications. When compared to identified and allowed programs, if the malware is determined to be unsafe, you’ll get a pop-up letting you know it was denied access to your storage.

The Complete Guide to Managing Popular Extensions Successfully

Browser Extensions

Protect Yourself from Potential Attacks Via Chrome Extensions

Learn two simple ways to set the privacy and activity settings for each Google Chrome extension on your browser and steps the company is taking to protect users.

Google’s Chrome web browser is a popular choice for businesses the world over. Managing the extensions gives you more control and faster results when using Chrome to its best. Here’s a closer look at Chrome add-ons and how to use them effectively.

And with emerging cyberthreats targeting browsers, now is an important time to know your way around the extensions.

Browser Extensions

What Is the History of Google Chrome Extensions?

Google introduced Chrome in 2008. By 2010, there were more than 10,000 extensions available in the Chrome Web Store. Today, the company does not release the number available, but it’s estimated to be in the hundreds of thousands.

That growth brings with it an increasing vulnerability to attacks via vectors embedded in extensions. The company does work to keep malicious extensions out of its store but mistakes are possible. Other extensions can invade users’ privacy.

Should I Uninstall All Chrome Extensions?

Deleting all extensions is not necessary. Instead, use these two helpful tools to manage your extensions better and control permissions you provide to the add-in.

1. Use Extension Icons

To the right of the address bar, you’ll find icons representing the extensions you’ve installed. If you right-click on an icon, you’ll see an option titled “This can read and change site data” with three options:

  • When you click the extension
  • On [the site you’re on]
  • On all sites

The default is the first option, which limits the use of the extension to user-activated times. If an extension is “loud,” meaning it uses a lot of bandwidth, these settings can provide more control.

2. Use Extension Settings

If you click on the hamburger menu icon to the far right of your address bar, you can click on the option “More tools” and click on “Extensions.” This will bring up a screen with a box for each installed extension. Click on the Details button for any extension you want to modify. You’ll see the three options again, but also an option to add the URLs of specific sites on which you want the extension activated.

What Can Go Wrong with Browser Extensions?

There are several risks to installing browser extensions. Here are a few of the ways extensions can do harm:

  • Malicious intent. Malware can be installed unknowingly that uses your computer for other purposes. Kaspersky, for example, noted a recent example of extensions that made money for the hacker by clicking on pay-per-click ads.
  • Hijacking. If a hacker steals a designer’s credentials, an extension can be compromised by changing the functionality or inserting malware.
  • Purchases. Extensions are hard for designers to monetize. That’s why many are eager to sell their code if approached by a buyer. Users are usually unaware if extensions change hands, meaning a previously well-intentioned add-on can be repurposed.

Is Google Addressing Extension Security?

Google recently announced steps it’s taking to combat the security issues with extensions. Among its changes:

  • More granular user permission options
  • A requirement that extensions only request access to the minimum amount of user data needed to operate
  • Expanding privacy rules for extensions. Those that carry user communications and user content will join those that handle personal or sensitive user data and need to post privacy policies

Proactive steps combined with Google’s efforts are critical to keeping your browsing and data safe and secure.

Watch Out for Hidden Malware on Your Phone

Malware Smartphone

What You Need to Know About Android Malware

Hackers are devising new ways to infect phones with malware. Learn about the latest attack on Android phones and how to minimize your risk of getting malware. 

Malware Smartphone

Since the first computer operating systems hit the market, malware has been a serious security concern. Today, malware can infect not only desktop and laptop computers, but devices that are connected to nearly everything we do: our phones. In July 2019, cybersecurity experts found that up to 25 million Android phones were infected with malware masquerading as trusted apps like WhatsApp. Here’s what you need to know.

Imposter Apps

The latest malware threat was able to breach Google’s Android OS and replace legitimate apps with “zombified” versions that bombard users with unwanted ads. The outbreak affected approximately 15 million phones in India, 300,000 in the U.S., and nearly 140,000 in the U.K., making it one of the most devastating cyberattacks of the decade.

The malware was traced back to 9apps.com, a third-party app store owned by Chinese company Alibaba. Hackers that plant malware on these sites usually target users in developing nations, though this particular attack hit a significant number of phones in the states and the U.K.

Research thus far into the imposter apps found no threat apart from malicious ads. However, hackers that employ this type of attack can potentially do much more evil such as stealing user data, tracking user locations, and even accessing private messages.

How Does the Malware Work?

The malware is programed into a variety of apps such as photo editors, games, and messaging apps and made available for download. Once downloaded, the app runs the malware, which is often disguised as a harmless app update. The malware then corrupts popular apps such as WhatsApp, turning them into zombie apps that launch unwanted ads. In this case, the hacker’s end goal appears to be to trick users into tapping the ads and generating revenue via a pay-per-click scheme. Fortunately, the malware does not appear to affect other data stored on the phone.

Who’s Behind the Malware?

Experts have linked the malware to a Guangzhou company involved in developing and marketing apps for Android phones. While most of the carrier apps were made available on third-party storefronts, the hackers may have considered sneaking the apps onto Google Play. Researchers at Check Point are working closely with Google to identify and take down potential malware installers.

How to Protect Your Android Phone from Malware

A good first step in minimizing your risk of malware is to update your phone to the latest version of Android OS. Be wary of downloading apps on third-party stores, which typically have fewer security measures in place than the official Google Play store. Even after taking these precautions, you should still be proactive in recognizing red flags. For example, if an app suddenly starts displaying ads or behaving differently than before, it’s likely infected. To fix this, navigate to your phone’s app info list and uninstall ones you don’t recognize.

No matter how many security updates Google releases, hackers will find and exploit loopholes. You can help stop hackers by being aware and reporting suspicious activity on your Android phone to Google.

Secrets to Searching Tabs on Chrome (It’s Time to Get Organized!)

Searching Browser Tabs

Save Time and Headaches by Searching Your Open Tabs Instantly

It is easy to lose track of which open tab contains the information you need when you are researching.

Use this Chrome tool to instantly find the right tab.  

Searching Browser Tabs

Do you do a lot of research online for work or school? Then you know that It isn’t uncommon to have 6, 7, or even more tabs open on your internet browser at the same when you are working on a large project. But with that many tabs open, you can easily forget which tab contains the information now. But don’t worry, Google Chrome has your back.

With Google Chrome, you will never again have to feel frustrated or waste your time clicking randomly on multiple tabs trying to find the one you want. You can just use the URL box, or what Google Chrome calls it’s Omnibox, to search your open tabs for the one you need. You may already be aware of some of the most useful tasks you can access directly from Chrome’s Omnibox such as solving mathematical calculations, checking the local weather or even finding files on your Google Drive, but did you know you can use it to search through your open tabs?

How to Use the Omnibox to Search Open Tabs

  1. Enable the Omnibox search mode. The ability to search your open tabs is disabled by default. Before you can use it, you will need to enable the capability. You can do this by opening a new tab in your Chrome browser. Then in the Omnibox at the top of the page, type or paste Chrome://flags/#omnibox-tab-switch-suggestions. Hit enter on your keyboard. This will take you to a long list of options with Omnibox tab switch suggestions highlighted in yellowSelect Enabled from the dropdown menu just to the right.
  2. Restart your browser. You will need to restart your browser to complete the process. If you are in the middle of a project, you may want to use the Relaunch Now button to remember your open tabs after restarting. Otherwise, close and restart your browser in the normal way.
  3. Conduct your first search. After Chrome restarts, and you have at least two tabs open, it is time for a quick test. Enter text from the title of any of your open tabs into the Omnibox. As you type, you will see several suggestions popup under the Omnibox. If you want to jump to one of the open tabs, click on the Switch to this tab button next to the suggestion. This will open the tab immediately in the browser.

Everyone is looking for ways to streamline their workflow. This small tip will definitely save you a few seconds several times throughout your day, and significantly add to your productivity.

Intuitive Scheduling: The Missing Link for a Happy Office

Doctors Office Scheduling

Finding the right scheduling software can make everyone happier, and thereby make everything run a bit easier and a bit more smoothly. Here is what you need to find in the optimal scheduling software program, and where to find it.

Doctors Office Scheduling

The medical field has always been an industry in which accuracy is key. From the moment a referral is processed to the moment that a patient leaves the office after visiting with their physician, accuracy, privacy, and efficiency are all fundamental components of what drives the medical experience. Even in a small doctor’s office, it is common for a single physician to have several hundred patients that they care for regularly. Therefore, the task of managing the caretaking of patients and their private information largely falls to the support staff. While scheduling appointments may at first sound like the least complex task to manage within a physician’s office, efficiency and accuracy in scheduling are pivotal in ensuring the success of the entire office. Taking advantage of a quality scheduling software can help to streamline the scheduling process, thereby helping to ensure that patients are scheduled when they ought to be, with the doctor they need to see, and all pertinent information is managed accordingly.

Shifting to automated online scheduling makes it easier to:

  • Provide patients with easy access to schedule appointments
  • Simplify the job of office staff workers
  • Streamline the functionality of a medical office, regardless of size

There are a few things that every medical office needs if it wants to run smoothly. A strong office manager, highly skilled nurses, and a caring physician are all important factors—but you can’t overlook something that has grown to become even more fundamental to the medical field, the right technology. Without the right technology, you could find yourself losing information, or even worse, making information too easily available to malicious eyes, and spending hours that should be reserved for better caring for patients instead of trying to deal with complications and redundancies in software.

Shifting to an intuitive scheduling platform can help to drastically streamline the appointment process and lead to improved morale among patients, office workers, and medical staff.

What is self-scheduling?

Self-scheduling is quickly becoming one of the biggest technology trends in the medical industry. This sort of software allows patients to use any digital platform, such as their home computer or mobile device, to schedule, reschedule, or cancel appointments at any time. This takes a huge burden off of office staffers, who are typically fielding calls throughout the day to manage appointments, while also providing a level of comfort and support to patients who are now able to schedule their medical appointments more inconspicuously, and without the need to wait on hold until an office staffer is available.

Patients appreciate the 24/7 around-the-clock nature of online scheduling, and office workers appreciate the reduction in time spent on the phone managing those appointments. Instead of speaking directly to all patients, office workers can instead focus on ensuring that incoming patients have ample time to complete their intake paperwork, processing necessary prescriptions, or any other number of tasks that are the responsibility of the medical officer manager, like dealing with the needs of patients with more complex issues.

Automated Waiting List

Putting it in the patient’s hands to schedule their own appointment at their convenience means giving the patient peace of mind to consider their personal commitments as they make an appointment, thereby making it less likely that they will have to cancel or reschedule. However, it also provides the patient with the opportunity to see the next available dates for appointments, and even to sign up for a waiting list for an earlier appointment, should one become available.

Online Scheduling: The Organized Option

The biggest benefit to shifting to an automated schedule is the organizational bliss that comes from putting all incoming information in one place. By utilizing an intuitive scheduling platform it is possible to cut down on wasted hours in the office, to reduce errors in scheduling by limiting overbookings and canceled appointments, and to ensure that all booked appointments are properly prepared for and the medical files necessary for each appointment are processed accurately. Office staff can easily work with the scheduling platform to match patients with the necessary provider, process insurance information, and fill in a provider’s schedule—all in one sitting. For a large medical facility, shifting to an automated scheduling system is a must-do to keep the office above water. For a small medical facility, this simple decision can make a world of difference in the level of functionality and productivity in the office.

Are You Tired of Google’s Background?

Google Chrome Background

Google Chrome Background

Change Your Background Image on Chrome

Do you want to add a little bit of your personality to your web surfing and internet searches? It is easy with the Chrome browser and this simple guide.  

Google’s is far and away the most popular search engine online. Besides returning helpful and fast search results, the website is streamlined and utilitarian in nature, letting visitors find the information they want without needing to deal with all the distractions of other search engines out there. And while the search bar on the home screen of Google’s Chrome browser is fine, some businesses and individuals may prefer a more customized experience such as adding a favorite photo or a company logo. Lucky, that is not a problem. Google, and the Chrome browser gives you the ability to choose any background image you want. And the best part is that’s it easy to set up!

How to Set Up a Personalized Google Background

  1. Load your Chrome browser. Chrome is a fast, secure, and easy-to-use browser, so, if you don’t already have it, download it now.
  2. Decide whether you want to use a pre-made Google theme or if you prefer to use one of your own photos. You can find a wide selection of pre-made themes to suit a wide variety of different styles and interests in the Google Store.
  3. Choose the pre-made theme you want. You can access the Google Store by launching the Chrome browser. Once the browser loads, look for the icon with the three dots in a vertical row. It is located to the far right of the address bar. Click on the icon and choose the Settings option near the bottom of the drop-down menu. From the menu on the left side of the Settings page, select Appearances. A new menu will open in the middle of your screen. Click on Themes from the new menu, and you will have access to dozens of themes from landscape photos to Zodiac symbols. Once you find a theme you want, choose Add to Chrome. Now when you open a new tab, your new theme will appear.
  4. Choose your own background image. Do you want to personalize your background even more? Then you can opt for using your own background image. You can do this by opening a new tab in the Chrome browser. On the bottom right of the screen is a button which says Customize. Older versions of Chrome may display a gear icon in the same place. Clicking on either will bring you to a Customize this page menu. Select Upload an image, and you can navigate to the file you want to upload. Once completed, open a new tab to make sure it worked.
  5. You can always reset. Do you prefer the official Google page? No problem, you can easily reset. Click on the Customize or gear icon at the lower right of the screen and select Restore default background.

Now that you know how to change the backgroud image, go ahead and experiment. You will be amazed how making one small change can have such a significant impact on a tool you use every day.

How to Leverage iOS12 Enhancements to Boost Productivity

IOS 12 Quick Tips

How to Use iOS12 to Instantly Share Information With Colleagues

Want an easier way to communicate with your colleagues? Save time and reduce errors by learning how to instantly exchange information using iOS12’s share feature. 

Beginning with Apple’s release of iOS8, it has been easier to share information, files and apps with others, including colleagues. The feature continues to be available in iOS12 as either an icon or a share link within apps. Individuals can share information within a message, an email, or by using AirDrop. The share feature also integrates with social media apps, such as Twitter and LinkedIn. iOS users can also share information with themselves through apps such as Notes and Reminders. The ability to seamlessly and instantaneously share information with others can boost productivity regardless of whether everyone is in the same office. By learning how to share files, images and media, employees can keep exchanging important and relevant content when urgency is a factor.

Using the Share Icon

With built-in iOS apps such as Photos or Safari, the share feature is available through the share icon, which is usually located at the bottom. In iOS12, the share icon resembles a single document or piece of paper with an arrow extending from the top. To share an image, a web page or link, or information within the News app, tap the share icon. In some of the built-in apps, the share icon will be located at the top instead of the bottom.

Besides news stories, articles, useful internet links, and images, location information from the Maps app can be shared with others. Venue information for meetings, conferences, and events that occur outside of the office can be exchanged without having to type all of the information within a separate email. Likewise, if one individual has written notes from an interview or something similar, the share icon is available within the Notes app to send it to the person that needs it. The act of retyping the information in an email or trying to describe it in a voicemail is no longer necessary.

Using the Share Feature

Some of the apps within iOS12 allow sharing, but do not display the share icon. The Contacts app is one of them. Employees can still share contact information, including name, phone number and email address using the “Share Contact” link.

Apple’s iOS12 also displays its share feature with three dots within apps that contain music and videos. The three dots represent a menu that brings up a series of options, including the ability to share. Depending on the app and the media, one could see a “Share Song,” “Share Album,” or “Share Episode” link. Podcasts with useful tips and information related to one’s industry, discipline, and particular role can be shared this way.

The need to share information with colleagues is not new, but the ability to instantly share pertinent information and files in digital form is. Learning how to leverage built-in mobile tools can make the process easier, more efficient, and more accurate. Apple’s iOS12 share feature is one of those tools that can become critical to productivity while traveling or working remotely. With modern smartphone capabilities, waiting to share information or taking extra steps to ensure colleagues are kept in the loop no longer have to be part of employees’ normal routines.

IOS 12 Quick Tips

Get More Out Of The Clipboard In Windows 10

Windows 10 Tips

Get More Out Of The Clipboard In Windows 10

You may have been using Windows 10 for some time now, but it’s likely that you haven’t mastered all of its features just yet.

Copy/Paste was a revolutionary feature when it came out years ago. However, operating systems have been slow to adopt the next logical step in its evolution – the clipboard.

Did you know that you can save 10 or more items to your clipboard on a long-term basis?

It’s simple – hit the Windows key + V to bring up your clipboard history. It’ll show you the many things you’ve Copy/Pasted, any of which you can choose to delete (for security purposes, if it were, say, a password) or pin for later use.

That way, you don’t have to always go back and Copy/Paste that same info from the same note or .doc file – you can have it ready for use on your clipboard for as long as you need it.

Enjoying our Windows 10 Tips and Tricks emails over the past few weeks?

How to Use Your Computer to Install Apps on Your Android Device

Installing Android Phone

Downloading Apps on Your Android Device: How to Use Your Computer

Installing apps to your Android phone via your desktop computer (or other “unofficial sources”) is fast and easy. Learn the simple process right here.  

Installing Android Phone

One of the best things about Android devices is the fact that you can access and execute unique commands on your Android from other devices, such as your computer. Of course, if you own and use an iOS (Apple) device, you know that there are certain commands you perform from your computer as well. But Androids allow for even more flexibility, and in particular, the ability to bypass the official “Google Play Store” for downloading apps.

Instead of being forced to use “Google Play Store,” you can instead opt to retrieve apps for your Android device from nearly any source. Without restrictions, you can download and install these apps onto your Android with just a few clicks.

Here’s how to do it.

Steps to Installing Android Apps From Your Desktop

Before diving into the specific steps, let’s talk about the utility you’ll need to use for this procedure. It’s called Android Debug Bridge or ADB, and it can be used on any operating system, from Windows to Linux and Mac.

This utility is what will allow you to transfer the installation of any app from your computer to your Android device. You can even remove apps that already exist on your Android device — all with Android Debug Bridge and all from your computer.

Ready to download some Android apps? Let’s get started!

Step 1: Download Android Debug Bridge.

Naturally, the first step in this process is to download Android Debug Bridge to your desktop computer. You can do this by going here. You’ll see the package called “SDK Platform-Tools.” Download the package for your appropriate operating system. Do not do anything with the download just yet.

Step 2: Enable your Android device to be recognized on your computer.

  • Head to the “Settings” app on your Android.
  • Navigate to “About phone,” and from them, tap on “Build number.” Do this approximately seven or eight times until it states you are a developer.
  • Go back to the “Settings” app.
  • Now, you’ll see an option labeled “Developer options.” Tap here.
  • Tap “USB debugging” to turn it on.

You’re all set to try installing an app!

Step 3: Get set up to download an Android app from your desktop.

Grab a USB cable, and use it to attach your desktop and Android. At this point, you may be asked to select your mode of connection. In this case, you should select “data transfer.”

Mac users:

1. Open Terminal

2. Enter: cd

3. Press “Spacebar”

4. Drag the folder labeled ADB from your “Downloads” folder (or wherever you receive downloads) and drop it into Terminal

5. Press “Enter”

PC users:

1. Open the downloaded ADB folder

2. Hold “Shift” down and right-click (doesn’t matter where)

3. From the pop-up menu, select “Open a command window here”

Step 4: Start the download process.

In the Terminal window at your disposal, type in the following: ./adb devices. Press “Enter.”

From here, you’ll see your Android phone listed (along with any other attached devices).

Keep in mind that at this point, you should already have the Android app APK file at-the-ready for installation. Keeping Terminal open, type in the following: ./adb install. Please “Spacebar.”

Now, navigate to the Android app APK file you’ve chosen as your first installation, and click and drag it into Terminal. Drop it into Terminal, and finally, press “Enter” to begin the installation process.

Head to your Android device and double-check that your new app has been downloaded.

And there you have it!

Not Interested in Downloading Apps This Way? ADB Can Still Be Highly Useful

Advanced Debug Bridge is a popular utility, most notably because of its ability to let you download apps to your Android device from basically any sources.

But even if you don’t plan on downloading and installing apps to your Android device with Android Debug Bridge, it’s a great utility to have on your computer. That’s because it allows you to perform numerous other useful tasks.

The most notable benefits you may receive from downloading and using ADB include the ability to create complete backups of your Android devices, the ability to reboot your device in recovery mode, and the ability to record your screen.

Whether you’re a professional developer or an average Android user, Advanced Debug Bridge is an excellent utility to consider. Again, you can find it here for immediate download.