How to Stop Spam from Ever Hitting Your Inbox

Spam Emails

Spam Emails

Spam emails can be incredibly annoying. Not only that, it can be downright dangerous, considering the phishing schemes and other email scams that are prevalent today. We can’t avoid spam completely and hope to have any kind of digital life, because so many services require an email address as part of the sign-up process. These can tend to clutter our inboxes with (technically not spam) promotional emails, and the less scrupulous of these may send real spam. That’s not to mention the frequency with which these companies’ databases are breached, creating a whole new layer of spam potential.

How to Avoid Seeing Spam

All of the most prevalent email services offer some degree of spam protection. Great spam protection is one of the reasons Gmail rose to such prominence a decade ago. Most services enable spam filtering by default, but check your email service’s settings to ensure that this setting is turned on.

If you’re still seeing a lot of spam, or if you’re using a service that doesn’t offer much in the way of spam filtering, here are some other suggestions.

Create Filters or Rules

You can create your own rudimentary spam filter by setting a filter or a rule. The terminology varies based on your email service, but you should find something by a similar name. You can create rules that auto-route email based on certain characteristics. For example, you can create a rule that sends any message containing NSFW language straight to the trash. Simply insert all those explicit terms in the field “message contains” and select “move to trash” as the action that is taken.

You can use filters or rules to move less important messages to a folder, too. If you still want to know about the latest sales at a few retailers, but you don’t want to be inundated right alongside emails that are actually important, create a rule that sends these emails to a “Retail” folder that you can check when you get the shopping urge.

Block Addresses

In the same area of settings, you should also have the option to block specific email addresses or even all addresses from a particular domain. Granted, it’s rare these days for spammers to frequently reuse the same address, but this function can still help with overly persistent individuals as well as companies or domains that refuse to take you off their mailing lists.

How to Stop Spam from Ever Arriving

There are other tools available to stop spam from ever showing up in your inbox.

Use “Report Spam” Button

The spam filters from email services like Gmail aren’t static. They can actually learn from you. When a spam message leaks through, you can help the spam filter learn. Look at the menu options available on the message. You should see one that looks like a stop sign with an exclamation point. Click this button to report to Gmail that the message is spam, and you should never see a similar message again.

If Gmail recognizes that your spam message is actually from a mailing list, it will try to unsubscribe for you if you click that option.

Set Up a Spam or Throwaway Account

Another savvy way to avoid spam is to set up a “spam account” that you use only for email signups, website logins, and the like. Give your main email address only to those personal and professional contacts you actually want to hear from, and sign up for everything else using your “spam account.”

If your current account is beyond hope, turn it into your spam account. Create a new main account, and let all your real-life contacts know about the switch.

These tips should help cut down on the chaos in your inbox. Got your own tips? Let us know!

How to Find Someone’s Email Address

Email Marketing

Email Marketing

Email is a great system when it works well, but it has some frustrating limitations. You have to know someone’s email address to be able to reach them via email, and there’s no central database for finding email addresses. You can often use the internet to find people’s mailing addresses via directory searches, but not such parallel exists for email. If you need to get in touch with someone but don’t have their email address, here are a few tips for finding someone’s email address.

Within Your Organization

If you’re looking for someone within your organization, you can use Outlook to find the person. Simply create a new email, then click the button next to the “To:” field. This will bring up an address book search. Try searching last name first.

You can also use a keyboard shortcut: click in the “To:” field, then start typing the person’s last name. Press ctrl + K, and Outlook will narrow your list. Click the right one, and you’re done.

Outside Your Organization

It gets a little tougher outside your organization. Here are a few tips.

Google It

You can always try a good old-fashioned internet search. Search for the person’s name and the word “email”. Maybe include the person’s job title as well. For all examples below we’ll be searching for Frank Johnson, accountant at Awesome Accounting, Inc.

Get creative with your Googling. Other search ideas include searching [“Frank Johnson” “contact me” “Awesome Accounting”] or [“Frank Johnson” “Accountant”]. If you’re looking for a personal account, you could also search for [“Frank Johnson” AND “@gmail.com”]. Keep trying other popular email services.

Mine Social Media

Many people have an email address associated with their Facebook or LinkedIn accounts, and sometimes they make this public. Be sure to search social media for the person you’re trying to contact. Even if you can’t find an email address, you will likely find a way to contact the person. If it’s a personal contact, a Facebook message might be most appropriate. If it’s a business connection, stick to LinkedIn.

Check for a Website

Does the person you’re looking for have a website? If so, there is likely a “contact me” page there. These often route directly to an email inbox. You don’t get to see the address unless the person replies, but it’s a place to start. Some people also include an email address directly on their websites. This is less common, but it’s worth checking.

Use a Search Tool Like Pipl

There is no universal directory for email addresses, but services like Pipl are doing what they can. Pipl maintains a database of known contact information for many people, and it’s free to use. If your other methods don’t yield results, check here.

How to Get the Most From Your Android Battery

Android Battery

Battery technology has come a long way in the past several decades. Today’s lithium-ion batteries are a pretty amazing feat of engineering, offering high capacity, low power leakage, and comparatively long life. That said, they aren’t perfect, and they don’t last forever.

Getting the most use out of your phone’s battery requires a little effort and a little know-how. Follow these tips to get the most from your Android battery.

Android Battery

Understand the Limitations

Even when well maintained, smartphone batteries will degrade over time. This is simply a result of use. After two or three years of moderate use, the battery in your phone won’t last as long as it did when it was new. This is normal.

Check for Defects and Damage

One big drawback to lithium-ion technology is that damaged batteries can become a fire hazard due to an electrolyte chemical reactions. You may remember the exploding Galaxy Note 7 debacle from a few years ago. If you notice your phone feeling swollen or bulging, chances are your battery is damaged and could be on its way to catching fire.

If the back casing comes off your phone, remove it and inspect the battery itself for leakage, cracking, or bulging. If you see any, replace the battery immediately. If you can’t access the battery on your Android phone but you see swelling or bulging in the phone itself, take your phone in for service immediately.

Calibrate the Battery

Sometimes a phone’s software can get confused about the battery’s true charge level. If your phone is dying at 25% charge or if the battery indicator swings wildly, you may need to recalibrate.

Note that calibrating the battery requires completely draining the battery to zero, something that itself can weaken your battery. Take this step when necessary, but try to avoid doing it frequently.

Step 1: Full Drain

Use your phone until it shuts itself off because of low battery. Android doesn’t wait until the battery is truly dead to do this, because it’s trying to help you avoid the full drain. In this case, we want to override it. Power your phone back up and let it die. Keep doing this until it won’t power on at all.

Step 2: Plug It In

While your phone is off, plug it in. Don’t power it up. Let it charge uninterrupted until it reads 100%. Unplug and power up. If the phone now indicates something less than 100%, plug it back in until it reads 100%.

Step 3: Restart

Unplug and then restart the phone. If it still doesn’t read 100%, plug it back in until it does. Repeat step 3 until you get a 100% reading right after reboot.

Step 4: Repeat

Drain your phone to zero again and then charge to 100%. At this point, your battery should be completely recalibrated.

How To Make Awesome Slides In Microsoft PowerPoint

Powerpoint Presentation

Microsoft PowerPoint is the industry leader in presentation software, a venerable application that’s over 30 years old. Awesome PowerPoint slides can greatly enhance the visual impact of a meeting presentation. The inverse is also true: terribly designed PowerPoint slides can create serious distraction and disinterest. Many a speaker has been undermined by his or her slides.

Today’s tech tip will teach you how to make your Microsoft PowerPoint slides awesome. View online here or watch the video below.


Step 1: Choose a Theme

PowerPoint offers a variety of prebuilt themes. Choose one that fits the tone of your presentation and your company. To do so, open PowerPoint and click the Design tab in the menu ribbon. One of the sections is named Themes. Click on a theme to apply it to the default slide. Don’t like it? Try another.

PowerPoint also allows you to find additional themes online. Click the drop-down arrow in the Themes pane and select “Browse for Themes…” to start that process.

Bonus tip: If you have a presentation that’s already filled with content, you can still experiment with changing the look by changing themes. Changing themes never removes or erases existing content, though it will change fonts and sometimes reposition text.

Step 2: Insert Your Raw Data

Whether you’re typing all your content in manually or pasting it in from another document, now’s the time to get the raw data into your file. Don’t worry very much about looks at this point. Just get the information in there.

If you’re working in a theme, remember to right-click on each new slide and select the appropriate layout. Placing content into slides with the proper layout now will save you headaches later.

Bonus tip: Not all themes have the same set of slide layouts available. Make sure the theme you choose has all the ones you need.

Step 3: Check Out Design Ideas

A new feature in Office 365, Design Ideas is a powerful, AI-assisted tool. It will dynamically analyze the contents of a slide and suggest a handful of alternative ways of displaying the information. It’s truly marvelous when it works just right (for example, turning a bulleted list into a sleek timeline), and you have to see it in action to fully appreciate it.

To access Design Ideas, click on the Design tab in the menu ribbon. At the far right, you’ll see a Design Ideas button in the Designer section of the ribbon. Click this button to open a sidebar. You may see “Generating design ideas…” for a few seconds. Next, a handful of design ideas will appear. Click through them and select the one that works best for you.

Using Design Ideas is the easiest way to create awesome, powerful PowerPoint presentations. Check it out today!

Powerpoint Presentation

How to Copy Cell Formatting in Microsoft Excel

Copy Cell Formating Excel

Excel is a powerful application, but because it can do so much it can be easy to miss certain features that could make your life much simpler. Today’s quick tech blog shows you one of these features. We’ll look at how to copy cell formatting in Microsoft Excel without disturbing the contents of the cells you want to format.

Learn how to copy cell formatting in Excel. Click Here or watch the video below.


Step 1: Format One Cell How You Want It

(Note: If your Excel sheet has already been formatted or if you’re working from a template, you may be able to skip directly to Step 2.)

Before you can use the format painter to copy cell formatting, you need to have at least one cell formatted the way you want. Select a cell and begin formatting. The easiest way to format a cell is to apply a style using the Styles tool. If you don’t see a style that works for you, you can manually adjust the elements in the cell using the buttons in the Font and Alignment tools. Change the font or font size, add color to the cell, or add borders to the cell.

Step 2: Select the Model Cell

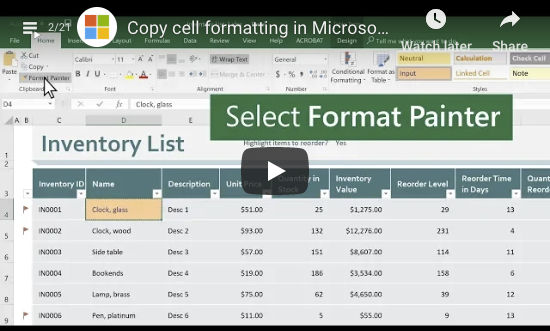
Select the cell that looks the way you want others to look. You’ll see a green border around it. Now click the Format Painter button in the Clipboard area (upper left). Your selected cell will now have a rotating box surrounding it. As long as the box is rotating, you know the format painter is using this cell as your model.

Step 3: Click (or Click and Drag) Other Cells

If you want to apply the style to just one cell, click on that cell. It should instantly take on the formatting of the model box. If you want to apply the style to multiple cells in a row, column, or region, then click and drag until you’ve selected all the cells you want to format. When you release your mouse click, all those cells will take on the formatting of the model cell.

Note that using this method won’t affect the contents of the cells or the formulas associated with them. As long as you’re using the format painter, only formatting and styles are affected.

This Method Works Everywhere

Another great thing about using Format Painter to apply formatting and styles is that it works on any content in Excel. It doesn’t matter if you’re using Excel mostly to organize text or if you have pages upon pages of financial data. The Format Painter doesn’t care about any of that. You can use this method to apply number styles to rows or columns of numeric content and general styles to text.

Copy Cell Formating Excel

How to Copy Cells in Microsoft Excel

Copy Paste Cells Microsoft Excel

Today’s quick tech tip covers one of the basic functions in Microsoft Excel.

Watch the video below or click here.


Here’s how to copy cells in Microsoft Excel, plus one of the advanced copy and paste features available in the application.

Step 1: Select the Cell or Cells You Want to Copy

If you want to select a single cell, you simply need to click on it. If you want to select a range of cells—whether that’s a partial or full column or row, or a wider range—click and hold on one of the cells you want to copy and drag to the other end of the range.

You can also select an entire column or row in one click by placing your cursor outside the grid, on top of the letter or number corresponding to the column or row. Your cursor will change to a rightward or downward arrow. Click to select the entire column or row.

Step 2: Copy

To copy the selected cells, click the “Copy” button in the Clipboard section of the ribbon. In your default view, the Clipboard section is in the upper left. You can also use a keyboard shortcut to copy: press Ctrl + C on a PC or Command + C on a Mac.

Step 3: Select Destination and Paste

All that’s left is to click on the cell where you want the copied information to go and paste. If you’ve copied a single cell, simply click on the cell where the copied content needs to go. If you’ve copied a range of cells, you don’t have to select an identical range of cells to paste. Simply select the cell that’s in the upper left corner of your range.

To paste your content, click the “Paste” button in the Clipboard section of the ribbon, or use a keyboard shortcut. This time, the keyboard shortcuts are Ctrl + V (PC) or Command + V (Mac). Your content will appear in the new location, and you’re ready to move on to the next task.

A Few Notes

Now that we’ve covered the basics, here are a few warnings and advanced tips.

Formulas

If you copy a cell with a formula in it, Excel will automatically copy that formula to the destination. If this isn’t what you want, click the down arrow below the Paste button. Excel gives you a dozen or so special methods of pasting. If all you want is the raw number, no formula attached, then use “Paste Values” instead.

Overwriting Content

If you copy a range of cells, be aware that pasting that range will overwrite anything in the destination range. Make sure you have enough space there and won’t lose any important data.

Copy Paste Cells Microsoft Excel

How To Show PowerPoint Slides In A Microsoft Teams Meeting

Microsoft Teams and PowerPoint

In today’s tech tip, learn how to make the most out of your Microsoft Teams meetings by showing PowerPoint slides directly in the virtual meeting window.

Watch the video below, or click here.


Microsoft Teams is a powerful collaboration tool with a deep, rich feature set. One of the great features in Microsoft Teams is the ability to turn calendar appointments into virtual video or audio meetings directly in the app. We’ve covered how to do this before, but did you know you can show Microsoft PowerPoint slides right inside your Teams meeting? We’ll show you how in today’s tech tip.

Step 1: Launch or Join a Teams Meeting

To launch or join a meeting in Teams, click on the Meetings tab (on the desktop app, this is on the left side of the app). If your organization uses the Outlook calendar, Teams will pull that data into the Meetings tab. You should see a list of meetings here.

If you’re joining someone else’s meeting, you should see it in the list. Simply click “Join”. If you’re launching your own, click “Schedule a meeting” at the bottom of the column. Fill in the relevant details and pick a time. (It can be right now, if you need.)

Bonus tip: If you’re the one scheduling the meeting, make sure to invite the relevant teams or people. Use the Scheduling Assistant to see when your participants are free.

Step 2: Find and Click the Share Button

Once you’ve joined a Teams meeting (either as host or participant), you’ll see a set of buttons whenever you move the mouse. The video camera and microphone are fairly self-explanatory, but the button that comes next is a little less obvious. It looks like a rectangle with an up arrow in it. This is the Share button. Click it to bring up the Share menu.

You can share all sorts of things, but PowerPoints are what we’re after here. You’ll see a section with some suggested PowerPoints. Microsoft attempts to guess which OneDrive or SharePoint files you might want, but if it fails to suggest the right ones, you can always navigate yourself by clicking “Browse”. Click on the file you want, and it will launch into the Teams meeting.

How Presenting Works

Now that you’ve launched your PowerPoint presentation, be sure to understand how presenting works. You can toggle through your slides as you move through your presentation, just like you would in an in-person meeting. If you’re not the presenter, you can even toggle backward or forward through the slide deck without disturbing the presenter. This is handy if you need to move back to a previous slide and copy down information (or see what’s coming up if you need to time a restroom break!).

Sharing PowerPoints within Teams is a great way to keep up engagement in virtual meetings. Use this tip in your next Teams meeting and increase the value to all participants.

Microsoft Teams and PowerPoint

How to RSVP to Invites With Outlook Mobile

Outlook Mobile Tech Tip


Outlook Mobile is a powerful mobile version of Microsoft’s popular Outlook application. Microsoft has provided users a standalone email app that’s packed with a real depth of features. Today we’re looking at how to quickly RSVP to meeting invites using Outlook Mobile. The best and quickest way to do this uses an Outlook Mobile feature called Quick Action, so we’ll start by explaining what Quick Actions are and how to do them.

Understanding Quick Actions

In Outlook Mobile, Quick Actions are those actions you can take from the main email screen without taking the time to open the corresponding messages. Outlook Mobile intelligently understands the nature of certain types of messages (like calendar requests). The app will offer you a quick action that it thinks may be appropriate based on the context of the message. RSVP, Remove, and Modify are a few of the quick actions you may encounter.

In the current version of the Outlook Mobile app, Quick Actions appear as a lightly shaded bubble directly underneath an item. The lightly shaded bubble displays a summary, and on the right side, there is a blue button with the suggested Quick Action.

Using Quick Action to RSVP to Invites

To use Quick Action to RSVP to an Outlook invite, find an invite in your Outlook Mobile inbox that shows you a quick action as described above. Tap on the blue bubble that says “RSVP”. Doing so pops up a window with quick-response actions.

In this window, you’ll see a snapshot of your Outlook calendar, reminding you whether you’re free. Add a message to the organizer if you like. This is especially useful if you need to explain why you’re tentative or declining the meeting outright. Next, tap one of the three available options: “Accept”, “Tentative”, or “Decline”.

Tapping this option will drop you suddenly back to the main app window, but don’t fear. The meeting organizer received your notification, and the meeting is now on your calendar. Not sure if it worked? Navigate over to the calendar tab and double check. You should see the meeting listed there along with all attendees and their responses (if you have the rights to see them).

Other Quick Action Scenarios

There are two other Quick Actions worth mentioning. First, Remove: If someone cancels a meeting that you were scheduled to attend, that cancellation comes through as an email calendar update. Outlook Mobile recognizes this kind of message and offers a “Remove” quick action. Clicking this quick action removes the entry from your calendar without having to fully open the message.

The other Quick Action is Modify, which may show up on certain types of messages, such as dinner reservation confirmations.

Conclusion

Quick Actions are speedy, powerful ways to interact with certain messages in Outlook Mobile, but they are just the tip of the iceberg. Contact us today to learn more about maximizing your use of Outlook Mobile.

Outlook Mobile Tech Tip

How to Share Screens with Microsoft Teams

Microsoft Teams


Microsoft Teams is an amazingly powerful collaboration tool that’s available as a part of the Microsoft Office suite.
At its core, it’s kind of like Slack on steroids, but that core functionality is just the tip of the iceberg. Because it’s integrated with the rest of Microsoft Office, it has so many powerful features.

One feature area in Microsoft Teams is the ability to host and join virtual meetings. Users can join or host meetings from desktop or mobile. Mobile users can share files with the group, and we covered that in a previous post. Desktop users can share screens with other users, and with a surprising degree of control. Here’s how to take advantage of this feature.

Step 1: Create a Meeting

The Share Screens feature works from within the Meetings function, so the first step is to create or join a meeting. Locate the tabs bar (usually on the left side), where you’ll see icons like Activity, Chat, Teams, Meetings, and Files. Select Meetings, and then create a meeting (or join a meeting that someone else is hosting). The Meetings tab is tied into your Outlook calendar, allowing you to see potential conflicts.

Quick note: Teams features can be enabled or disabled at the enterprise level. If you don’t see a Meetings tab at all, your IT department hasn’t enabled it yet. Contact IT and plead your case for enabling this awesome feature.

Step 2: Click the Share Button

Once the meeting is in progress, you’ll see a series of buttons in the bottom middle of your screen. If you don’t see them, move your mouse to that location to make them show up. You’ll see buttons for video (if enabled), microphone (for muting yourself), ending the call, and more. The one you want looks like a rectangle with an upward arrow. This button, aptly named the Share button, represents screen sharing. Click it to continue.

Step 3: Choose What to Share

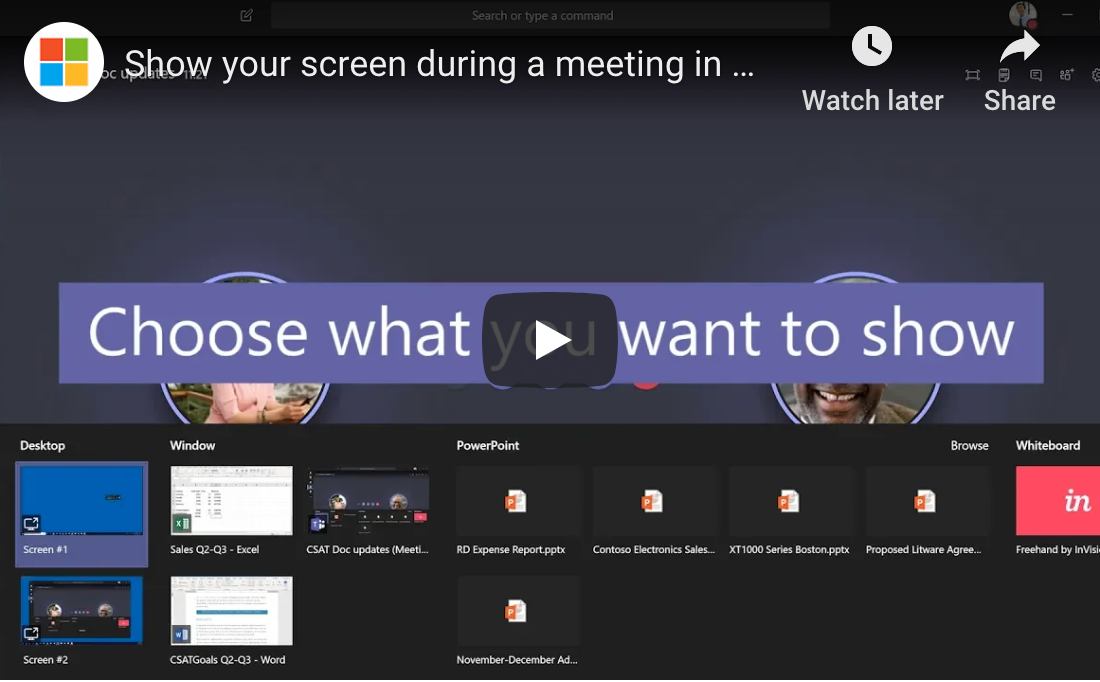
Screen sharing isn’t exactly new technology, but the implementation here is particularly well done. When you click the Share button, Teams doesn’t immediately share your entire screen. Instead, you have options. “Desktop” allows you to share one of your desktops. “Window” lets you choose a single window or app to share. “PowerPoint” shares the presentation you choose. There are even more options available under “Browse”.

Conclusion

This level of granular control makes screen sharing in Teams a killer feature, and there’s so much more that Teams can do for you. Team-based chat, productivity tools, and real-time collaboration on nearly any Office file are a few more ways it can help. If you’re ready to keep exploring, contact us to keep learning.

Microsoft Teams

Pick the Perfect Meeting Location Using Outlook Mobile

Microsoft Outlook Mobile


Microsoft’s Office suite makes it easy to schedule meetings, reserving the right room and inviting all the right people. Many people think they can only use these powerful features from their office computer, because Exchange calendar integration in iOS doesn’t support these features. In reality, mobile users can still access these powerful scheduling features using Outlook Mobile. Here’s how.

Step 1: Create a New Event

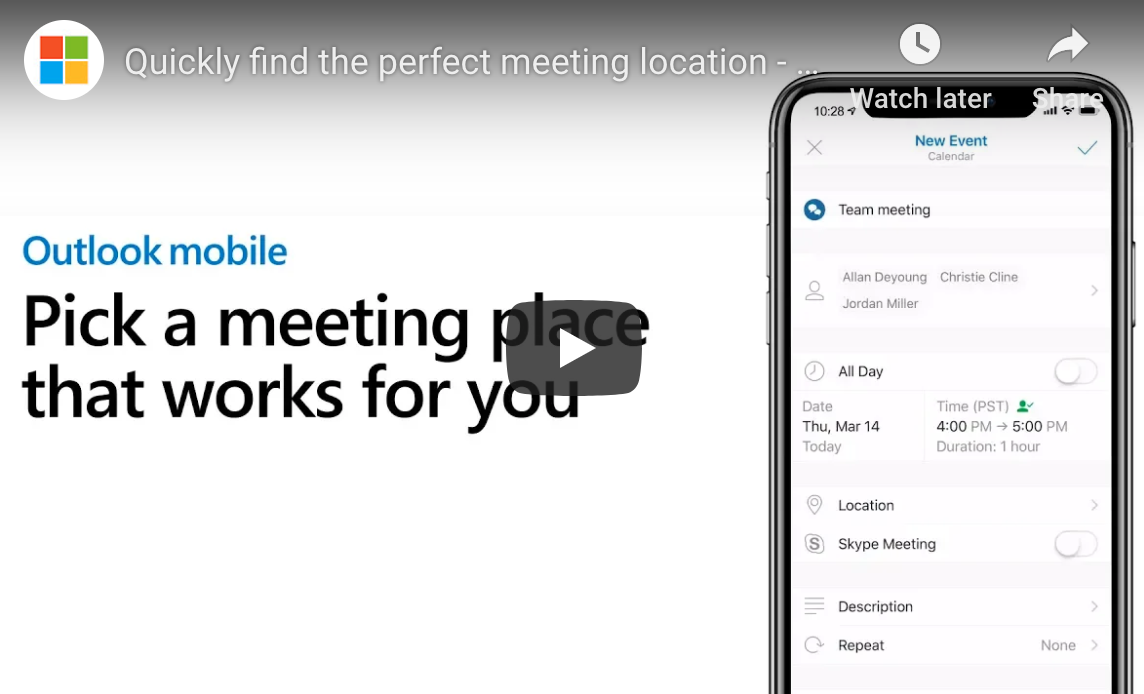
Open your Outlook Mobile and create a new event. To do this, tap on the calendar tab along the bottom of the app. Next, press the big plus sign in the lower right corner. (As always, locations can change over time and depending on device. You’re likely to find a calendar page and a plus sign somewhere, though—use them.)

Step 2: Name Event, Add Attendees, and Set Date and Time

Choose a name for your meeting in the first field, and add all the people you want to attend the meeting in the second one. For the latter, just start typing names. Outlook Mobile will pull up relevant contact information. Click on the contacts you want to include.

Note: Depending on your configuration settings, Outlook Mobile may offer you multiple options for some contacts. If you have a personal and a work version of a contact, for example, be sure you choose the right one. Do the same if you have a single contact with multiple email addresses associated.

Before moving to step 3, check that the date and time information is set correctly. You can change this later, but setting it up now allows the magic below to work properly.

Step 3: Click Location

Next, tap the “location” field a little bit lower on the screen. This is where the magic happens. Outlook Mobile will intelligently suggest connected meeting rooms that you use frequently and that are free for your selected time. It will also suggest places nearby, which is useful if you’re calling an off-site meeting. Outlook Mobile learns from you, too: the more you use it, the smarter its suggestions become.

If you don’t see a suitable location listed, you can search for a better one. This can be an on-site meeting room or any mappable location.

If you and your meeting attendees have “Time to Leave” enabled in settings, Outlook Mobile will even notify you a few minutes before you need to leave your current location to get to the meeting on time. One-touch directions are available directly in the calendar event, too.

Wrap Up

This is just one of many powerful yet overlooked features in Outlook Mobile. To learn more or for help with other IT questions, contact us today.

Microsoft Outlook Mobile