Reclaim Productivity with These Microsoft Excel Secret Shortcuts

Microsoft Excel Tips

25+ Microsoft Excel Shortcuts to Boost Your Productivity

Are you getting your money’s worth out of this productivity tool? Find out how to save insane amounts of time and frustration with these 25 Microsoft Excel Tips  

When it comes to processing data, Microsoft Excel is everything to everyone. But because it’s a vast tool, many people never take the time to discover the Excel shortcuts relevant to them.

Obviously, these Excel shortcuts aren’t really secrets. No one’s hiding them from you. But because we don’t learn them, we waste a lot of time in an otherwise very streamlined and powerful productivity tool.

Franklin Covey, the author of the bestseller business classic, 7 Habits of Highly Effective People, said we need to take the time to “sharpen the saw”. Are you working with a dull blade by not using Excel to its fullest? Check out these Excel tips that will instantly sharpen your skills.

Learn Navigating Shortcuts

Ctrl+End moves you to the bottom right-hand corner of your worksheet. Because this stays within the cells in which you currently have data points, shortcuts like this let you quickly move from one side of the sheet to the other. You don’t have to endure the frustration scrolling too far.

Similar navigation shortcuts include:

  • Ctrl + Home – Go to upper left-hand corner.
  • Ctrl + Down Arrow – Go to lowest cell in the currently highlighted column.
  • Ctrl + Up Arrow – Go to the top cell in the current column. But keep in mind that if you have a blank cell in the column, it will stop there whether you’re going up, down, left or right.
  • Ctrl + Right – Go to the far right of the current row.
  • Ctrl + Left – Go to the far left in that row. Home key also does this.

Use the Go To Box

In the upper left-hand side of Excel, above your worksheet, you’ll find a Go To box. Simply point and click into the box. Then you can type any coordinates to go directly to a cell. For example, G102. If you’re working with a large sheet, Microsoft Excel tips like this are indispensable.

Keyboard shortcuts will always save time once you know them. But it’s when you’re on devices that have difficulty with point and click systems that you’ll save the most time.

Use F5 or Ctrl + G to pull up the Go To box automatically. Then type, press enter and go.

Use this same shortcut to select ranges of cells.

You can further use Go To Special, which is in the bottom right of the Go to Screen. This takes you directly to cells that meet a particular requirement. For example, if several cells on a spreadsheet should have a formula, this gives you a visual of which cells are missing formulas to help you validate your data.

From here, while the cells are highlighted, you might choose to add special formatting to make your sheet more understandable at a glance.

Highlight Cells Without the Mouse

Once again, your mouse is a terrible way to navigate in Excel. As you try to highlight groups of cells across columns, you inadvertently select other cells and can’t seem to get the right ones selected.

Yes, there are some better ways to select large numbers of cells with Excel shortcuts.

Ctrl+A highlights all cells with data points in them. Press Ctrl + A again to highlight the whole sheet.

Or highlight a specific section with this keyboard-mouse combo. Just start at the top-left cell of the part you want to select. Then Shift + click into lower right cell with the mouse. This highlights everything vertically and horizontally in between those cells.

You can accomplish the same thing without the mouse if needed. Simply move to the starting cell (always top left) for your highlighted area. Then hold the shift key and use the arrows to highlight across a row, down a column or across columns/rows.

You can also keep holding shift and move the arrows until you get it just right. Or use the mouse plus keyboard technique first. Then fine-tune what you select by pressing shift again and then using the arrows.

This is perfect for erasing large sections or formatting areas of your sheet.

But let’s say that the cells you want to highlight aren’t all next to each other. You can still highlight them together. But you will need the mouse for this one. Hold select while clicking the various cells, you’d like to highlight.

Once you’ve highlighted these cells, use Microsoft Keyboard shortcuts like:

  • Ctrl + B – Bold
  • Ctrl + I – Italic
  • Ctrl + U – Underline

And know that even if you’re using Excel on a Mac, you still have similar shortcuts. In most cases, the Command key replaces CTRL.

Improve Cell Data Entry Speed

Data entry is the centerpiece of Excel. But there are definitely some right and wrong ways to do it when treating Excel like the productivity tool it is. Check out these Microsoft Excel tips for faster and more accurate data entry.

  1. Highlight an occupied cell and start typing to replace the data. There’s no need to delete or backspace first. But be careful. You could accidentally erase a cell this way.
  2. Edit more detailed cell data from the formula bar instead of in-place. This is especially effective if you have formatted your sheet to not show all the data in a particular cell because it’s long. Just click the cell and then click into the appropriate place in the text to start typing within that bar.
  3. Use in place editing when small amounts of data in a cell. Simply double click to open the cell for editing.

Excel Shortcuts & More

We’ve only scratched the surface. So practice these 20+ tips and you’ll be eager to learn more. For more ways to increase your individual and corporate productivity, follow our blog.

Microsoft Excel Tips

Watch Out! Windows 7 Loses Support in January

Windows 7 End of Support

Careful – Your Windows 7 Loses Support in January 2020

If you use Windows 7, you need to be aware that Microsoft will end support for your operating system in January 2020. Now is the time to upgrade to Windows 10.  

Windows 7 End of Support

Windows 7 is an operating system that still has plenty of serious fans – in fact, it was only earlier last year that the market share for Windows 10 moved past Windows 7. Considering that Windows 10 was released in 2015, that is saying something. All good things must come to an end, though, and Windows 7 is no exception. Microsoft is ending support for Windows 7 in January of 2020, which means that it will become much more difficult to keep the OS up and running moving forward. And a recent announcement from Microsoft has let Windows 7 users know that they are going to be seeing bigger, full-screen pop-ups to warn them of the upcoming end of life of the operating system.

Microsoft is Magnifying it’s Warnings about End of Windows 7 Support

All through 2019, Microsoft has been telling Windows 7 users that the support for their operating system was going to end in 2020. Of course, if you are using Windows 7, you may have missed the warnings or just decided to think about them later – after all, a year is a long time. But the end is really around the corner now.

The official end of support for Windows 7 is January 14, 2020. The day after, on the 15th, you will no longer be able to get support from Microsoft if something goes wrong with your operating system. That is why the prompts telling you that Windows 7 support is going to end are getting a lot bigger and more obnoxious. Microsoft is going to push full-screen pop-ups telling you that “your Windows 7 PC is out of support”.

You don’t have to keep looking at the notifications if you don’t want to. You can ask Windows to remind you later or to never remind you again. You can also choose to ‘learn more’, which will take you to an information page about what loss of support means and give you the option to upgrade to Windows 10.

What Does “Loss of Support” Mean?

There are several things that will happen when support ends for your Windows 7 operating system, including:

  • Loss of tech support. Right now, if something goes wrong with your Windows 7, you can contact Microsoft and get somebody to help you with the problem. They can run you through troubleshooting steps and try to get things going again. But when support ends, you won’t have the option of contacting Microsoft about it. They will tell you that they no longer support your operating system.
  • No more software updates. Microsoft is always working to improve their operating systems – at least the ones they currently support. But once they stop support, they stop putting resources into improving an OS. That means there will be no more updates to make Windows 7 secure and stable.
  • Loss of security. There are always people out there looking to compromise Windows operating systems, even ones as old as Windows 7. When you lose support for your OS, it means that Microsoft will no longer be trying to identify threats and upgrade your OS to defend against those threats.
  • Loss of compatibility. This is the biggest problem for most people with unsupported operating systems. You may be ok with being less secure and not getting the latest and greatest improvements, but you are unlikely to be happy when your favorite software stops working with your version of Windows. Over time, the thing you can use your computer for will become fewer and fewer as software moves beyond your OS.

Fortunately, getting support for your OS is easy enough – you just have to upgrade to Windows 10.

Are SAML-enabled Enterprises Needed?

SAML Enterprises

SAML-enabled Enterprises Increase Network Security with SSO

SAML helps organizations implement single-sign-on. End-users need a single username and password for system access. SAML simplifies management of network security  

One of the first things most of us do when we arrive at work is sign-on to the corporate network. On the rare occasion that we have to sign on to a specific application, we’re irritated. Why is the separate sign-on necessary? The simple answer is SAML.

SAML Enterprises

What is SAML?

SAML stands for Security Assertion Markup Language. It is an open standard for sharing information across an enterprise for authentication and authorization of the end-user. It’s what lets you sign on once to access multiple applications. For SAML to work, all applications must communicate using the SAML specification. If an application cannot support SAML, the end-user will have to sign on separately.

How Does SAML Work?

A single-sign-on (SSO) environment has an identity provider where the user’s identity information is stored. When the end-user wants to use an application in the SSO environment, the application or service provider makes a request to the identity provider. The identity provider authenticates the end user’s identity and responds to the service provider’s request. The end-user is either granted or denied access.

A simplified SAML process for an end-user named Joel might flow like this:

  • Joel tries to sign on to his work computer. His sign on initiates a request to the company’s identity or SSO provider, asking for authentication.
  • The SSO provider authenticates Joel’s identity and grants him access to the network.
  • Joel launches his email program. His request initiates an exchange with the email application referred to as a service provider.
  • The service provider is configured to authenticate using SSO, so the application asks the identity provider for authentication of Joel.
  • The identity provider responds to the service provider with a digitally signed response that identifies Joel.
  • The SAML-formatted response either authenticates and authorizes Joel for the email application or denies access.
  • The service provider validates the identity provider’s response and either grants or denies access to the email application.
  • Joel accesses his email via the service provider’s application, based on the identity provider’s response.

All requests and responses must conform to the SAML protocols for exchanging information.

Why Use SAML?

SAML centralizes the authorization process. It also externalizes authentication to a separate identity provider. The configuration provides several benefits for both the end-user and the organization.

  • SAML provides a standard for deploying internet-based single sign-on.
  • SAML raises security access to the highest level. An identity provider can enforce a high level of authentication, such as Two-Factor Authentication, even if the individual applications do not support a high degree of authentication.
  • SAML simplifies the sign-on process for the end-user, who only has to remember a single user name and password.
  • SAML offers a single point for deactivation by centralizing access rights.
  • SAML enables the identity provider to audit access across SAML-enabled applications.

With a SAML-enabled enterprise, administration and monitoring of user access are reduced. Using an identity provider with a higher level of authentication than other applications within the network increases security. Allowing end-users to sign-on with a single username and password minimizes the number of times individuals require assistance because of forgotten passwords or usernames. The ability to control user access from a single point enables an organization to de-activate end-users quickly.

Chrome Users Need to Update Now

Google Chrome Updates

Why Google Chrome Users Should be Concerned About Security Patches

Does Your Organization Use Google Chrome? Find Out Why Recent Security Flaws Have Created an Urgent Need to Update Your Devices’ Browsers Immediately  

Google Chrome Updates

If users in your organization use Google Chrome, there is a high chance that several of those systems are creating an opportunity for hackers to install malware. Google recently identified a major security flaw with its Chrome browser that impacts Windows, Mac, and Linux-based devices. Although Google has released a security patch to correct the security vulnerabilities, the patch fixes two separate problems.

Security Vulnerabilities

One of the security vulnerabilities Google identified is Chrome’s audio component. The other vulnerability is tied to the browser’s PDF library. Both allow unwanted modifications or corruptions to memory data. This allows hackers to elevate privileges on the device or within applications installed on the device. If someone is able to gain administrative access to a system or software on a system, the individual could make unwanted changes or wreak havoc on the device’s operating system. There is also a high chance that a hacker could install malware or execute malicious code on the device.

Version

The version of the browser that fixes the security issues is 78.03904.87. Although the Chrome browser may be configured to automatically update itself in the background upon launch, it is a good idea to manually check each device. The browser can be manually checked by selecting the Help menu and then “About Google Chrome.” If there is an update available, the browser will automatically search for it and find it. The browser’s version will also be displayed in the “About” section. If the listed version is 78.03904.87 or later, then the device has received the necessary security patch.

If there are problems with the browser updating, it may need to be removed from the system and reinstalled. Some organizations have an automatic process to uninstall and reinstall applications from the server once the devices connect to the organization’s network. Reports can be run to see which systems still have outdated versions and technicians should manually check those systems to diagnose why automatic updates are not going through.

Other Considerations

A system that is not receiving automatic updates from Google Chrome may have other issues. Technicians should check for the following:

  • Is the anti-malware program up to date and running correctly?
  • Is the OS receiving approved updates and are these updates installing?
  • When was the last time the system pinged the network?
  • Has the system been restarted recently?
  • If the system has been disconnected from the organization’s network, how long has it been offline?
  • Has a malware scan recently been run? Were any malicious items identified and removed?
  • Are there are any suspicious executables or unauthorized programs installed?

Sometimes wiping a system and completely reinstalling the OS are the best courses of action. Signs that a device may be too infected, corrupted, or outdated include the presence of unauthorized or suspicious applications, more than 100 pending OS updates or a previous update date that is more than a month old, and an anti-malware program that will not update or run a scan correctly. Before wiping a system and reinstalled the OS, a technician should check for and back up any user data that may be installed on the device’s hard drive. However, the data should be carefully scanned for any malware infections prior to transferring it back onto the system.

How Do You Insert a PDF Into a Word Doc?

PDF Document

Insert a PDF Into a Word Doc

Need to know how to add a PDF to a Word document? Head here and learn two tried-and-true techniques for seamlessly adding PDFs to any Microsoft Word doc.  

PDF Document

Have you ever needed to insert a PDF file into a Word document?

Let’s say you’ve found a relevant chart or graph in a PDF file that you’d like to insert into a report you’re writing in Microsoft Word as a static image. Or, let’s say you want to insert an entire PDF file into a Word document as a linked object.

Below, we’ll explain just how to do both of these tasks using your Windows computer and the following versions of Word:

  • Word 2010
  • Word 2013
  • Word 2016
  • Word 2019
  • Word for Office 365

Before we explain these procedures, however, let’s explain what a PDF file is.

What Is a PDF file?

A PDF file is a type of file. PDF stands for portable document format. This format allows you to view a document of text, graphics, or both in a layout that appears as if it’s a printed document. Users can view PDF files on a computer or portable device, print them, or send them electronically.

How do you insert a PDF file into Word as a static image?

To insert a PDF as a static image (that is not expandable or clickable as an object or icon), you’ll first need to convert the PDF to a JPG file. Once you’ve done this, make sure you save the JPG in an easy-to-find location. The following process works best on older versions of Microsoft Word.

1. Open Microsoft Word.

2. Put your cursor in the exact place you want the PDF image to go.

3. Click “Insert” in the menu at the top of Word.

4. Click “Picture.”

5. Within the “Insert Picture” dialog box, find the JPG version of the PDF image you want to insert.

6. Click “Insert,” and the image will be inserted where you last had your cursor.

How do you insert a PDF file into Word as a linked object?

You may want to insert a link to a full PDF file in your Word document. This will result in the first page of the PDF being displayed as a preview. If the preview is clicked, it will bring the user to the full document.

1. Open Microsoft Word.

2. Put your cursor in the exact place you want the PDF file to go.

3. Click “Insert” in the menu at the top of Word.

4. Click “Text.”

5. Click “Object.”

6. Within the dialog box that appears, click “Create From File”

7. Select “Browse” and navigate to the PDF you’d like to insert.

8. Click “Link to File.”

There are other techniques for inserting PDF files into Word documents as well. If the above techniques do not work with your unique device or your specific version of Word, talk to your managed service provider to see how you should go about this procedure.

How to Prepare Your Device for iOS 13

IOS 13

Apple has launched the latest iteration of its mobile operating system: iOS 13. Here’s what you need to know before installing the update to your iPhone.  

Apple is set to release the latest version of its mobile operating system this fall. iOS 13 aims to bring major security, functionality, and aesthetic updates to your iPhone. Here’s what you need to know before installing the update.

An Overview of iOS 13

The biggest changes that iOS 13 will bring include:

  • Dark Mode
  • Swipe to Type
  • Updates to Photos, Maps, Reminders, and other apps
  • Improved privacy and security

iPad users will enjoy new iPadOS features including:

  • A redesigned Home screen
  • Slide Over and Split View
  • Full-page markup
  • Improved text editing

Preparing Your Device for iOS 13

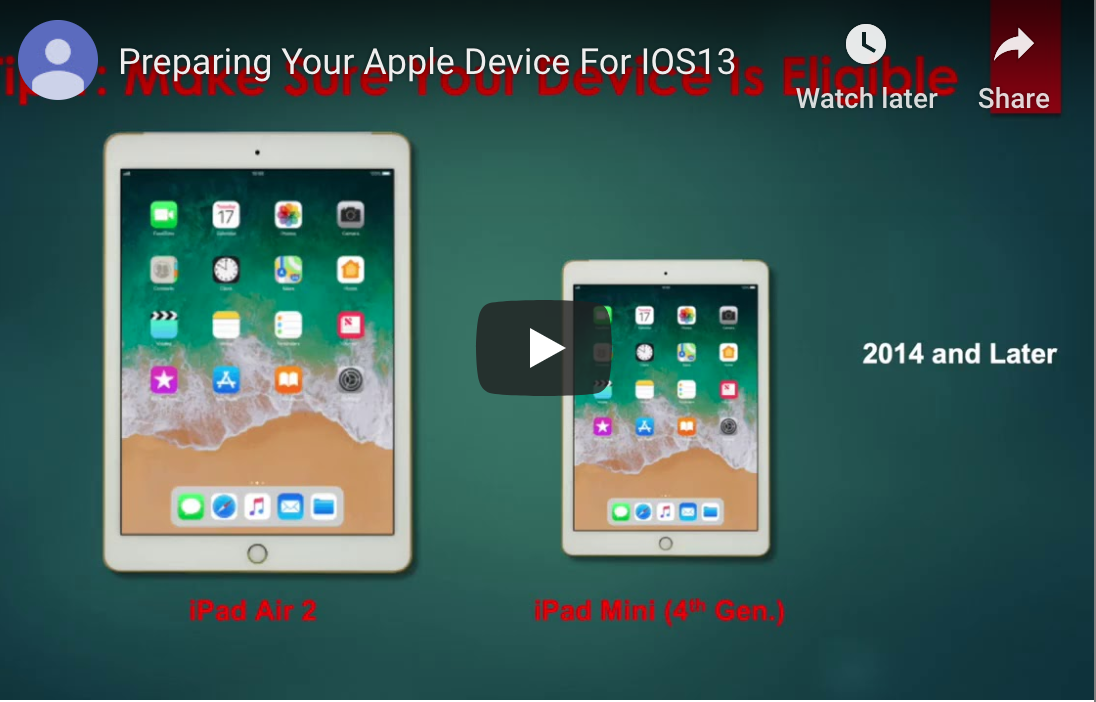
Before you can update to iOS 13, you’ll need to make sure your device is compatible. The oldest devices that can receive the update are the iPhone 6S and the iPhone 6S Plus, both released in 2015. Earlier models of the iPhone will not be able to update to iOS 13. For iPads, the cutoff sits at the iPad Air 2 and the 4th Gen iPad Mini, introduced in 2014 and 2015, respectively. Newer models of these devices can be updated to iOS 13.

Delete Unused Apps

Because iOS 13 is a sizeable update, you’ll want to make sure your device has enough space to accommodate it. A good way to clear up space is by deleting apps you don’t or rarely use. Don’t worry; you can download them again after the update if you change your mind. Apps that you paid for will not charge you to re-download them. An easy way to see which apps you don’t really use is by navigating to Settings > General > iPhone Storage. From there, scroll down the list of apps to see when each app was last used. The ones on the bottom of the list or that don’t appear on the list at all are candidates for deletion.

Enable iCloud Backup

Before you update, make sure that iCloud Backup is enabled in case an error occurs during the update process. To do this, navigate to Settings > Your Name > iCloud and check that iCloud Backup shows ‘On.’ If it was Off, switch it to On and give your phone time to back up its data to the cloud. Depending on how much data you have stored, this process can take anywhere from less than an hour to 24 hours or more.

If you follow these tips, your iPhone and/or iPad should be ready to update to iOS 13 in fall 2019.

IOS 13

How to Automate Microsoft Outlook Email Responses

Microsoft Outlook Training

Automate Email Replies in Four Ways to Share Information Better

Learn how to use four powerful tools to automate Microsoft Outlook email responses, including Automatic Replies, Quick Parts, Signatures and Templates  

Managing email responses, especially if you are a busy executive looking to keep in touch with clients, colleagues, investors and partners.

With Microsoft Outlook, you have multiple opportunities to automate your email responses. Here’s a look at four of the most effective ways to automate your email responses.

How Can I Use Templates to Automate Email Responses?

Templates are a simple way to create automated messages.

You can start with templates by creating a new message or replying to one.

On the ribbon, click on the View Templates button. This will bring up a new window with a section called My Templates, with a few common responses listed.

You can edit or remove these templates or create your own. For each template, you can give it a title and in the text box enter in any standardized response you choose, including copying and pasting from other documents.

Once you have your templates selected, you can add them to a new email or response quickly and edit them within the body of the message. For frequent phrasing and responses, the templates option helps to accelerate your communication.

The advantage of templates is that they are very easy to use, edit, update and delete. The downside is that they are very basic and include no formatting options within the template itself.

How Can Signatures Be Automated?

Preset signatures can help create various messages for different situations. In most cases, a default signature will be applied to all your outgoing messages. These signatures typically contain the following:

  • Full name
  • Title
  • Phone numbers
  • Website
  • Social media links

Often these signatures are standardized throughout an organization or division, and often contain specific marketing or legal language.

Signatures are highly formattable and can contain graphics or photos to convey further messages.

You can use signatures to be more productive and create messaging that varies based on the email recipient or whether the email is for business or personal reasons.

To create, modify or delete signatures, there are several ways to proceed. If you’re in a new message, go to the Message tab and click on the Signature button. This will bring up any existing signatures already in your account. To create a new one, click on the Signatures … selection at the bottom of the menu.

Another way to access the Signatures functionality is to use the File menu, clicking on Options, then Mail then Signatures.

No matter which option you choose, you’ll reach a new screen where you can select an existing signature to edit, rename or delete, or create a new signature. In the bottom box, you can:

  • Add text and images
  • Adjust the font and size
  • Insert hyperlinks
  • Set the signature’s alignment

Signatures are listed alphabetically, so naming conventions are important, especially for employees managing emails for other people or corporate accounts.

The top right section of the Signatures screen allows you to choose the email account to use and the default signature to use for new messages and replies or forwards.

Signatures have additional functionality. For messages that are sent repeatedly, the Signatures tool helps automate communication. The signature box can be used to include copy that is used for regular messages — a much faster option than saving text to a draft message or copying and pasting from a Word document. You can create multiple response signatures for typical inquiries.

What Is Quick Parts?

Quick Parts, formerly known as Building Blocks and Auto Text, helps you copy and save repeated boilerplate text blocks that can be inserted into an email. This is helpful for messages that include requests for information or other repetitive content.

To create a new Quick Part, reply to a message or create a new one. Type new text or highlight and copy existing text that you want to retain. Formatting will remain. In the ribbon, under the Text group, click on the Quick Parts button. This action brings up a list of existing Quick Parts, sorted by category, and allows you to create a new entry. A new window appears, where you can create a name, gallery category and description for the entry. (You can create new categories from this screen, too.)

Finally, you can determine in what email template you want the Quick Part available and some options for insertion.

Once saved, the Quick Part is now available for use. Create a new message, click on the Insert button and then the Quick Parts option to see a list of options for you to insert.

Quick Parts has several advantages. It allows for the inclusion of long entries with retained formatting for text and graphics. It also allows you to add multiple Quick Parts to the same message.

Right-clicking on any of the Quick Parts pops open options for where to insert the quick part, edit its properties or organize your available items. Quick Parts can also be inserted into Calendar entries or Tasks.

How Do Automatic Replies Work?

Automatic Replies are a standard staple in most offices. It’s an excellent time-management tool that quickly lets those within and outside your organization know your status.

To use Automatic Replies, you’ll need to be using an Outlook version that includes Microsoft Exchange server account or Exchange Online through Office 365. Standalone versions of Outlook do not support this feature.

Access Automatic Replies by going to the File tab and choosing Automatic Replies (Out of Office) from the Info tab. Select the Send automatic replies button and if you prefer, enter the dates and times you want the feature to be used in response to incoming messages.

The window defaults to the message you want sent inside your organization. You can add the text you need and apply basic formatting (font, size, effect, bullets or numeration, and indentation.

Remember to review the content so you don’t use an old message.

You can also opt to have a different message for those outside the organization. You can cut and paste between the two audience windows to create customized communications options.

The basic information to include in an Automatic Reply message is:

  • The length of your absence
  • When you will return
  • Who to contact for urgent matters

The Automatic Reply message is also a great way to share other information, such as social media links, news or other high-value content.

You can also set rules regarding your messages, such as whether to alert or copy a coworker regarding messages from specific senders or to reply with a specific template.

Once turned on, you’ll see a message bar in yellow at the top of your Inbox reminding you that Automatic Replies are turned on, along with an option for turning them off.

Automation is a powerful way to save time, deliver important messages and improve communication in your email responses. Using the four featured solutions here, either independently or together, can keep projects moving and share information.

Microsoft Outlook Training

Complimentary Microsoft Outlook Training

Every month, we host Microsoft Office and other technology training sessions. Our training sessions are completely free of charge and are available “on-demand”.  Yes, you can tune-in whenever and wherever you like.

Microsoft Outlook Training
 

This month’s training session: 4 Ways To Use Microsoft Outlook Efficiently.

Our in-house Microsoft training specialist, Dawn, will guide you through some very important tips and tricks, such as:

  • Quick Parts
  • Templates
  • Automated Responses
  • Signatures

Tune into this month’s training by clicking here.

10 Tips for Navigating Microsoft Excel

Managing Excel Workbooks

Shortcuts and Keyboard Tricks Make Navigating Excel Easier

Learn 10 tips to improve your mastery of Microsoft Excel, including tricks for navigating, adding, deleting, renaming and grouping worksheets within a workbook.

Microsoft Excel has become a powerful tool used in businesses of all types. What started (and is still used) as an accounting tool, the product now is ever-present in offices around the world.

Mastering some key functions in Excel can help your users work more efficiently. Here’s a look at 10 top navigation tips.

1. Use the Arrow

If you have lots of worksheets open (Excel lets you have as many as 1,000) in your workbook, it can be difficult to find the one you need. On the bottom left are two black arrows that can be used to scroll through the different worksheets to find the one you need. Click on it and it becomes the active sheet. You can also use the Ctrl key with the arrows to move to the first or last sheet.

Right-clicking on either of the arrows brings up a pop-up window with a complete list of your worksheets. Click on the name and brings you to that worksheet.

2. Use the Shortcuts

The following shortcuts can save you time moving through your workbook:

  • Ctrl + Page Down: Go to the next worksheet
  • Ctrl + Page Up: Go to the previous worksheet

3. Right-Click to Manage Worksheets

Right-clicking on any worksheet brings up a list of helpful options. Here you can quickly change the worksheet color, rename a worksheet, or copy or delete it.

4. Insert a New Worksheet

There are four ways to add a new worksheet to your workbook.

  • Right-click on any worksheet tab and select the Insert option
  • Shift + F11
  • Click on the plus sign in a circle on the bottom right of the tab listings
  • Go to the Home menu, go to the Cells section, click on Insert and select Insert Sheet

5. Delete a Worksheet

Right-clicking provides you with the option to delete a worksheet. If there’s data in the worksheet a warning will appear. You can also go to the Home tab in the Cells group and click on Delete and select Delete Sheet.

A word of warning about deleting sheets. You cannot undo a sheet deletion.

6. Rename a Worksheet

There are three options, from slowest to fastest:

  • Go to the Home tab, click on the Cells group and the Format option. You’ll see a choice to Rename Sheet. This will activate the name box for the sheet
  • Right-click on the worksheet tab and choose the rename option
  • Double-click on the worksheet tab

7. Add a Tab Color

Large workbooks can make it difficult to organize and find a needed worksheet. Adding color tags to the worksheet tabs is a big help. Right-click on the tab, select Tab Color and choose the shade you want.

8. Move a Worksheet

This is a simple tip. To move a worksheet, click the tab and hold. A mouse pointer will appear and you can move the tab to the spot you want.

9. Copy a Worksheet

When you need to copy a worksheet within the same workbook, copying and pasting is not the best option. The copied data often does not look the same and can require a lot of time to fix. Another option is to again click and hold the tab you want to copy, and hit the Ctrl key. Move to the spot you want to add the copied worksheet and a new tab will be added.

To copy a worksheet to a new workbook, first open the destination workbook. Go to the source workbook and the sheet you want to copy or move. Right-click anywhere and select the Move or Copy option. Next, move to the destination workbook and choose the location.

One note: It’s best to copy the sheet you want, even if you want to move it, just in case it gets misplaced. You’ll still have the original.

10. Group Worksheets

When you want to add headers and footers or formatting to multiple worksheets, Excel does not have an intuitive solution. Using the Grouping function lets you handle several key tasks that apply to more than one sheet, including:

  • Page setups
  • Printing
  • Entering or editing data
  • Formatting
  • Moving, copying or deleting

To group sheets, select the first sheet you want in the group. Depress the Shift key and you can select consecutive sheets you want to group. If sheets are not consecutive, use the Ctrl key instead.

These tips will accelerate how fast work is done and give your employees more confidence and control of their Excel work.

Managing Excel Workbooks

The End Of Windows 7

Windows 7 End of Support

As of January 14th, 2020, Microsoft will be ending all support for their hugely popular Windows 7 operating system, which has technology professionals strongly recommending businesses upgrade to Windows 10 in response.

This brief video on the subject discusses what the end of Windows 7 support means for users and the risks that come with choosing not to upgrade before January 2020.


If you have questions or want to find out how we can assist you with upgrading smoothly to Windows 10, give us a call at {phone} or email us at {email}.

Windows 7 End of Support