Are You Tired of Google’s Background?

Google Chrome Background

Google Chrome Background

Change Your Background Image on Chrome

Do you want to add a little bit of your personality to your web surfing and internet searches? It is easy with the Chrome browser and this simple guide.  

Google’s is far and away the most popular search engine online. Besides returning helpful and fast search results, the website is streamlined and utilitarian in nature, letting visitors find the information they want without needing to deal with all the distractions of other search engines out there. And while the search bar on the home screen of Google’s Chrome browser is fine, some businesses and individuals may prefer a more customized experience such as adding a favorite photo or a company logo. Lucky, that is not a problem. Google, and the Chrome browser gives you the ability to choose any background image you want. And the best part is that’s it easy to set up!

How to Set Up a Personalized Google Background

  1. Load your Chrome browser. Chrome is a fast, secure, and easy-to-use browser, so, if you don’t already have it, download it now.
  2. Decide whether you want to use a pre-made Google theme or if you prefer to use one of your own photos. You can find a wide selection of pre-made themes to suit a wide variety of different styles and interests in the Google Store.
  3. Choose the pre-made theme you want. You can access the Google Store by launching the Chrome browser. Once the browser loads, look for the icon with the three dots in a vertical row. It is located to the far right of the address bar. Click on the icon and choose the Settings option near the bottom of the drop-down menu. From the menu on the left side of the Settings page, select Appearances. A new menu will open in the middle of your screen. Click on Themes from the new menu, and you will have access to dozens of themes from landscape photos to Zodiac symbols. Once you find a theme you want, choose Add to Chrome. Now when you open a new tab, your new theme will appear.
  4. Choose your own background image. Do you want to personalize your background even more? Then you can opt for using your own background image. You can do this by opening a new tab in the Chrome browser. On the bottom right of the screen is a button which says Customize. Older versions of Chrome may display a gear icon in the same place. Clicking on either will bring you to a Customize this page menu. Select Upload an image, and you can navigate to the file you want to upload. Once completed, open a new tab to make sure it worked.
  5. You can always reset. Do you prefer the official Google page? No problem, you can easily reset. Click on the Customize or gear icon at the lower right of the screen and select Restore default background.

Now that you know how to change the backgroud image, go ahead and experiment. You will be amazed how making one small change can have such a significant impact on a tool you use every day.

Free On Demand Excel Training: Tips & Techniques For Managing Workbooks

Organization Shouldn’t Be Complicated

Out of all of Microsoft’s Office programs, Excel is one of the most universally used. What started out as a fairly basic spreadsheet program has evolved into a must-have business tool. However, the more you use Excel, the more data your workbooks will accumulate.

Keeping these workbooks organized and easy to navigate can be a challenge. We can help with that. Check out our short Excel: Tips and Techniques for Managing Workbooks training video, available to you free and on-demand.

Simply Click Here.

Watch at your leisure, and say goodbye to your Excel frustrations.

Managing Excel Workbooks

How Can You Insert a Text Box in Google Docs?

Woman working on computer in Google Docs

Woman working on computer in Google Docs

How Can You Insert a Text Box in Google Docs?

There are two simple ways to add a text box into your Google Doc. Each lets you set apart text that stands out. Both methods allow you to copy-paste or move the text box between documents. The methods include inserting a textbox into a table and inserting a text box in a drawing. This article covers inserting text into a table.

How Can You Create a Table Text Box in iOS, Android or in Google Docs?

You can create a Google text box on iOS or Android devices in Google Docs by inserting a table. The app lets you edit the table text box on any device. The default table dimensions are three rows by three columns. The trick is modifying the table to display one row and one column. This results in a single cell, where you can add text.

Here’s how to do that in a Google Doc on iOS and Android:

  1. Select + (add).
  2. Select Table.
  3. Select the down arrow to the right of Columns and reduce the number to 1.
  4. Select the down arrow to the right of Rows and reduce the number to 1.
  5. Select Insert Table.

Your table is created and displays a single cell, which servers are a textbox.

What if I Use Desktop Chrome?

You still use a single-cell table, but the process is a bit different.

Here’s how to do that in a Google Doc on desktop Chrome:

  1. Select + (add).
  2. Select Table.
  3. Adjust Columns and Rows by selecting a single cell. (1×1 will display).
  4. Select Insert Table.
  5. Enter your text into the table cell.

What Should I Know About Entering Text in the Text Box?

In both cases above, you can enter any appropriate text. You can change the font size, font and color just like regular text. If you’re working on a mobile device, select your text and look for and select the text format icon. It’s near the top of your screen and looks like an A with four horizontal lines to the right.

For Chrome Google Docs on the web, highlight the cell text and make format changes using the font controls available on the menu bar. You can also use Format | Text Options to make your changes.

These fast, easy methods give you more control of your content on a variety of platforms.

How to Select Between Office 2019 and Office 365

Office 2019 and Office 365

Office 2019 and Office 365

Without the ability to quickly and easily access the right business productivity software, your office is likely to come grinding to a halt. The basic tools and functionality that businesspeople utilize throughout the world are something that we are so used to we often forget it is there — until something happens and it’s not working! With the latest release of updates to the perennial favorite Microsoft Office suite of software, there are two key options for obtaining licenses and many businesses struggle to determine which is right for their needs. While the core functions of the platforms are nearly identical, there are significant differences in the pricing models as well as how often you receive updates to the software. This quick overview will help you select between the two primary options for Microsoft Office based on your current needs and where your business is headed in the future.

What Is the Difference Between Microsoft Office 365 and Office 2019?

There are a few key differences between the two versions of this most popular business productivity software suite. Office 2019 provides the core functionality of Microsoft Outlook, Access, Excel, Word, PowerPoint and OneNote. This perpetual, on-premise license is valid for a single device and named user. While transferrable, this more traditional license model does have some serious limitations. You won’t receive support, you won’t receive improvements and you’ll be missing some of the cool new AI and cloud features. What you gain is a one-time purchase of software that your business can safely use for years.

With Office 365, Microsoft generously provides a set amount of storage space per license and the licenses are valid for up to 5 total devices so you’re able to work with more flexibility. This includes fully-featured mobile versions of the popular Office software as well as real-time collaboration tools and Skype minutes. New features, patches and bug fixes are dropped on a regular schedule and there are several different plans available so you can select the one that most closely meets your needs.

Which Microsoft Office Option is Best for Startups?

Startup businesses are often running lean and mean, making it difficult to make an early investment in business software. With Microsoft Office 365, you’re able to make a smaller monthly investment in your business software, while funneling any additional funds back into growing your business and attracting customers. Microsoft offers several attractive options for businesses that are just getting started, such as their Microsoft 365 solution, that brings together office productivity software plus Windows platform, cybersecurity options and device management. With a monthly or annual subscription, you will always have the right number of licenses as your business grows and won’t be overpaying for licenses that you’re not quite ready for yet.

Which Microsoft Office Option is Best for Small Businesses?

While it’s relatively easy to make a selection for business startups, small businesses might find that there’s a slightly different value proposition to consider. Some businesses are small simply because they’re in a period of growth and are still scaling up, while others are mature businesses that are considered small by design. If your small business is still in growth mode — regardless of the age of your business — you might be better off selecting Microsoft Office 365 or Microsoft 365 to support all of your business needs. These scalable solutions receive updates in real-time as they’re released and ensure that you are fully covered for all upgrades in the future.

Small businesses that are stable in size and have a fair amount of upfront capital available for purchase may find that the perpetual license option with Microsoft Office 2019 is more attractive. While you’re still receiving the full desktop versions of all the office software that your team needs to be productive, you can save money over time as many businesses keep their Office suite for multiple years without an upgrade. This isn’t necessarily recommended, even though critical security patches will still come through. You might be missing out on new functionality that will help your business move more swiftly or collaborate more cleanly internally and with external customers.

Which Microsoft Office Option is Best for Mid-Size Businesses?

Businesses that are in a stable growth pattern often reach for the more flexible software alternative that leaves resources free to re-invest in the business — Microsoft Office 365. As organizations mature, they are more likely to be multi-site and have more complex needs for management of their licensing, and also the added complexity involved with a larger pool of staff members. With Office 2019, some staff may find that the options are too limiting such as the inability to utilize popular programs on their platform of choice. Windows 10 and MacOS are the only two operating systems supported with Microsoft 2019, and customer support is not available. When you contrast that with the full support for Office 365 and the flexibility to also utilize older Windows operating systems, mid-size businesses may find that Office 365 is a better value for their organization.

There are no hard and fast rules about which solution is right for your business. If your organization runs on multiple platforms with professionals who need to be productive regardless of their physical location, Office 365 may be a better fit. More traditional office settings where there are limited changes and a fair amount of capital to invest may discover that Office 2019 perfectly suits their needs. Microsoft Office is still the choice for the vast majority of business users throughout the world, meaning new employees will be comfortable — and productive — right away.

5 Social Media Mistakes Businesses Must Avoid Making

Social Media Business

Social Media Business

Social media is an incredible chance for your brand to interact directly with your audience and grow it even further. If you’re not able to manage your social media marketing properly however, you’ll simply waste time and resources, or worse, actually harm your brand’s reputation. Here are five key social media marketing mistakes that your business must avoid at all costs:

1. Discussing Hot-Button Topics

Some topics, especially political and religious ones, are simply not worth bringing up. This is especially true in today’s divisive political environment. You’ll end up dividing your audience and perhaps even bringing negative attention onto your brand. It’s better to avoid these issues altogether and playing it a bit safer with your choice of topics.

2. Winging It

Social media marketing is the same as any other digital marketing strategy. You need to know what you want to get from it. If you don’t have specific goals for your social media strategies, you’ll never know exactly what to do or when they’re successful. Take the time to think about what you really want from each social media platform, and brainstorm about what you must do to get there.

3. Posting For the Sake of It

Research has found that the number of social media posts you need to be making on a daily and weekly basis is quite frequent in order to truly engage with and grow your audience. On Twitter, for example, you may need to Tweet up to 15 times per day. However, this doesn’t mean that you need to simply fire out meaningless Tweets all day to keep your numbers up. Each post needs to be meaningful and engaging. If you’re just posting low-quality content over and over again to meet a minimum criteria, your audience is going to see through it and will most likely unsubscribe. It’s important to post frequently, but only as often as you have something important to say. You cannot forego quality for the sake of quantity.

4. Treating All Platforms the Same

It’s likely that you have a presence on a wide variety of social media platforms. At the very least, Facebook and Twitter, and then probably a couple out of Snapchat, Instagram, YouTube, Pinterest, etc. The problem is when you treat all social media platforms the same. The average audience on Facebook and Twitter are much different. People use Instagram differently than they use Pinterest. If you want to truly thrive on social media, you need to understand each platform and what your audience is looking for on it. If you’re struggling to do that, you may want to focus on establishing a strong presence on just one or two platforms at a time.

5. Ignoring Negative Activity

It’s critical that you don’t get defensive on social media, but you cannot simply let negative feedback go unanswered. Not only does it further harm the relationship between you and the individual complaining, but it also adds some legitimacy to the complaint for everybody else to see. After all, if you had a reasonable response to the complaint, why wouldn’t your company voice it? Make sure that you have dedicated customer service resources handling your social media comments in a professional, expedient manner.

By avoiding the key social media marketing mistakes listed above, your business will be in a great position to not only survive on social media platforms, but thrive on them. Your audience will be engaged and energized, and you’ll reach more people than you ever thought possible!

Google Trips vs. TripIt

Google Trips vs. TripIT

Google Trips vs. TripIT

Have you been searching for a better way to organize your travel plans, reservations, and itineraries? You’re tired of looking through your email for separate flight, hotel, and car reservations and want a central place where you can instantly access all the information. A smartphone travel app is a convenient and efficient way you can get organized, find nearby attractions, and find suggestions of things to see based on your destination. However, you’re also wondering which app you will get the most use out of and which one will prove to be the most reliable. Google Trips and TripIt are two popular travel apps that allow you to plan ahead and access all of the information you need in one place. Before you decide which app is best for you, you’ll want to ask yourself a few questions.

Things You Need to Consider

Similar to other Google services and apps, Google Trips works with an existing Gmail account. If you already have a Gmail account or are planning on signing up for one, Google Trips will automatically gather your travel itineraries and reservation confirmations from your email’s inbox. TripIt offers both a free and paid version of the app, but you will need to forward your reservation emails to the app so it can add them. You can also manually add in the information to either app, but if you prefer the convenience of an app being able to automatically sync your data, Google Trips will be a better fit.

If you’re a fan of alerts and reminders, you can enable several different types of alerts within TripIt. Do you need reminders of when to check in for your flight, when you can check into your hotel room, and when to pick up your rental car? TripIt can remind you of all of these and keep your trip on schedule. The app will even alert you to any flight status changes and prompt you when it’s time to leave for the airport. TripIt’s notifications can also let you know when you’ve shared the details of your trip with others and when you’ve received new reservations in your email.

Google Trips has an offline mode you can use to access your trip’s information even when you’re not able to connect to Wi-Fi or a wireless carrier’s network. If you’re traveling to a remote area or a destination with unreliable cell service, you can still pull up details about your destination. The app integrates with Google Maps and individual contributors’ information about tourist attractions, restaurants, shopping, transportation, historical sites, and local parks. You can gather information about available discounts on dining, tours, events, and transportation using the app’s discount tab. You can also organize places or sites you would like to visit using Google Trip’s saved places feature.

Availability and Advantages

Whether you have an Android or an iPhone, you can use either app. Both Google Trip and TripIt are available for both types of phones. You can download and install the apps from the Google Play Store or Apple’s App Store. If you want to try both apps out to see which one you like the best, you can. Both of them will work without causing any compatability issues.

While you will find Google Trip easier to use and more of a personalized destination guidebook, TripIt’s robust itinerary features will let you add other travelers to your trip. These travelers can offer suggestions and make edits, which is helpful if you’re traveling in pairs or with a group. Google Trip offers a streamlined experience, but TripIt offers added customization tools. Both apps offer you a way to organize and keep track of your travel plans, without having to dig through multiple reservation details and manually map out your departures and arrivals. You can try each one without any commitment or risk.

What Makes a Chromebook Different From a Conventional Laptop?

Chromebook

Chromebook

Chromebooks are a relatively new type of laptop, first hitting the market in 2011. If you’re in the market for a new laptop or are in charge of purchasing laptops for a group, Chromebooks may have caught your eye due to their low prices.

Before you jump onto the Chromebook bandwagon, it’s important to understand the significant differences between Chromebooks and conventional PC or Mac laptops. First, let’s take a high-level look at what Chromebooks are.

Chromebook Overview

The underlying vision for Chromebook was to create an entirely new category of laptop, one that’s streamlined, durable, and low in price. Chromebooks generally don’t look as flashy as higher-end laptops. They don’t have hard drives; instead, they rely on small amounts (16, 32, or 64 GB typically) of eMMC storage. eMMC storage is cheaper and less feature-packed than SSD storage. Critics call them underpowered; proponents say they’re intentionally streamlined.

Chrome OS

One of the most noticeable differentiators between Chromebooks and other laptops is Chrome OS. Chrome OS is a much simpler operating system than Windows or macOS. It’s quick and responsive — most Chromebooks boot up in around 8 seconds — but it lacks many of the features and much of the depth of both Windows and macOS.

Software Options

With a few exceptions, the apps in Chrome OS launch and run in the Chrome browser. Chrome OS’s file manager and media player launch on their own, but that’s it. Everything else runs in the Chrome browser. Granted, the Chrome browser is powerful, and these days many apps have a web version accessible via Chromebook. Still, this gives you an idea some of the limitations you might face when choosing a Chromebook. You won’t be running Photoshop, iTunes, or other popular desktop-only applications.

If you want to know more about what software is and isn’t available for Chromebook, search the relevant stores. All Chromebooks have access to the Chrome Web Store, and some additionally can access the Google Play Store.

Hardware

If you’re looking for a streamlined, lightweight machine to do basic office or education-related tasks, Chromebook may be a good choice. It’s no hardware powerhouse, though, and that’s by design. If you need raw computing power, you won’t find it here. Most Chromebooks have decent but not great displays. They have lower levels of eMMC storage, which itself is less powerful than SSD technology.

Their processors are adequate for what the OS allows you to do, but they are slower than what you’re likely to find in a late-model PC or Mac. Because Chromebooks don’t do a lot of heavy lifting, most of them are fanless, which reduces both weight and power consumption.

Chromebook battery life is usually fantastic. Smaller, slower, simpler components don’t need as much power, and along the same lines the sleek, streamlined OS doesn’t demand much, either. Bear in mind that the more intense the task, the faster the battery will drain—just like other laptops.

Cost

Cost is one of the biggest differentiators. Because Chromebooks don’t need to include the fastest and best components, they are far cheaper than flagship PC or Mac laptops. While prices vary depending on hardware specs, many Chromebooks are available for less than $200. The cheapest MacBook air starts at $999. You could buy 5 Chromebooks with that money!

Should You Get One?

The answer is, of course, it depends. If you need a powerful device capable of running any and all software, or if you have a strong preference for Windows or macOS, then a Chromebook isn’t right for you. On the other hand, if price is a big consideration, you’re a casual user, or you’re wanting a simple, streamlined device, Chromebook may well be a great choice for you.

Mac Tech Tip: Deleting Content in the Photos App’s Hidden Trash

Recovery Files MacOS

Recovery Files MacOS

Keeping photos and videos on your Mac is convenient. Depending on your line of work, it may even be essential. Photos and videos can eat up serious storage space, though, and today’s solid state drives aren’t always the most spacious.

Users who run into storage space limits often start paring down their photos and videos. Photo libraries transferred from phones usually end up with plenty of throwaway photos. Macbook users running MacOS Mojave may run into trouble still. They delete gigabytes worth of photos and videos, but that doesn’t make a difference in their available storage space.

Deleted, But Not Forgotten

What’s going on here? As the old saying goes, “it’s a feature, not a bug.” MacOS Mojave included numerous app updates, and the Photos app got a big behind-the-scenes overhaul. One “magic” feature is the ability to recover photos that were deleted within the app. For around 29 days, users can restore photos that they’d deleted, as long as they deleted them inside the photos app rather than in Finder.

The trick here is that Photos isn’t doing anything by magic. When you delete photos inside the Photos app, those photos don’t actually get deleted. Instead, they simply get moved to a hidden folder. If you later realize you made a mistake, you can undelete the photo. The app “magically” goes into the hidden folder, finds the photo, and moves it back to the normal location.

The Problem with the Hidden Trash Bin

This feature has a problem, though: since the photos don’t get deleted, you don’t get the storage space back. If your main goal is to gain storage space, and you’re sure you don’t need the photos back, it’s time for a workaround.

Finding and Emptying the Hidden Trash

To find and empty the hidden trash, first open the Photos app. In the sidebar, you should see a tab named Library. You’ll see a variety of entries here, including Photos, Memories, and People. At the bottom of the list you should see Recently Deleted. Click it.

In the Recently Deleted folder are all the photos and videos you’ve deleted in the last month or so. Right click on individual items to delete them permanently or use the “Delete All” button in the upper right corner if you’re sure that everything is really trash.

Find Something You Like? Click “Recover”

As you look through your Hidden Trash, you might see something you didn’t intend to delete. Right click on it and choose Recover. You may also use the Recover button in the upper right. Either method returns the item to its original location.

Conclusion

Finding the Hidden Trash is one way to alleviate storage concerns, but it isn’t always enough. For more help with storage concerns, contact us today. We’re ready to help your business’s IT reach the next level.

The Top Online Productivity Apps

Top Productivity Apps

Productivity is huge, but it’s elusive in our digital, always-on, social world. Productivity apps can help you focus better.

Top Productivity Apps

We live in a serially distracted world. The internet is everywhere—and this is great, really! It allows many of us to work from anywhere we want. Entire industries have sprung to life thanks to the ubiquity of the internet. Along with the benefits, though, come some serious drawbacks. Information comes easily, perhaps too easily. We’re inundated with social media, device notifications, and targeted advertising.

To be our best, we need focus and productivity. Ironically, many people are solving this technology-induced productivity crisis by turning to more technology.

Here are our top 4 productivity app recommendations.

Focus Booster

Built on the principles of the Pomodoro technique, Focus Booster is a powerful productivity app that’s available just about anywhere: web-based, Mac, PC, and mobile. The Pomodoro technique encourages uninterrupted 25-minute periods of focused work, followed by a short (5 minute) distraction break. These shorter periods of focused work are grouped together. Once practitioners reach their set goal of focused work sessions, they take a longer (say, an hour) break. Focus Booster uses exactly these principles, and it gives you access to a depth of data as well.

With Focus Booster, your time is automatically logged, giving you the ability to create instant timesheets for employers or clients. Focus Booster also provides easy-to-read charts and graphs documenting how you spent your time. Use these tools to fine-tune your productivity by learning where you’re consistently losing time.

Though a free “starter” plan is available, Focus Booster describes itself as a subscription service that starts at $2.99 per month. That subscription allows you to track time and gain focus from any device in any location.

Focus Keeper

Focus Keeper is, in a way, the mirror image of Focus Booster, in that it’s mostly free with an optional paid Pro version. It’s a streamlined focus tool that also uses the Pomodoro technique. It covers all the basic functions that Focus Booster has, but it doesn’t go quite as far in depth. Set and use 25-minute timers and your usage goals, and Focus Keeper will gently remind you when your sessions (and breaks) are over. One nice additional feature is a “prevent lock screen” toggle, enabling you to use your iPhone like a persistent desk timer.

Like Focus Booster, you can view time graphs and charts in Focus Keeper, though they aren’t as comprehensive. If you want to access this data long-term, you’ll need to purchase Focus Keeper Pro, a separate app with a one-time $1.99 purchase price.

Both Focus Keeper and Focus Keeper Pro are iOS exclusives.

Flora

If the above options are a little too serious for your style, then Flora for iOS might be right for you. This app is yet another in the Pomodoro camp, but with an added layer of gamification, including collaboration. The idea here is that each 25-minute timer is “planting a tree.” If anyone involved with planting a tree exits their app before the 25-minute timer finishes, the tree dies. It sounds silly, perhaps, but killing trees is no fun!

Flora is a free app, but there are a handful of creative ways to spend money in it. Is the threat of killing a virtual tree not quite (pardon the pun) cutting it? Set a Price before planting a tree (that is, starting a timer), and if you kill your digital tree, you pay that price (in real money) to fund the planting of a real live wooden tree. You can also reverse the incentive by activating Flora Care. Now, each time you reach your larger productivity goal, you fund a real tree being planted.

If you’re an Android user that loves the idea of Flora, check out Forest, a similar but less polished “gamified productivity” app.

Fabulous

Fabulous is an exceedingly valuable tool that’s available for both iOS and Android. It’s not cheap: a monthly subscription is $9.99. The old saying “You get what you pay for” holds true here, though, as Fabulous is insanely powerful and deep.

Productivity is just one small part of Fabulous. You won’t find any Pomodoro-style timers here. Instead, you’ll start on a series of Journeys based on the information you give the app. Some call it self care, but the app creators (working at the Center for Advanced Hindsight at Duke University) prefer to call it behavioral science. That’s right—the science behind this app is backed up by research.

Use Fabulous to go on Journeys to make small changes that add up to big gains. Whether you need to lose weight, exercise more, focus better, or all of the above, Fabulous will help you get there through small changes. The Journeys available cover all sorts of areas, from sleep quality to learning Stoicism to eliminating specific bad habits.

How To Share Files From Online Storage With Outlook Mobile

Microsoft Outlook Mobile Tip


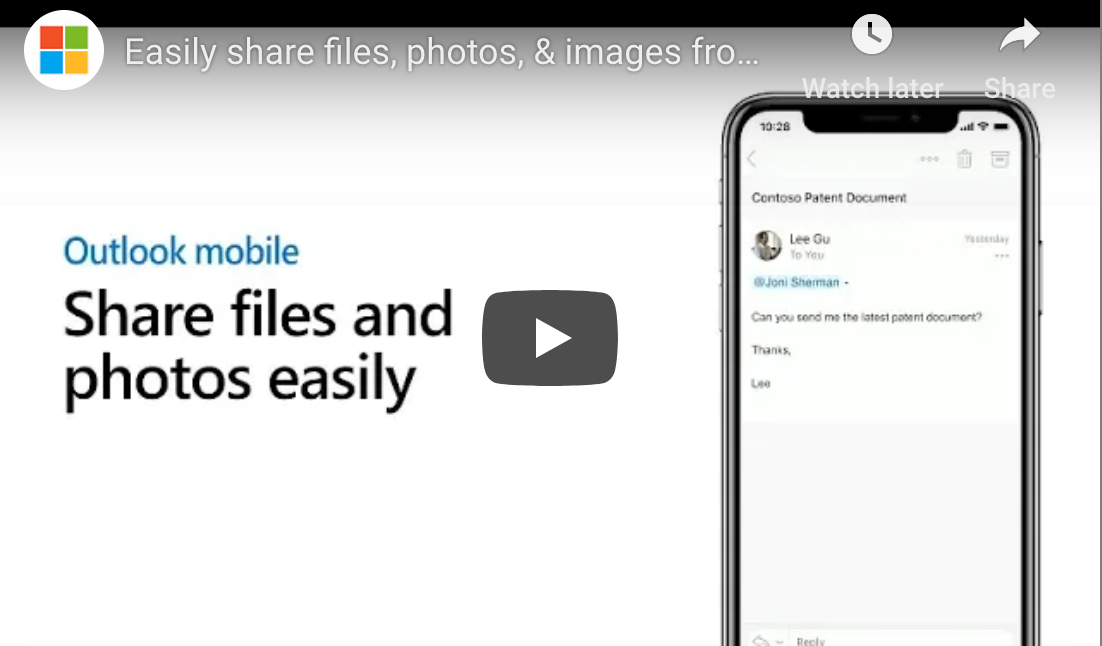
Microsoft’s mobile email solution, Outlook Mobile, is a powerful alternative to your phone’s native mail client. We’re offering some tips and tricks for those accustomed to another mail client. Today’s tip is how to share files from online storage using Outlook Mobile.

Step One: Create Message

To share files using Outlook Mobile, you’ll be sharing them within emails. First things first, you need to create the message that you want to use to send the file. Either create a new message or reply to an existing email by clicking “reply”.

Step 2: Click the Paperclip

Just below the area where you’d type your message, you should see a paper clip symbol. Click this, and on iOS you’ll see three options: “Attach file”, “Use last photo taken”, and “choose photo from library”. The latter two options allow you to send photos on your device, but that’s not what we’re learning about today. Click the first option, “Attach file”.

Step 3a: Add the Services You Need

(Note: If the online storage service where your file is located is already connected, you can skip this step.)

When you click “Attach file”, a list of services pops up. If the service you’re using is listed as “Add…” (such as “Add Google Drive…”), click that button and follow the login prompts.

Step 3b: Find Your Service and Your File

Once you’ve connected the services you use, you’ll see them listed in the “Attach files” menu. Scroll to the service you need. Outlook Mobile suggests recent files that you might need. Select the one you need, or if you don’t see it, click “see all”. Find your file and click on it.

Step 4: Choose How to Send

You now need to choose how to send your file. If you send it as an attachment, you’re creating a copy of the file. Your recipient can use the file as he or she sees fit, but you won’t see any changes that he or she makes until the file is returned to you. In many cases, the better choice is clicking “Insert OneDrive for Business link”. Doing so sends a link to the online version of the file. Changes your recipients make save in the online file, eliminating the possibility of duplicate files.

Other Things You Can Do

Outlook Mobile offers you additional ways to collaborate. Click the camera button in your email draft to quickly take a snapshot, perhaps of the whiteboard in your meeting room. You can even mark up the photo using markup tools, available in the upper right corner of the photo interface.

Got additional questions about Outlook Mobile? Call us today! We’re here to help.

Microsoft Outlook Mobile Tip