Microsoft PowerPoint on the iPad: Sketching Your Thoughts

PowerPoint is a slideshow presentation program that is part of the Microsoft 365 office suite of tools. Now, PowerPoint makes it easy to create professional, engaging presentations right on an iPad Pro. PowerPoint for iPad is finally powerful enough so users can confidently leave their personal computer at the office and take their iPad Pro on the road to create, edit and present their PowerPoint slides.

One of the newest and most creative features of Microsoft Powerpoint on the iPad (This feature is available to Microsoft Office 365 subscribers on Windows and iOS) is the Ink Feature. This convenient and easy to use tool allows users to actually write, draw, scribble and sketch right on the screen with a finger, digital pen, or mouse. Shape recognition is part of the PowerPoint for iPad program and makes it easy to convert what is handwritten in free-form ink to Microsoft Office shapes, graphics and professional fonts. For example, if you need to create an Infographic presentation slide that combines text, graphics, and shapes, simply design it free-form on the iPad screen and then after a few clicks, it will automatically transform into a visually stunning slide. Here’s how:

1. From the toolbar, select Draw.

2. Select a pen. There are a variety of sizes and colors including the standard black, red, blue, or green, or for something more custom, select the available color wheel.

3. Create a sketch with a finger, digital pencil or mouse.

When ready to convert sketches, there is a Lasso Select tool so users can highlight everything on the slide or portions of the slide they want professionally converted. Here’s how:

1. Go to the Draw tab on the top toolbar and select Ink to Shape.

2. Drag a digital pen or finger around what content you’d like to be converted. A faded and dashed area will appear while dragging.

3. As each conversion option is clicked, a preview of how it will look appears. Tap on the one preferred. When completed, users can edit the text and other images as needed.

4. Select the Ink to Shape again to stop converting shapes.

Erasing images is as easy as drawing them. Here’s how:

1. Select the Draw tab from the toolbar.

2. Select the Eraser tool.

3. Using the digital pencil, draw over the top of any drawn image or mark. Note: Tapping a single line will erase an entire line.

View this informational video showing some of the features of Microsoft PowerPoint for iPad.

How To Create A Photo Calendar In Microsoft PowerPoint

Microsoft PowerPoint User

What Can You Use Personalized PowerPoint Photo Calendars for?

A personalized photo calendar is a great way to provide loved ones with updated family pictures during holidays and birthdays. You can print them out on regular paper or cardstock, or send your projects to family and friends digitally. It’s simple to complete in Microsoft PowerPoint, even if you don’t consider yourself the artsy type. It’s also a fun project to show off pictures of employees or coworkers?

What Are the Steps to Create a Microsoft PowerPoint Photo Calendar?

  1. Find a template. To do this, you can open PowerPoint, search for “photo calendar,” and click on the magnifying glass icon to start the search.
  2. Choose any template and select Create.
  3. To replace the default pictures with your photos, right-click on one of the images. Then, select Change Picture > From a file, browse for a picture you want to include, and click on Insert.
    • You can replace the other stock photos by repeating this step.
    • You can change photos you’ve added in the same way.
  4. To save your file, select File > Save As > OneDrive – Personal, name it and save.
    • This example saves it to the cloud.

How Can You Share Your Calendar?

To share your calendar, print it or send the PowerPoint file (.ppt) via email or message to your family and friends. When you do this in PowerPoint Online, you can do it with the file still open and the file is automatically saved for you prior to sending.

Microsoft PowerPoint User

What’s the Process to Print the Personalized PowerPoint?

To print your personalized calendar, simply press Ctrl+P. When the Print dialog opens, click the link to open the PDF version of your personalized photo calendar. Then, you use the PDF program’s Print command for optimal results.

How Can I Enter and Analyze Data via a Data Entry Form in Microsoft Excel?

Microsoft Excel Data

You can create a data entry form in Microsoft Excel without using VBA or even recording a macro. If those terms don’t mean anything to you, don’t worry. You won’t need to learn them. Excel has a hidden tool you can use to make dreaded data entry fast and easy. Using a data entry form lets you view one record at a time while entering the data, but also makes it easy to analyze multiple records in a tabular format.

1. Open an Excel file.

2. Place the Form tool in your Quick Access Toolbar.

3. Click the Form command to bring up the data entry form view (no other step is needed for this).

4. Use the Find Prev and Find Next buttons to analyze your data one row at a time.

How do I Format the Data for the Data Entry Form?

To use the data entry form, simply put the data in the following format:

  1. One record of data goes in each row in Excel.
  2. Include column headings above the data.
  3. You need at least one record prior to activating a data entry form.

How Do I Add the Forms Toolbar to Excel’s Quick Access Menu?

You can add the Forms… command to Excel’s Quick Access Menu for convenient usage. Here’s how to do that:

  1. Press the options icon that lies to the right of your quick access toolbar.
  2. Choose More Commands when the drop-down list appears.
  3. Add the Form command to the quick access toolbar.
  4. Go to the Choose commands drop-down list. Select Commands Not in the Ribbon from the list.
  5. Scroll down until you come to Form… and click on it to highlight it.
  6. Press Add.
  7. This brings the Form… command in the rightmost box.
  8. Press OK.

Microsoft Excel Data

How Can You Analyze the Data?

Here are some quick tips for navigating the data block created by your entries.

  1. Place the cursor anywhere inside your data block.
  2. Each row has a single record.
  3. Each column has a column heading.
  4. Press the Form button in the quick access toolbar.
  5. The data entry form activates, allowing you to view data or add records one at a time.
  6. Use the Find Prev or Find Next button to surf through the records.
  7. Add a record using the New button or delete existing records with the Delete button.

How Can I Apply Styles With Microsoft Excel?

Excel’s ready-made formatting styles bring life and color to your spreadsheet. It lets you give printed versions a polished, professional look. Color coding makes it easier for audiences to interpret your data. Use this neat feature to take your worksheets up a notch.

What is a Preset Excel Style?

A cell style puts together font size and style, number formatting, borders and shading into pre-fab-style packaging you can apply with the click of a button. The software comes with built-in options in a variety of palettes to suit almost any taste. Once you become more familiar with them, you can customize cell styles and make them available in all your workbooks.

Keep in mind that cell styles are affiliated with the theme of your document and applied to the whole workbook. If a document’s theme is changed, the cell styles change as well. Also, you can use the lock cells feature to prevent other users from modifying the styles used in your workbooks.

How Can You Apply Cell Styles?

It’s relatively easy to apply cell styles to jazz up workbooks and impress your internal and external clients. Just follow the steps below:

  1. Select a range of cells to format.
  2. On the Home tab, click on Cell Styles to view a gallery of style choices.
  3. Click on the cell style that fits your spreadsheet or personal preferences.

How Can You Create Your Own Cell Styles?

You can also create customized styles that reflect your company or personal branding by taking the following actions:

  1. Select a single cell in your worksheet.
  2. Apply your favorite formatting options to the cell. A built-in style may be the easiest starting point. Then, you can tweak it to add your own flair.
  3. Click the Home tab on the ribbon and choose Cell Styles to access the Cell Styles Gallery.
  4. Now, choose the New Cell Styles option (It’s near the bottom.)
  5. Enter the name for your new style in the Style name box.
  6. Excel lists the formatting options applied to the selected cell for your reference.

How Can You Modify an Existing Cell Style?

To preserve the built-in styles, it’s safest to duplicate them and then make your modifications to a saved style. However, you can make changes to pre-set and custom styles, as follows:

  1. On the Home tab, select the Cell Styles icon.
  2. In the Cell Styles gallery, right-click on any cell style, then choose Modify to access the Style dialog box.
  3. Click the Format button to reach the Format Cells dialog box.
  4. Use the various tabs to apply your changes and click OK to get back to the Style dialog box.
  5. In the Style dialog box, under Style Includes, clear the check boxes of formatting elements you no longer want.
  6. Click OK to exit the dialog box.

Microsoft Excel

This takes you back to your worksheet and the modified cell style should now reflect the changes.

How To Add A Contact In Microsoft Outlook

Adding a new name and email address to your list of Microsoft Outlook contacts is pretty simple. There are two different ways you can do it depending on whether you want to add the contact information from an email or just want to create a brand new contact.

How to Add a Contact From an Email

1. Right-click the name of the sender in the heading of the email from whom you want to add as a contact.

2. Select “Add to Outlook Contacts” from the drop-down menu.

3. After clicking, you will see a form which is partially filled in with information such as the person’s name, email address, phone number, job title, etc. Fill in any missing information or make any other changes you want.

4. When you are satisfied, click on “Save & Close” on the menu bar at the top of the screen.

How to Add a Completely New Contact

1. Find and select the person icon on the verticle menu bar on the left side of the window.

2. Click on the “New Contact” button on the top menu bar.

3. This will bring you to a completely blank form which will allow you to add the person’s name, email address, and other personal information including a photograph.

4. When you finish adding information, select “Save & Close” on the menu bar at the top of the screen.

Microsoft Outlook

That is it!

Now whenever you want to email the person you just added, you will only need to type in the first few letters and Microsoft Outlook will automatically suggest the contact. Remember that you can always change or add to the personal information for each of your contacts by selecting the person from your contact list.

How To Set Up Your Microsoft Office 365 Email On Your Smartphone

Office 365 Email smartphone

Office 365 Email smartphone

Do you want to have the ability to stay on top of your emails from anywhere without the need to learn a new email system? Then enjoy the convenience of using your Microsoft Office 365 email and calendar directly on your smartphone. The Microsoft Outlook app is available for both iPhone and Android devices, it is free to use, and only takes a few minutes to get it up and running.

A Quick Guide to Installing the Outlook Office 365 Mobile App on an iPhone

  1. The first step is to download Microsoft Outlook from the App Store. Be sure to search for and download the latest version of the “Microsoft Outlook – Email and Calendar” available from Microsoft Corporation.
  2. Once the Microsoft Outlook app finishes downloading, open the app and select “Get Started” from the menu. Choose “Get Notifications” if you want to receive email alerts. Remember, you can always adjust your notification setting in the future.
  3. To connect with your Microsoft Office 365 account, input your email address and click “Add Account.”
  4. This will take you to a login screen with the email portion of the form already filled. Enter your email’s password and select “Sign in.”
  5. If you want to add additional work or personal accounts, you now have the option. If you don’t want to add more accounts at this time, click on “Maybe Later.”
  6. Go through the tutorial to learn how to use the app to write, read, and respond to emails or access your calendar. Now, whether you access your Microsoft Office 365 account using your phone or computer, everything will remain perfectly synched.

A Quick Guide to Installing the Outlook Office 365 Mobile App on an Android Phone

  1. First, go to the Play Store and search for the latest version of Microsoft Outlook. Once you find it, click on “Install.”
  2. When Microsoft Outlook finishes downloading, open it and choose “Get Started.”
  3. Type in your Microsoft Office 365 email, and select “CONTINUE.”
  4. Now you need to log in using your Microsoft Office 365 credentials. The email portion of the form is already complete, so just enter your password and select “Sign in.”
  5. At this point, you can either add additional accounts by clicking on “CONTINUE,” or skip this step for now by tapping “SKIP.” You can easily add additional accounts in the future.
  6. Learn how to use the app to write, read, and respond to emails or access your calendar by going through the short online tutorial. Now your Microsoft Office 365 account will remain synched whether you access it through your computer or smartphone.

Once you have on-the-go access to your Microsoft Office 365 email and calendar, you will find yourself being more productive no matter if you are in or out of the office.

How To Restore Files With Microsoft OneDrive

Microsoft OneDrive


Accidentally deleting a file or folder was once something that could ruin your entire day, week, or month even — maybe even your career. All that work put into it. Countless hours put into it. And then: gone. Fortunately for those of you using Microsoft OneDrive for professional, personal, or academic reasons, there may be a way to retrieve and restore files or folders that were deleted. The same is true if your files or folders were overwritten, corrupted, or infected by a virus or malware. Depending on your subscription, you may have two methods to recover files: (1) restore files from the Settings page; or (2) restore files from the Recycling bin.

Files or Folders Recovered Using Settings

From your OneDrive website, you will want to follow the next steps in order.

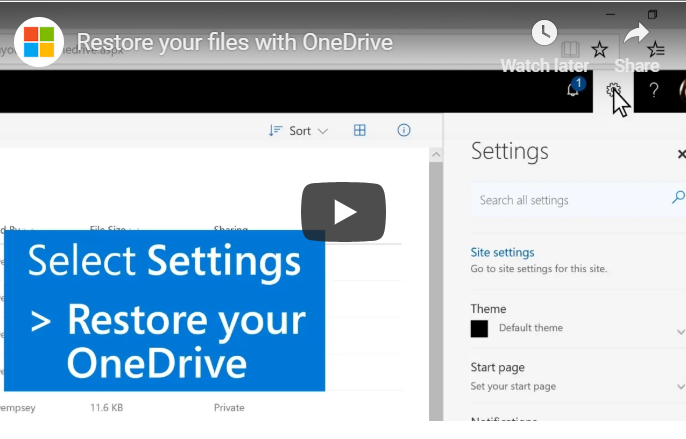
  1. Select Settings, which is the gear symbol in the upper right corner of the page — usually between the bell indicating notifications and the question mark for help.
  2. From the Settings sidebar, scroll down until you see Restore your OneDrive.
  3. The Restore your OneDrive page will open. Under Select a date, use the dropdown menu to select your option: (1) One week ago; (2) Three weeks ago; or (3) Custom date and time. If you choose Custom date and time, you will be provided with a chart. Simply slide the bar to indicate the days.
  4. Click the Restore button.
  5. All your files and documents from that time period will be restored.

If this option does not seem to work, there is another way to recover deleted files or folders.

Files or Folders Recovered Using the Recycling Bin

From your OneDrive website, follow these steps.

  1. In the navigation pane, select Recycle bin.
  2. The Recycle bin will generate a list of files and folders. If you use a work account, you have only one option for file recovery, but if you use a personal account for work, you have two options.
  3. For work and personal accounts, simply select the circle checkbox to the left of each entry you want to restore. When you select the circle check box, the header will change. Once all entries are selected, click on the Restore button in the new header.
  4. For personal accounts, you can also restore all items at once by clicking on the Restore all items button in the original header.

Things to Consider about Recovery of Files or Folders

Keep in mind that you can only recover files or folders in the Recycle bin so long as the files or folders have not been permanently deleted. Typically, files only live in the Recycle bin for 30 days for personal accounts or 93 days for business accounts — unless the administrator for business accounts changed the setting for a shorter or longer period. Once the time limit is reached, the files are automatically deleted. Files can also be automatically deleted within three days if the Recycle bin is full, at which time the oldest items are deleted first.

It is also important to note that if you want to restore a file to a specific version, File Restore cannot do so if version history was turned off. It is a good idea to always keep version history on while you work.

In summary, when using OneDrive, you have the potential to restore a file or folder that has been accidentally (or in some cases, intentionally) lost. The key is knowing the functions of your Microsoft subscription. Need more tech tips? Return to this blog. New tips for your OneDrive subscriptions and other tech needs are posted regularly.

3 Easy Steps To Secure Word Documents With A Password

Microsoft Word Password Security

Microsoft Word Password Security

Do you regularly send sensitive documents via email? If so, you are probably careful to double check that you have included the right recipient; you might even go one step further by adding a read receipt to the email. The next step that you could take when sending sensitive documents via email, is to use an encrypted email. However, if you truly want to protect sensitive documents that contain either personal or business assets, then you should consider the benefits of using Microsoft Word’s latest password protection feature.

Protect The Documents You Need To
The beauty of Microsoft Word’s password protection feature is that you can use it to protect the documents you need to. In other words, you don’t have to password protect the memo about days off or the daily office joke that brings a bit of cheer in the morning. Instead, you can pick and choose what documents you protect with a password. In this vein, it should go without saying that you need to send the password via a secure measure. In other words, it doesn’t do you any good to protect a document and then simply send the password via the same email as the document. Additionally, remember that passwords are case-sensitive and cannot be easily recovered if they are lost. With these tips in mind, there are three simply steps that you can take to add a password to any Microsoft Word document that contains sensitive information.

3 Steps To Add A Password To Microsoft Word Documents 
To add a password to a Microsoft Word document you will need to complete the following three steps in order.

  1. Select the File tab and scroll down to Info.
  2. Once you have selected Info, click on the Protect Document button. You will then select the Encrypt with Password option, which can be found from the drop-down menu.
  3. Click Encrypt It and type in the password that you want to use for the document. Keep in mind that each password will be case-sensitive, unique, and cannot be easily recovered if it is accidentally forgotten. Once you have selected the password that you want to use, click OK.

Through the above three easy to implement steps your Microsoft Word document will be securely locked behind your carefully chosen password. It is important to note that this process can be completed in Microsoft Office 365 and Microsoft Word 2016. Finally, you can always remove the password by simply following the above three steps and their prompts. Whether you need to protect your personal or business files, the Microsoft Word password protection feature is an easy way to bolster security as you write, edit, and send sensitive documents.

What Are the 3 Big Changes at Microsoft in 2019?

Microsoft Changes 2019

Microsoft Changes 2019

Ever since Microsoft incorporated as a company in April 1975, it has led the way in releasing innovative computing products for home and business users. From the release of its first operating system to the computer mouse to Microsoft Office, the company has always been one step ahead of the competition in changing the way people in the United States, Canada, Australia, and England manage their home lives. This year will be no exception. With 2019 being just days old, Microsoft has already indicated it will make three significant changes to the personal computing landscape.

Microsoft Edge to Become Chrome Engine

For as successful as Microsoft has been with its software programs and operating systems, the same cannot be said for each of the browsers it has released. It seems that every browser from Explorer 1.0 for Windows 95 to Microsoft Edge has struggled with spotty performance and security issues that did not win the confidence of users.

The introduction of Google Chrome and Mozilla Firefox gave consumers more options and caused a steep decline in the number of people who still used Microsoft Explorer, Edge, or other Microsoft browsers. To counteract its lost market share and inspire consumer confidence, Microsoft is rebuilding Edge using open-source software. It is the same software that currently allows Google Chrome to operate. Microsoft even plans to make the upgraded browser available to Mac users.

People who currently use Microsoft Edge will not have it disappear on them. Instead, they will notice greater consistency in website displays and overall improved performance. Current Chrome users will have a better experience while surfing the web on a Windows operating system. The goal is to improve the Internet for all who use it, not just those who choose to use a Microsoft product.

Skype for Business Changed to Microsoft Teams

Skype, the application that allows users to see and talk to one another through a video application, has long been a staple of the business world in developed nations around the globe. It has allowed companies to forgo expenses associated with sending people out of state or to another country to attend meetings and hold them remotely instead.

However, Microsoft recognized that the application required some tweaking to be more user-friendly for teams with people working remotely all across the world. This led to the creation of Microsoft Teams along with the announcement that Skype for Business would no longer be part of the Microsoft Office bundle for customers with fewer than 500 seats.

In development for several years, 2019 is the year that Microsoft Teams officially launches. Its designers considered the corporate and remote user and included several features that would make file sharing and team collaboration much easier.

The new communication system is a single platform that draws largely from cloud computing. This includes a chat application, inclusion of the popular cloud collaboration program Slack, and all features that users currently enjoy with Microsoft Office 365. Perhaps the biggest benefit of Microsoft Teams over Skype for Business is that it includes all features on a single platform.

The Introduction of Microsoft Office 2019

In the three decades since its 1989 launch, Microsoft Office has consistently been the productivity tool of choice for businesses and private users alike. People use programs such as Word, Excel, PowerPoint, Outlook, Publisher, Visio, and Project every day to create, manage, and communicate on the job and at home.

Its current version, Office 365, connects people to the cloud to make it easier than ever for collaborative teams to get their work done without sharing the same office space. Coupled with the increased ability to store files on the go, Office 365 shares much of the credit for making it possible for growing numbers of people to log in and work from anywhere.

The release of Microsoft Office 2019 is one of the three major changes the company will make this year. The new program shares many features with Office 365, including the availability of each of the seven productivity applications. It also has several key differences, including the following:

  • Developers planned Microsoft Office 2019 as a one-time release, which means it will not receive any future updates
  • More mobile application features that enable users to create a higher volume of content in less time
  • Zoom features on PowerPoint for an enhanced viewing experience
  • New Excel spreadsheet features that make it easier to create charts and analyze data
  • Outlook email program automatically sorts emails and pushes the most important ones to the top

The major decision facing Microsoft Office business users is whether to remain with the subscription-based 365 program or upgrade to the one-time 2019 release.

What Next?

It is too early in the year to determine how these changes will affect users and whether Microsoft will ultimately profit from them. The only thing any computer user or an IT department can say for sure is that change is constant. The most successful people accept that nothing stays the same in the world of personal computers. They welcome the opportunity to change and to reap the benefits of someone else’s innovation.

How To Open A Shared Mailbox Using Microsoft Outlook 2016

Shared Mailbox In Outlook

Shared Mailbox In Outlook

A shared mailbox in Microsoft Outlook will prove invaluable if your team is collaborating on a project, as they can exchange messages from a central platform. A communal email center is also an asset if your employees are responsible for responding to customer inquiries. Outlook Calendar allows members to create events or let others know when they’ll be out of the office. When you create a shared mailbox in Outlook, members can monitor messages via a public email alias, which usually appears as info@companyname.com. The sender appears under this alias, too, rather than by name.  Group members can now communicate without logging into the mailbox or conveying personal information. If you’re new to using shared mail in Outlook, here are some “how-to” tips to help you get started.

Creating a Shared Mailbox in Outlook

Before you use the mailbox, you will need to have an office 365 admin for your company or organization set it up and add you as a member. If you are the admin, follow these steps:

  1. Sign into Office 365 and select admin.
  2. Go to Groups and choose Shared Mailbox.
  3. Choose Add a mailbox and type in the name you want it to have. Many addresses begin with “support”, “info”, or “contact.” Then click Add.
  4. When the wizard continues to Next Steps, choose Add members. It may take a few minutes to reach this step after you add the mailbox.
  5. Add members by searching for them or selecting them from a list. When you’re finished, click Save, then Close.
  6. If you want to make changes or updates at any point, select the new mailbox and click on Edit next to the information you want to modify.

Using a Shared Outlook Mailbox: Getting Started

Once the admin has created the public mailbox, close Outlook and restart it. The mailbox should appear automatically in the Folder pane. Note that it may take a few minutes to display after the admin added it, so if you don’t see it, wait a bit, then close and restart Outlook again. If you still cannot locate the shared mailbox, you will have to add it manually.

  1. Once you’ve opened Outlook, select File.
  2. Select Account Settings and then choose the Email tab.
  3. Be sure that the correct account is highlighted, then select Change.
  4. Select More Settings. From there, choose Advanced, then click Add.
  5. Type the name of the shared email address, choose Ok and Next followed by Finish and Close.

Using the Shared Calendar

If you want to access the calendar right after the admin created the shared mailbox, you will need to close and restart Outlook to gain access to it. The shared calendar connected with the public mailbox is added to your Calendars list automatically. To use the shared calendar in Outlook, navigate to calendar view and choose the shared mailbox. From there, you can manage schedules and appointments. This feature allows all team members to be on the same page about schedules and appointments.

Using Shared Contact Lists in Outlook

When the mailbox has been created, the corresponding Contacts list is automatically added. To access it with Outlook:

  1. Select People.
  2. Look under My contacts to select the contacts folder for the shared contacts list.

Using a Shared Mailbox with a Mobile Device

If you or your team members need to take work on-the-go, you can access the shared mailbox from a smartphone or tablet, too. Unfortunately, the Outlook app on your mobile device won’t allow you to use the shared mailbox, but there is a workaround. Follow these steps to use your primary mailbox and the shared one simultaneously:

  1. Right-click on the name of your primary mailbox in the left-hand pane, then select Add shared folder.
  2. In the dialog box, type the email address or name of someone who has shared a mailbox with you, then click Add. Another option is to enter the name of the shared mailbox you are a member of.

In Outlook on the web, you should see the mailbox in your Folder list. Just as you can do with your primary folders, you can expand or collapse the shared mailbox folders. If you want to remove the shared mailbox from the Folders list, right-click Shared mailbox and choose Remove shared folder.

How to Use the Shared Calendar with Outlook on the Web

As a member of a shared mailbox, you also have access to the shared calendar. This feature allows you to create, edit and delete events (that you or someone else created) and make the information available to all members. To use the calendar from a mobile device:

  1. Sign in using Outlook on the web, then select Calendar.
  2. Right-click Other calendars, then select Open Calendar.
  3. Use the from directory option to search for the shared calendar you need to access and click Open. You should see the shared calendar on your Calendar folder list.

A Few Things to Know About Shared Mailboxes in Outlook

With a shared mailbox, you can send, receive and reply to messages just as you do with your primary mailbox. However, if you want to send automatic replies, only the admin is authorized to set this up. You cannot give anyone outside your organization access to your shared mailboxes. If you want to include people outside your business in your group correspondence, you can create a Group in Outlook instead.

Creating a shared mailbox is a helpful way to ensure that your team stays up-to-date on appointments, schedule changes and group messages. It’s also a critical tool for connecting with customers and vendors. Keeping members “in the know” improves communication, employee performance and morale.