How to Password Protect an App on Your Android Device

Password Protect Android Device

Password Protect Android Device

Have you ever wanted to put access to certain apps on your phone or tablet under an extra layer of security? There are all sorts of reasons people might want this. Maybe you want to share your phone with a child, but you don’t want little Johnny messing with work apps or your grown-up Netflix account. As another example, maybe you want to let a fellow salesperson review a presentation on your phone without having access to your contacts and sales leads. Some people may have sensitive chats that they want to keep safe from inquisitive eyes, too.

Whatever your reason for wanting to protect certain specific apps, we have good news and bad. First, the good: On Android, there’s an app (or 3) for that! The bad news: there really isn’t any kind of equivalent function on Apple beyond the content restrictions found in Screen Time. If this is something you want to do, you’ll need an Android Device.

How to Password Protect Individual Apps on Android Devices

Password protecting individual apps isn’t something that you can do natively on Android phones. In other words, the functionality is not a standard feature that’s part of the operating system. That said, there is a way to add this functionality. You just need to download the right app.

Step 1: Download AppLock by SuperTools

The first step is to download an effective app-locking app from the Google Play store. There are several to choose from. We recommend AppLock – fingerprint lock & phone cleaner, by SuperTools.

Remember that the Google Play store has plenty of lookalike and copycat apps. If you search for an app protector app, make sure you select this one or another that has very strong reviews.

Install the app, then click OPEN once it’s installed.

Step 2: Set an AppLock Passcode

Once you open AppLock, you’ll be greeted with a landing screen with a big START button. Tap it. The next screen prompts you to create a new password. Don’t be fooled if this screen looks like your Android login screen! It’s something different entirely. This is where you create the password you want to use to access your password-locked apps.

Pick something you can remember but that’s different from your phone’s main lock code. Otherwise, you’re more or less defeating the purpose of this added security. If your kid or your coworker knows your main password, he or she can just guess that same password when trying to access a sensitive app and bingo, they’re in.

When you finish setting up your passcode, you’ll get a couple screens asking if you want to give AppLocker permission to draw over other apps. Set this to Allow/enable/permit, whatever your version of Android calls it. You may need to do this in 2 consecutive screens.

Step 3: More Configuration

Once you’ve taken care of your permissions settings, head back over to the AppLocker app. You should see a list of other apps. Find the ones that you want to lock and click the icon on the right that looks like an open padlock. It will change to a colored, closed padlock when you tap it.

Once you’ve selected all the apps that you intend to lock, click the LOCK button at the bottom.

Step 4: Test It Out

Now that you’ve configured your AppLocker app, it’s time to test it out. Exit to your main screen and open an app that you’ve locked. You should see a secondary login screen with the app’s icon at the top. Enter the passcode you created earlier, and you’re good to go.

Wrap-Up

Adding an app locker to your Android device is a simple way to add an extra layer of security. You’ll gain the freedom to share your device with more people knowing that your sensitive apps are protected.

Do You Really Need To Eject That USB Drive?

Eject USB

Eject USB

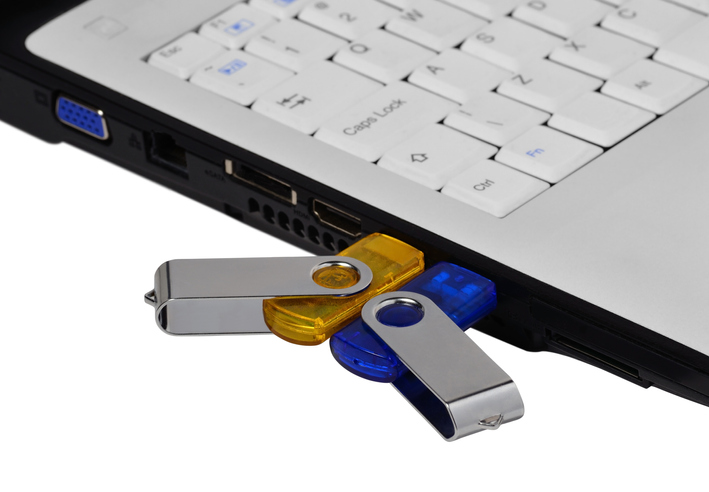
USB drives offer so much convenience. A little storage device as big as your finger, you can carry it around without even noticing it—and with every passing year, the amount of data they can hold grows and grows. These small storage devices are so easy and convenient to use that they are found everywhere in the business world, from desk drawers to branded swag drives on keychains. And since they are so easy to pop in and out of your USB drive, if you are like many people, you probably do not even bother to eject them before you take them out of your drive. Is there really any problem with not ejecting your USB drive properly? Unfortunately, the answer is a definite “Yes.”

From losing data to ruining the drive, failing to properly eject your USB drive can lead to real issues. Read on to discover the way your USB drive works and why it is so important to go through the ejection process on your computer.

Removing a USB Drive Without Ejecting—What You Need to Know

How USB Drives and Computers Communicate

Using a USB drive is such a seemingly simple task. But when you look more closely at what goes on with your drive and your computer when they interact, you will discover that the way they work together involves a lot more than just plugging in and unplugging.

When you plug a USB drive into your computer or laptop, the first thing that happens is the computer delivers power through the USB port to the USB drive. The drive does not have its own power source, so it requires power from the computer to operate. After the computer has supplied power, the computer and the drive must communicate with one another.

Proper communication between a computer and a drive requires having the right drivers installed on your computer. Fortunately, today’s drives come equipped with drivers that your computer can download to allow it to communicate with the drive—which is why modern USB drives are considered “plug-and-play.”

When the computer and the drive have established communication, the computer does what it needs to do to figure out what is on the drive. There are multiple steps to just this process, including reading the directory structure, Master Boot Record or Partition Boot Record (the process can vary by drive).

Every one of the things described above happens before you are able to see your USB drive contents on your computer—all within a matter of seconds. There are numerous other things that go on behind the scenes as you use the USB drive as well. While it may seem like the changes you make to your drive happen instantly, in reality, there are multi-stage processes occurring that may take longer than you realize.

Alterations to Your Drive Happen in Batches

As your computer is reading your drive, it is changing the information in the metadata on the files, such as changing the time and date that the file was last modified. Then, when you make changes to files, such as adding or deleting a file, the changes you make will first occur in your computer’s cache. Eventually, your computer will make the actual alterations to the information on your drive. Again, these things happen quickly, but it is important to understand that they do not happen instantly, which is one of the reasons why pulling the drive out can cause problems.

Other Programs May Be Using Your Drive

You see a very small portion of what actually happens with your computer at any given moment. While you may not be interacting with your drive right now, other programs on your computer could be doing so. For example, your antivirus and anti-malware programs could be busy scanning your drive while you are doing other things. Removing the drive while such programs are doing things on your drive can cause the files to be corrupted.

What Happens When You Eject the Drive?

Your computer and your drive have to go through a process to say goodbye just like they had a process to say hello. By pressing the eject button in your system you are telling the computer to start this process and finalize everything so that the drive can be removed safely. The computer will make sure that all of its interactions with the drive are completed before it says that you can safely remove the drive—like waiting until the antivirus is done scanning the drive.

Always Eject the Drive to Avoid Damaging Files or the Drive

Failing to properly eject your USB drive can damage files or corrupt the entire drive. That is why you always want to go through the proper ejection process. Failing to do so could cause you to lose your data on the drive or cause you to lose the ability to use the drive at all.

How To Remove Microsoft Office Metadata?

Microsoft Office Metadata

Microsoft Office Metadata

This article covers the definition of metadata and how to view, manage and delete it in Microsoft applications.

What is Metadata?

Metadata is information about your data. It contains facts that can’t be disputed, the same way data does.

Here is an example from Microsoft Word. Let’s say you’re writing a letter to a co-worker. The letter consists of characters that form words and sentences. To the computer, this is translated as a series of ones and zeroes that make up the data associated with your letter. Other information about the letter includes when it was typed, who wrote it, when it was saved, and what version of Word you used. These facts are metadata.

How Can You View Office Metadata in the File?

You can view the metadata associated with your Excel, Word and PowerPoint files. (Metadata for Outlook email is more complicated and isn’t covered here.)

  1. Open the workbook, document or presentation you wish to check.
  2. Click on the File menu in the top-left of the screen.
  3. On the Info screen, you’ll see the Pages, Size, Total Editing Time, Words, Created, Last Modified, and Related People options.
  4. At the bottom of the list, click Show All Properties for more information.

NOTE: Look at the Template data. Keep in mind that a template with your name or company name can be used to trace the file back to you.

How Can You View Office Metadata in Windows Explorer?

You don’t have to open the file to view the metadata. Here’s how to view it in Windows Explorer:

  1. Open Windows Explorer and go to your saved file.
  2. Right-click on for filename or icon and click Properties.
  3. Click on the Details tab of the Properties window. The metadata appears in a list.

What’s the Best Way to View Metadata for All Your Microsoft Files?

You can use Extensible Markup Language (XML) to view the metadata for all your presentations, documents and workbooks. XML is used to store metadata in computing, including Microsoft Office files.

Let’s use a Word document as an example of how to use XML to view metadata:

  1. In Windows Explorer, go to your saved file.
  2. Make a copy to protect the original file.
  3. Select the copied and either click the F2 button or right-click to select Rename.
  4. Change the file extension to .zip. (NOTE: Each Office filetype ending in x contains compressed XML documents.) Click Yes on the warning that appears.
  5. Right-click the file to choose Extract All…
  6. You will be asked where to save the extracted files and whether to show them when finished. Leave the default values and click Extract.
  7. The extraction produces three folders as well as an XML file. You can examine the files to view the stored information. When you double-click an XML file, it usually opens in Internet Explorer.
  8. You should be able to piece together what the information means. These XML files may include your name: core.xml under the docProps folder, and document.xml and people.xml in the word folder.

How Can You Delete Metadata from Microsoft Files?

Here are the steps to follow to delete your information from these files in Excel, Word or PowerPoint:

  1. Click on the File menu in the top-left corner.
  2. On the Info page, select Check for Issues near the middle of the page.
  3. Select Inspect Document and the Document Inspector opens.
  4. Ensure that all the Document Inspector checkboxes are checked, then select the Inspect button.
  5. Once the Document Inspector finishes, you can see the information it found. If you see a green checkmark in a circle, it found no data for that category. A red exclamation mark indicates it found data of that type.
  6. There’s a Remove All button next to the data type’s description. Click it to remove all data of a certain type. Scroll down to ensure you clear all the desired data.
  7. To double-check, click the Reinspect button to see if you missed anything.
  8. Save your document so that the data isn’t re-entered.

What are the Steps to Ensure the Metadata was Deleted?

First, repeat the steps under “How Can You View Office Metadata in the File?” When you inspect the document.xml, people.xml and core.xml files, there shouldn’t be any personal data. Change the extension from .zip to .docx, to open the file in Word.

How Can You Delete Metadata using Windows Explorer?

This method strips metadata from several files at the same time.

  1. Open Windows Explorer and go to the file with the metadata you want to take out. Right-click it to select Properties.
  2. Under Properties, click the Details tab then select both Remove Properties and Personal Information.
  3. There are two ways to remove information. Remove the metadata from the original file or a copy.

How Do I Remove Metadata from Original File?

  1. Select Remove the following properties from this file:
  2. Check the boxes you want to remove or choose Select All button.
  3. Click OK.

Can You Make a Copy with No Metadata?

This makes a copy of your file with the “Copy” appended to the filename. This copy will have no associated metadata.

  1. Under the Remove Properties window, click Create a copy with all possible properties removed
  2. Click OK.
  3. Compare the properties of the original and copy to view the changes.

Are You in the Clear Now?

What you do next with the document determines whether your metadata stays gone. Digital processing, such as emailing it, may add metadata. The best option is to print and mail the document to avoid add metadata that could be traced back to you.

How To Use Incognito Mode To Privately Watch YouTube Video

Youtube videos

When it comes to watching videos online, no name comes to mind more often than YouTube. They host nearly 2 billion users each month. 60% of people now prefer watching YouTube to watching TV. 80% of people under 49 are watching videos on YouTube.

Youtube videos

It’s popular. We get it. Everyone is on it. And there’s a huge variety of content from funny cat videos to videogame walkthroughs to guided meditation. And the fact is that regardless of whether or not you have any reason to hide what you’re watching, it’s no one’s business what you watch on YouTube as long as it’s not illegal. And even that can be a gray area.

Despite this fact, you should know that everything you do on YouTube is very carefully monitored by the company. And you have to ask yourself, just how many of your personal preferences does YouTube have a right to? According to the privacy policy, they have a right to everything. But you do have the option to go incognito. And we’ll show you how.

But first, what does YouTube do with your viewing history?

A.I., Automation & Analytics

YouTube is owned by Google, one of the biggest and most powerful tech companies in the world. Through Google’s many tech assets, they can gather endless amounts of data about you. While we don’t believe Google has any nefarious intentions for this data, we do know that Google puts this data to work to expand the empire they’ve built, primarily by enhancing their ad platform.

In a practical sense, they use this data to learn about individual and demographic behavior. What ads do you click? What makes you click? How long do you watch videos? What do you watch? All of this information helps a company like Google show you more relevant and targeted ads that may be hard not to click because they’ve been engineered with such precision.

Modern analytics allows Google to glean endless amounts of data and aggregate it into a useable form. Using artificial intelligence (A.I.), they can automate this entire process. Each time you visit, it learns something new and continually adjusts the algorithm to deliver more targeted ads.

In YouTube specifically, they can also use viewing data to make relevant recommendations to you.

This technology is actually great. It has opened the doors for personalization and relevancy in advertising that can’t otherwise be achieved. And people love that. 57% of people say they’re willing to share more data for a more personalized experience. But you have a right to control this flow of information.

Watching YouTube Videos

How to Set up Incognito in YouTube

These instructions are the same whether you’re on Apple or Android. In order for this to work, you do need to log into your YouTube account. And before we go any further, let’s get one misunderstanding out of the way. Just because you don’t log in doesn’t mean they don’t track you. They put cookies on your device to track every visitor.

Follow these steps.

  1. Open the YouTube app.
  2. Tap the profile icon
  3. Tap “turn on incognito”.
  4. Check to see that your profile icon is replaced with the “incognito symbol” to know you can privately watch YouTube videos.
  5. Whenever you go into YouTube, check for this icon first to know that it’s active.
  6. When you finish private viewing, we recommend that you turn this feature off.
  7. Tap the profile icon again.
  8. “Turn off incognito”.
  9. YouTube is again tracking what you do.
  10. Switch back and forth, as needed. It’s so easy to do so.

But you may still have a pressing question. We’d like to address it.

Why Would You Want YouTube to Track You?

Personalization is pretty cool. YouTube can very quickly figure you out and recommend things that you weren’t even thinking to search for but would love to view. YouTube’s personalization is kind of like having your own personal assistant that knows you so well that they can always recommend the perfect thing.

Sometimes that you might want to consider privately watching include:

  • If you’re viewing something somewhat embarrassing. Seriously, it’s no one’s business.
  • If you want to view something without seeing ads for it later.
  • If you’re letting your child, spouse, etc. watch on your account. This way they don’t see recommendations intended for you, which may not be appropriate. And their viewing on your account doesn’t mess with the algorithm. Otherwise, YouTube is recommending children’s cartoons for a month after you let your 4-year-old use your phone.

Remember, You Have the Power

Yes, YouTube and their parent company Google are collecting a lot of data about you. They use this data to enhance your online experience. And most of the time, personalization is awesome. But you may not always want this data collected. And you have the power to say when you’d prefer not to share. Use incognito to watch YouTube videos privately when you want to and turn it back off to get the best recommendations.

What Are Google’s Local Guides?

Google Local Guides

Google Local Guides

Local Guides have contributed content about hundreds of thousands of businesses. They get together and have held meetups and conducted projects in Europe, India, South America, North America, Australia, and Asia.

How Are Google’s Local Guides Different From Google Users?

People have been contributing reviews, photos, and videos to Google for years. Google Local Guides are part of a program that offers benefits provided through Google Maps.

The Local Guides provide a way for Google to improve its maps and local business information. Local Guides can post photos, reviews, and answer questions about businesses — all tied to Google Maps.

What Do Google Local Guides Get From Contributing?

The Local Guides program offers a rewards program for participants. The points-based program offers a way for guides to get points for contributing nine different kinds of information based on their local area.

The types of information and points include:

  • Answers: 1 point
  • Edits: 5 points
  • Fact Checks: 1 point
  • Photos: 5 points
  • Places: 15 points (for places and roads)
  • Q & A Answers: 3 points
  • Ratings: 1 point
  • Reviews: 10 points, plus additional 10 points for reviews over 200 words
  • Videos: 7 points

Guides advance through the point system. They start at Level 1 and can achieve Level 10. People using Google Maps can see the Guide’s level and use it to decide the trust level and authenticity of the information.

What Other Benefits Do Local Guides Get?

Local Guides have access to perks from Google’s partners and also get early access to Google features. They can also get badges and recognition from other Google Maps users.

Google Local Guides have profiles that display badges and recognition. Recognition from users shows next to the Guide’s level on their profile.

How Do Local Guides Level Up?

Local Guides advance through Levels by accumulating points from their contributions. Level 1 Guides are just starting out. They have 0 points. By Level 2. guides have achieved 15 points.

Here are the other Local Guide levels and points needed to achieve them:

  • Level 1: 0 points
  • Level 2: 15 points
  • Level 3: 75 points
  • Level 4: 250 points and a badge
  • Level 5: 500 points and a new badge
  • Level 6: 1,500 points and a new badge
  • Level 7: 5,00 points and a new badge
  • Level 8: 15,000 points and a new badge
  • Level 9: 50,000 points and a new badge
  • Level 10: 100,000 points and the highest badge

Level 10 is a high level of achievement requiring many contributions over a significant period. As of 2018, members of the Local Guide community identified over 500 Level 10 Local Guides around the world. The number of Local Guides of different levels in each area shows on each Local Guide’s profile.

How Do You Become a Google Local Guide?

Anyone with a Google account can visit the Local Guides page and choose “Join Local Guides” to get started. Provide your home location and confirm the details, and then sign up.

How to Make Calls with Amazon Alexa

Calling With Alexa


Did you know you can use just about any Amazon Echo device to make phone calls for free? You can do the same in the Alexa app on iOS or Android, whether or not you have an Echo device. You can also call others in your contacts on their Echo devices instead of their phones. These services can be convenient, and they are real money savers for people paying per minute for their cell or landline phone. In today’s tech tip we’ll show you how to make calls with Amazon Alexa.

Step 1: Open the Alexa App on Your Phone

Making phone calls using Alexa is an opt-in service, meaning you’ll need to enable it and set it up before it will work. Open the Amazon Alexa app on your phone, and tap on the menu bars (likely in the upper left). Choose “Things to Try”. On that page, choose “Calling”. This area reveals several videos and explainers on how to get calling with Alexa set up.

Alternatively, you can simply ask your Echo device, “Alexa, how do I set up calling?” for verbal instructions. Those are nice, but you’ll end up needing to work in the app anyways. For that reason, we think it’s easiest to start in the app.

Step 2: Give Alexa Access to Your Contacts

In the Amazon Alexa app, open the Communicate tab by tapping on the Communicate button in the bottom row. If you’ve not done this before, the app will ask for access to your contacts. Tap OK to grant access.

If you want to use the Alexa app to make calls directly from your phone, you can do it from this screen. Simply select the contact you want to call, choose the right number (cell, work, or home), and the call should begin.

Step 3: Talk to Your Echo Device

If what you really want to do is make calls using your Echo device, you should be able to do so after following steps 1 and 2. You have to know the right lingo, however. You can start with a simple phrase like “Alexa, make a call.” Your Echo device will respond with a question of its own, asking who you want to talk to.

Some of your contacts can be reached multiple ways, so you’ll need to be specific with Alexa. Alexa should understand commands like “Call mom’s cell phone” or “call Shawna at work.” You can also call numbers not in your contacts list with “Alexa, call (555) 356-4321.”

To call another Echo device, simply say “Alexa, call Leslie’s Echo.” If Leslie has calling enabled on her echo, you’ll get patched right through.

If you want to explore phrases in more detail, look back at the “Things to Try” area in the app.

Note: Alexa Can’t Do Everything

One thing to note before diving into the world of phone calls with Alexa: Alexa and her associated devices do have some limitations. There are a few types of phone calls that Alexa can’t make. First, and most importantly, Alexa can’t call 911 or other emergency service numbers. These services need to know where you are, and even though you might think Alexa knows that, the functionality isn’t foolproof enough to support emergency calls.

Alexa also can’t (or won’t) call those pricey 1-900 numbers. (Yes, that’s still a thing.) Similarly, directory assistance and information lines of the 211, 411, or “star-88 on any cell phone” variety aren’t compatible with Alexa’s calling technology. For now, Alexa also won’t call internationally, nor will it respond to “call 1-800 CONTACTS” or other letter-to-number prompts.

Conclusion

Making phone calls through Amazon Alexa is a great way to save if you’re still counting minutes on your landline or cell phone plan. Follow the steps above to enable the feature and give it a try today.

Calling With Alexa

Google’s New Chrome Extension Gives Your Passwords a Checkup

Google Chrome Password

Google Chrome Password

In early 2019, white-hat security expert Troy Hunt and other researchers shared a massive database of breached passwords and usernames. The stolen data constitutes 25 billion records and 845 gigabytes of stolen data.

While many of the collected records are from previously reported thefts, there are new records there, too. It’s a clear indication of regularity, scope and potential damage caused by poor password management.

That news coincided with Google’s announcement of its new Password Checkup extension for Chrome browsers. The extension is designed to alert and protect users who may have compromised credentials.

What is the Password Checkup Extension?

Password Checkup allows users to check if their Google account, and any other account you check into while using Chrome, has been potentially compromised during a previous data breach. Developed in partnership with Stanford University cryptographers, the extension is designed to give you critical information while safeguarding your data.

How Does Password Checkup Work?

After installing the extension, Google will alert users if they find potentially compromised passwords. The passwords are checked against a database of 4 billion known compromised credentials. Warnings are issued automatically, along with a recommendation to change the potentially compromised credential.

It’s important to note that the extension will not alert you to any outdated passwords or weak passwords. While those other factors can also lead to your account information being hacked, the Password Checkup only identifies known hacked passwords contained in databases.

What Does It Look Like When Password Checkup Is Activated?

The Password Checkup icon appears in your browser bar as a green security shield. The extension app will monitor your account whenever you use Chrome to log into a website or a service.

If it detects that the password is potentially compromised, a bright red warning box pops onto your screen. It features a warning sign and urges you to change your password. The box allows you to ignore the alert for the designated site. There’s also a link to learn more information via a page with more details about Password Checkup and how to change a potentially compromised password.

If for some reason you miss the red pop-up box, the browser extension icon turns from green to red.

Can Google See My Passwords if I use Password Checkup?

No. None of the passwords that the app uses are stored and personal information is not collected. The checked passwords are anonymized using hashes and encryption. Password Checkup was designed to prevent hackers from attacking it.

What Are the Risks of Compromised Passwords?

News stories are constantly reporting on the latest corporate data breach, revealing the thousands of records that were exposed and how that company is responding. The story behind the story is what happens to those stolen credentials.

In some cases, hackers sell information on the dark web. For users that do not know about the hack or aware but choose to do nothing, the consequences can be dire. Bad actors now can access accounts, make purchases, steal money or gain other personal information that can help to steal one’s identity.

People affected by stolen credentials can spend months or years resolving the issues related to compromised accounts. This work is time-consuming, costly and stressful.

Are There Other Tools to Check Compromised Credentials?

There are many other services that help monitor and detect stolen passwords, including websites such as Have I Been Pwned? and Watchtower and password managers like Dashlane and Keeper.

How Prevalent Are Data Breaches?

According to the 2019 Verizon Data Breach Investigations Report, stolen credentials are also an increasingly popular approach for hackers looking to gain access to cloud-based email servers. Stolen credentials are a particular issue for businesses in the accommodations and food services, financial and insurance, educational services, manufacturing and professional services industries.

What Can Be Done to Prevent Compromised Credentials?

For businesses, there are several steps that can mitigate the risks of data breaches that result in compromised credentials:

  • Develop and enforce rigorous password policies, including password complexity, reuse and expiration dates
  • Implement two-factor or multi-factor authentication that uses both known information, such as a stored password, and new information, such as a texted or emailed credential, (e.g. a one-time access code)
  • Centralized identity access management
  • Centrally managed single sign-on protocols

Google’s new extension is an excellent way to provide individual Chrome users with information that will protect themselves and their personal information. When combined with broader business rules, the extension should reduce the rate and severity of compromised credentials.

How to Install Microsoft Launcher on Android Devices

Microsoft Launcher Android

If you haven’t looked lately at what Microsoft’s mobile offerings, it’s time to look again. Microsoft’s first forays into the iOS and Android mobile spaces (circa 2010) were underwhelming to say the least, but in recent years the company has turned things around in an impressive fashion. One of these recent developments, Microsoft Launcher, is an immensely powerful tool and an Android exclusive. We’ll review what Microsoft Launcher is and then walk you through the installation and setup process on your Android device.

Microsoft Launcher Android

What Is Microsoft Launcher?

Microsoft Launcher is an app available on the Google Play store, but it doesn’t operate in the way most apps do. In the Android ecosystem, launchers are essentially replacement interfaces for your home screen. When you select a launcher besides the default one that comes with your phone, you gain access to whatever functionality is built into that launcher.

I’m an iPhone User and I’m Confused

It’s OK; we understand. There’s not really any parallel to this on iOS. Android phones offer far more customization on the home screen than iPhones do. It’s a difference in philosophy: Android users who customize effectively benefit from a polished, streamlined home screen. Those who don’t end up with a mess. Apple prevents both extremes by providing their own polished home screen and limiting what users can modify.

What Microsoft Launcher Can Do

Microsoft Launcher gives you system-level integration with your Microsoft accounts. This is powerful stuff if your business is using Microsoft 365. Integrate your contacts, calendar, documents, and more at the system level. Once installed, swipe right for deep Microsoft interactions, or swipe two fingers down to access Launcher settings.

How to Install Microsoft Launcher

To install and configure Microsoft Launcher, first download the app from the Google Play store. Next, choose Microsoft Launcher as your new home screen. In most versions of Android you’ll tap the square soft key from the home screen to bring up a “select launcher” pane. If that doesn’t work, try opening the app from your “all apps” menu.

When you choose Microsoft Launcher as your new launcher, you’ll get a system warning about setting the app as default. Click OK.

What Just Happened?

When you clicked OK, your home screen changed, perhaps drastically. Congratulations, you’re now running Microsoft Launcher! Customize your home screen with your favorite apps (Microsoft apps encouraged, of course), and be sure to sign in to your Microsoft account in settings.

Swipe Right

When running Microsoft Launcher as your home screen, you can swipe right for all sorts of Microsoft interactions. See your calendar, task list, and recent OneDrive documents. You can interact with these here, and changes will update across all your devices. You can even send a photo directly to your PC, similar to Apple’s Airdrop feature.

Conclusion

Microsoft Launcher is a powerful tool for Android users who use Microsoft 365 at work. We recommend downloading right away!

How to Create a Strong Password You’ll Remember

Password Changes

Nearly every site or service we use online requires a username and password. Remembering hundreds of unique passwords is just about impossible, and reusing passwords across multiple sites can be dangerous. If one account is compromised in a data breach (and this is likely: check out IdentityForce’s list of all the breaches so far this year), any other account using that same password is now at risk.

Password Changes

Today’s username and password convention is a difficult system to manage well, but it remains important to create strong, unique passwords for your various accounts. We’re here to help today by sharing a few ways to create unique passwords that are strong and memorable.

Base Your Password on a Familiar Phrase

One way to make a password easier to remember is to base it on a phrase or term that’s familiar to you. Notice we didn’t say to use a term that’s familiar to you: “ilovesarah”, “sparky”, and “gocowboys” are all terrible passwords because they’re easy to guess. Anyone who knows that your wife’s name is Sarah, that your dog’s name is Sparky, or that you love the Cowboys might guess these easily.

Instead, come up with something creative, but that still has a connection to something you won’t forget. Something like “R3dsk1nsRool!” would be hard to guess since it runs counter to your actual interests, and it would be hard to crack due to the character variations. You’ll have an easier time remembering it, though, since it connects to one of your true passions.

Another variation on this theme is to take a poem or song lyric that’s meaningful to you and turn it into an acronym. “Row, row, row your boat gently down the stream” could turn into “RrrybGdtS”, for example. Easy to remember; hard to guess.

Use Long Passwords

Long passwords are hard to guess, but they’re even harder to crack using hacker tools. Use a memorable phrase in its entirety, or choose a series of seemingly unrelated words that mean something to you. You’ll create a password that’s easier to remember than the previous method and that’s even harder for a computer to crack. Check out this Xkcd comic, which illustrates this principle with an added dose of humor.

Use Two-Factor Authentication Wherever Possible

You should enable two-factor authentication (2FA) on any site that offers it. 2FA adds a second method of authenticating that you’re who you say you are. Most 2FA methods involve sending a numeric or alphanumeric code to the account owner (that’s you). This code can be sent via email, text message, or even be displayed on a physical key fob. The code is only good for a short window (usually 1, 2, or 5 minutes). After supplying your username and password, you’ll be asked for this code.

Most consumer applications of 2FA involve sending the code via text message. Unless a hacker has stolen or cloned your phone, he or she won’t be able to view this code and thus won’t be able to log in to your accounts—even with your username and password.

Change Your Password Frequently

Changing your password frequently is another way to stay ahead of information thieves. A stolen password is only useful until you change that password to something else. It’s good practice to change your passwords frequently, such as every 3 to 6 months. We realize that can be a lot of work. Changing only your most sensitive passwords (financial, social, and email) is better than changing none.

Use a Password Manager

All this sounds like a lot of work, and it is. Thankfully, there’s a better way. Using a password manager, you can create long, unique, complex passwords for each account — but you don’t have to worry about remembering them! All your passwords are stored in the password manager. All you need to remember is the strong master password you create for this utility.

4 Strategies For Super Strong Passwords

Password Security

Password Security

Some days it seems like everything in our lives requires a password: banks, apps, debit and credit cards, online banking, business applications, healthcare accounts . . . the list is literally endless. Technology professionals recommend that you use a different and highly secure password for each site — but how is it even possible for humans to associate that many unique and unusual passwords with the correct website or application? You continually hear cautions from security professionals that simple passwords or those that are reused make it all too easy for hackers to break into your accounts and steal your sensitive personal, health or financial information. Even your social media accounts and business websites are being used to glean information about your life that can potentially be used as details to build a complete biography in hopes of breaking into your confidential data. With all these challenges, these four strategies will help you create the super strong passwords that you need to stay protected online.

1. Avoid Simple Concepts and Terms

Few people enjoy creating unique and individualized passwords for each application or website, but it’s crucial that you avoid these Top 100 terrible passwords, as compiled by SplashData. The list includes everything from the expected “123456”, “password”, “sunshine”, “princess”, “football” and “monkey”. From the list, it looks like men and women are equal opportunity offenders when it comes to poor password selection, and SplashData estimates that approximately 10% of people have selected at least one of the Top 100 worst passwords in the prior year. Think of it like this: if the password seems simple for you to remember, it’s probably going to be simple to hack as well. This includes the standard dictionary of user names, birthplaces or birthdays, favorite colors or foods, pets and the names of relatives.

2. Long, Random Words Are Tough to Guess

The days of a hacker sitting in a basement in the dark trying to guess a complex password are long over. Today’s attempts to breach your account are through sophisticated computer programs that can try millions of word and number combinations very quickly. Previously, the government’s cryptography expert recommended that you create a phrase that you can easily remember and simply replace some of the letters with numbers or other letters to make it more difficult to read (and remember!). Bill Burr’s 2003 password creation recommendations are no longer considered valid, and he has since rescinded those recommendations in favor of creating a long string of random words. Well-known Bible verses, famous movie lines and other phrases that are common to the American vernacular are not ideal — nor is the phrase on your favorite coffee mug.

3. Don’t Reuse Passwords

We get it. It’s tough to remember a bunch of different long, complex and rambling phrases. Wouldn’t it be a lot easier to simply create a single phrase that you could use everywhere? It would be easier for you — and also for anyone attempting to gain access to several of your accounts at once. Reusing passwords is a major no-no, but one error that many people commit. If you ever need to share a password with a service provider, you need to be sure to change it so you don’t have that information floating around anywhere. Would you rather have hackers gain access to a single system, or have to cancel every credit card and account that you own due to having a shared password?

4. Use a Password Manager or Random Password Generator

Keeping track of your highly complex and secure passwords is something that can be difficult for humans, making password lockboxes a necessity. Instead of getting a small notebook that you lock up in your purse or pocket, consider using a password manager. These secure online solutions allow you to create a single, memorable password to a platform that automatically creates passwords for each new application or system that you need to access. When your computer is creating and memorizing these passwords for you, you’re much less likely to make simple mistakes when creating your password. The best programs also provide feedback on how secure your password is and when you should make a change. Avast, a leader in online security, offers a free random password generator that you may want to check out, too.

Creating and remembering secure passwords could either be a full-time job, and you could still end up with vulnerabilities due to the common nature of the words that you choose to make up your passwords. When you follow these four password strategies, you are more likely to protect your important business and personal accounts from both humans and computers.