Create Your Own Fonts In Windows 10

Windows 10 Tech Tips

Create Your Own Fonts In Windows 10

You may have been using Windows 10 for some time now, but it’s likely that you haven’t mastered all of its features just yet.

Did you know that you can create your own fonts?

In the Windows store, you can get the “Make Your Own Font” app, a great way to add a personal touch to anything you may need to write. For example, you could even send an email in your own handwriting!

All you need to do is fill out the alphabet letter by letter (lower and upper case) as well as numbers and symbols. Then you name it, save it, and upload it via Control Panel > Fonts.

The next time you’re drafting something and find that Times New Roman is too formal, you’ll be able to switch to your personalized font instead.

Let us know what you think about this Windows 10 tech tip.  Just reply to this email.  Over the next few weeks, we’ll have more Windows 10 tips for you.

Online Excel Training: Tips & Techniques For Managing Workbooks

Organization Shouldn’t Be Complicated

Out of all of Microsoft’s Office programs, Excel is one of the most universally used. What started out as a fairly basic spreadsheet program has evolved into a must-have business tool. However, the more you use Excel, the more data your workbooks will accumulate.

Keeping these workbooks organized and easy to navigate can be a challenge. We can help with that. Check out our short Excel: Tips and Techniques for Managing Workbooks training video, available to you free and on-demand.

Simply Click Here.

Watch at your leisure, and say goodbye to your Excel frustrations.

Managing Excel Workbooks

Online Free Excel Training: Tips & Techniques For Managing Workbooks

Managing Excel Workbooks

Organization Shouldn’t Be Complicated

Out of all of Microsoft’s Office programs, Excel is one of the most universally used. What started out as a fairly basic spreadsheet program has evolved into a must-have business tool. However, the more you use Excel, the more data your workbooks will accumulate.

Keeping these workbooks organized and easy to navigate can be a challenge. We can help with that. Check out our short Excel: Tips and Techniques for Managing Workbooks training video, available to you free and on-demand.

Simply Click Here.

Watch at your leisure, and say goodbye to your Excel frustrations.

Managing Excel Workbooks

Efficiently Manage Notifications In iOS 12

iOS 12 notifications

Apple’s mobile iOS operation system is one of the most popular platforms in the world. With more than 1.3 billion devices running iOS worldwide, Apple has clearly done an excellent job of providing a world-class experience for its users.

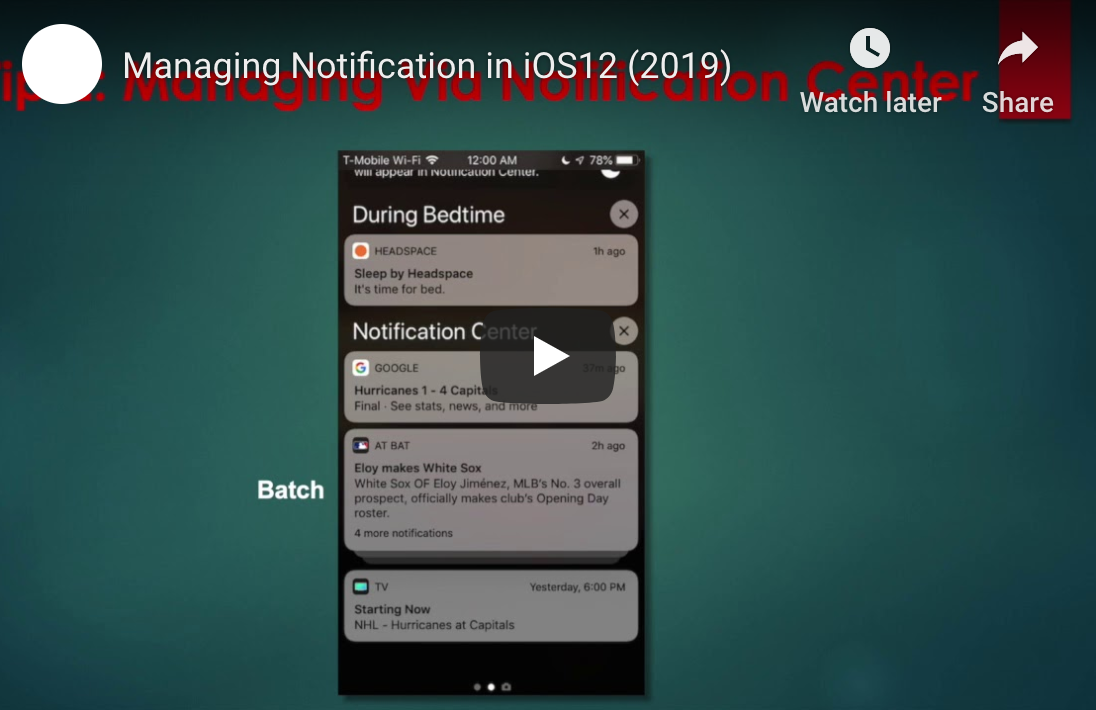
Watch the video below or click here to watch on YouTube.


One area of the operating system that has undergone significant development in recent updates is in notification management. With more apps — and corresponding notifications — than ever before, it is important for mobile operating systems like iOS to provide ways for users to manage these notifications in a simple and streamlined way.

Here are some of the ways Apple is helping users manage their notifications in iOS 12:

Notification Grouping

One great innovation in iOS 12 is the ability to have notifications from individual apps “grouped”. This means that, instead of having a long list of every notification from an app, you will see the most recent notification for each app, with previous unanswered notifications stacked behind them. This makes it easier to see notifications from multiple apps, without the notifications from one app taking up all the space on your screen.

Grouped notifications can be expanded by tapping on the top notification, so you’ll still have access to all notifications when you’re ready to view them.

Deliver Quietly

Another new feature is the ability to have notifications delivered “quietly”. The “Deliver Quietly” function can be activated from the notification screen. When this setting is turned on, notifications will not cause a vibration or notification tone, but will still be visible when looking directly at your device. In essence, “Deliver Quietly” is very similar to the “Do Not Disturb” function — except that it can be app-specific.

App-specific notification settings

In addition to the “Deliver Quietly” feature, iOS 12 also gives users the ability to change other notification settings for individual apps. In addition to the ability to “Deliver Quietly” and turn notifications off completely, users can choose where notifications appear (notification screen, lock screen, banner at the top of the screen). In addition, individual apps can have sounds and badges turned on or off. Even notification grouping can be turned on or off for individual apps.

For the privacy-conscious, iOS 12 also gives users the ability to turn notification previews on or off for individual apps. This means you can still keep non-sensitive apps showing previews while protecting potentially sensitive data by turning off notification previews.

Quick notification setting changes

Perhaps the most convenient notification feature in iOS is the ability to quickly make app-specific notification changes. Instead of going through multiple menus in the “Settings” app, users can simply click on the ellipsis (three dots) that show up in the top-right of notifications. From here, users can make all the changes discussed in this article.

While there are more notifications than ever before, Apple is making them more manageable in iOS 12.

iOS 12 notifications

How Can You Encrypt Files and Folders in Windows 10, 8 or 7?

Data Encryption

Data Encryption

How Can You Encrypt Files and Folders in Windows 10, 8 or 7?

You can encrypt files and folders in Windows (vers. 7-10) using BitLocker. This Vista operating system extension has on-disk encryption as well as key management capability. It’s protected by two-factor authentication, so anyone who wants to crack the code needs a hardware key and your specified long passphrase.

Through its trusted platform module (TPM) hardware, BitLocker provides advanced security features. For instance, when encryption is only at the software level, access may be vulnerable to dictionary attacks. Hardware-level protection safeguards your system from guessing or automated attacks.

What Steps Let You Check For a TPM Chip?

Follow these steps to see if your computer has a TPM chip:

  1. Select the Windows key + X and choose Device Manager.
  2. Expand on Security devices.
  3. One of the devices should read Trusted Platform Module and contain a version number.

BitLocker is typically available on these platforms:

  • Windows 10 on Enterprise, Pro, and Education
  • Windows Vista and Windows 7 on Ultimate and Enterprise
  • Windows 8 and 8.1 on Enterprise and Pro
  • Windows Server 2008 and later

How Can You Encrypt Files and Folders in Windows 10, 8, or 7?

Follow this procedure to encrypt folders and files:

  1. In Windows Explorer, right-click on a folder or file.
  2. From the context-menu, choose Properties.
  3. In the dialogue box, click Advanced.
  4. The Advanced Attributes dialogue box appears. Look for the Compress or Encrypt Attributes section.
  5. Check Encrypt contents to secure data.
  6. Click OK then Apply.
  7. For folders, a Confirm Attribute Change dialogue box appears to confirm whether you want everything in the folder encrypted. Select your preference and click OK.
  8. You can also choose to Back up your file encryption key. If you miss the message, you can access it in Notification Area for your operating system.
  9. Make sure to plug in a USB flash drive.
  10. Choose Back up now (recommended).
  11. Click Next to create your certificate.
  12. You can accept the default file format for the export.
  13. on the next screen, select the Password: box to enter and re-enter your password.
  14. Go to the USB drive, enter a name for the key and certificate you’re exporting and click Save. (It’s saved with as a .pfx)
  15. Click Next, Finish, and OK.
  16. Remove the USB drive and store it in a secure spot.

How Can You Decrypt a Folder or File?

To decrypt your file or folder:

Follow steps 1-6 above. However, uncheck the Encrypt contents to secure data box for step 4.

Now, you can unlock your drive at startup by entering a password or inserting the USB drive.

You can encrypt the whole hard drive, but the process is time-consuming. If you have a lot of data, expect to wait a long time. You’ll want to leave your computer connected to an uninterrupted power source throughout the process. You have to reboot for the changes to take place. However, you can work throughout the process.

Now you can secure your files to keep out prying eyes and hackers.

How To Send Large Attachments Over Email

Email Marketing

Sending Large files over email

How To Send Large Attachments Over Email

When you’re trying to send large files to colleagues, customers or partners, you often can run up against issues that make transmission difficult.

Many commercial email programs put size limits on files transmitted over their networks. For example, attachments sent via AOL, Gmail or Yahoo are limited to 25 Mb per email and Outlook.com puts a 10 Mb limit.

In addition to the limits set by email providers, the email accounts to which you’re sending the attachments may also limit size.

So, what are you supposed to do when wanting to send large files? Here are a few ways to deliver what’s needed.

Can I Use a Cloud Storage Service?

There are plenty of commercially available cloud storage services, many of which are free. Among the most well known are Dropbox, Google Drive and OneDrive, the latter two of which are tied to email services (Gmail and Outlook, respectively). After you’ve uploaded your large files to these services, you can provide a link to those you want to see it and determine if they have editing capabilities.

What Is Compression Software?

Compression is a process that shrinks the size of each file considerably, up to 75 percent in some cases, without disrupting the integrity of the files themselves. The compressed files will be placed in a ZIP file. If the compressed ZIP file is now below the size limit for your email provider, you’ll be able to send it with no problem.

The recipient of your email can then unzip the file, where your files will be available for use.

Is Archiving an Option?

File compression into a ZIP file is one form of archiving, a process that collects multiple files into a single file. Archiving files is a good way to send large numbers of files at once. However, even this process can be problematic, with archived files themselves exceeding email provider limits.

If your files are already archived, you can extract all the files, split them into their own archives and send away.

What Is the Sharing Option About?

Many cloud storage sites include sharing shortcuts to allow for even faster collaboration. With OneDrive, for example, you can right-click on a file (in Windows) and select the Share feature. Click on the Send Link option and you’ll be able to enter an email address and message.

Are There Other Online File Sharing Options?

There are several online services available that are designed expressly to help with uploading and sharing large files. In most cases, you can upload your large files to the site. Then you can send a link to the files. Some sites require those accessing the files to have an account with the site; others allow anyone to whom you send a link to access the files. In some cases, there’s a free option for file sharing (but the allowed sizes are usually pretty small) and tiered account options.

Are There Any Other Solutions?

Depending on your internet service provider, you may be able to set up a Virtual Private Network (VPN) that would allow you to keep your files highly secure and sendable. However, a VPN transmission of large files could slow down your VPN and the files may not be intact upon arrival.

If you have a web hosting account, you can use its File Transfer Protocol (FTP) service to upload the files to your anonymous folder. Share the folder name and have the recipient access the folder via their own FTP features. This option takes some technical expertise, however, and can lead to a long upload process.

Finally, there is an old-school option. You could purchase a USB drive or an external hard drive, transfer the files to the device, and physically deliver them to the recipient.

Large files a reality for many businesses, freelancers and individuals. However, there are multiple options for transferring those files safely and affordably.

How Are Face and Touch Recognition Changing iCloud Access?

facial recognition Software

facial recognition Software

How Are Face and Touch Recognition Changing iCloud Access?

Apple may be testing new security procedures for iCloud.com with its next OS release. 9to5mac has reported that the beta for iPadOS 13, iOS 13, and macOS Catalina can use Touch ID and Face ID to secure and access their devices.

When Will the Change Take Place?

Beta users can already access the features on beta.icloud.com or a beta device or their regular desktop. A popup asks if users want to use Face ID or Touch ID. Many consider this logical and convenient since both systems are already available to lock and unlock devices and or to authorize Apple Pay transactions.

These features could end up in the company’s Sign in with Apple tool. With this tool, users can utilize one sign-on button to access websites — this resembles Google and Facebook partnerships with companies across the internet, where users can log in to certain sites with their Facebook or Google credentials. Apple believes itself to be a bastion of privacy for its users. By positioning Touch ID and Face ID as reliable tools, the company could be making a strategic move. This is especially critical following a major breach on iCloud a few years ago.

What is Touch ID?

You can use fingerprint recognition as a security feature with Touch ID. Apple designed and implemented the system, which unlocks and locks Apple devices. Apple users can also make iTunes and App Store purchases using their fingerprint as a credential.

What is Face ID?

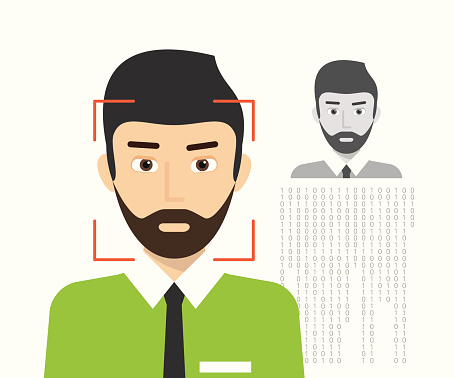
With Face ID, facial recognition is used instead of a fingerprint to lock and unlock devices. This tool is also the brainchild of Apple Inc. and a feature of iPhone and iPad Pro devices. Biometric authentication can also be used to make payments, access personal data and endow Animoji’s with realistic facial expressions.

How Does it Work?

If you’re a beta tester for iPadOS 13, iOS 13 or macOS Catalina, you can help Apple test the new iCloud sign-in process. This gives you access to Touch ID and Face ID. Users also encounter the technology in iCloud when using Safari devices equipped with iPadOS, iOS or macOS or beta versions.

For those visiting iCloud.com on a beta device, the system will redirect you to beta.icloud.com. Even if you aren’t re-routed, you can go to beta.icloud.com manually to take the new feature for a test run. Make sure you are running a compatible operating system — iPadOS 13, iOS 13 or macOS Catalina. Otherwise, you won’t get the new sign-in option or two-factor authentication.

This feature protects users from compromised data and privacy concerns if their device is lost or stolen. Any measure users can take to proactively protect themselves online is a welcome addition. Apple is expected to make the Sign in tools available ahead of the feature’s launch in September.

Touch ID and Face ID on iCloud.com make signing in easy and more secure than typing in sign-in information. Plus, the experience will be familiar to those who’ve used it in the App Store or iTunes.

How Secure Are These Technologies?

Face ID and Touch ID are secure. According to Apple, there’s a 1 in 50,000 risk that someone else’s fingerprint will unlock your devices and 1 in 1,000,000 risk someone else’s face will grant them access to your device.

Using Today View in iOS 12

iOS 12 Today View

iOS 12 brings a lot to the table and you will want to take full advantage of it to get the most out of your device. The Today View in iOS 12 is one feature that is worth exploring to determine how you can leverage it to make your workday and personal life more organized. As the name implies, the Today View is there to let you know what is going on right now. But there are a lot of different information points that your device can inform you of, so customizing your Today View and learning to navigate it is essential to getting more out of your iPhone.

The Today View in iOS 12

Your iPhone is designed to keep you organized and updated on the things that matter most to you. As a business user, that means staying abreast of what is going on in your department, your company and your industry. If you are like most business users, it also means managing your professional life and your personal life on the same device.

Taking care of all these needs requires using a variety of apps. In the olden days of earlier smartphones, those apps would need to be opened to see what they had to offer. But today, with your iPhone and iOS 12, you can get most of the information you need from each app on your Today View—at least the fundamental information that you are likely to want access to at a glance. Instead of having to go to your Home screen to get the information you need, you can just do a quick swipe and see what you need more quickly and more conveniently than you would if you have to open each app individually.

One of the most useful things about the Today View is that you do not even need to unlock your phone to access it. As long as you have your security settings established where your Today View shows on your Lock screen—which is the way your phone comes by default—you can check your Today View at any time whether the phone is locked or unlocked.

How to Access Your Today View

Whether you are on your iPhone’s Lock screen or on your Home screen, your action to get to the Today View is the same. You will simply swipe to the right side of your phone screen. You can start your swipe from the left side of the phone, from the middle of the phone screen and even from pretty close to the right edge of the screen. Wherever you begin your swipe, as long as you slide your finger off the right edge of the screen, your Today View will pop up.

When you want to leave the Today View, you perform the opposite gesture. Swipe to the left edge of your screen to leave the Today View both on your Home screen and on your Lock screen.

What Does the Today View Show You?

The things that you will see on your Today View will vary based on the apps you have installed and the widgets you have told your phone to include on the Today View. For instance, you will see FAVORITES that shows some of your favorite contacts that you have called recently. You will also see other widgets that are based on the apps that you have recently used. Like if you have used Maps recently, your Today View will show a MAPS DESTINATIONS widget with a destination that you are likely to want to go to—such as your home.

Show More

Many of your widgets will give you an option to show more information if you need it. The option to Show More will show to the right of the name of the widget. Just click the Show More section and the widget will expand. For example, your FAVORITES widget will only show four favorite contacts initially, but if you click Show More you will see eight contacts.

Launching Apps

Some of the widgets on your phone will give you the option of launching the app just by tapping the widget. For instance, the Maps app widget, MAP DESTINATIONS, will launch Maps if you tap the widget and create a map to the destination offered in the widget—like your home address.

Changing Widgets

You can add or remove widgets from your Today View by tapping Edit at the bottom of the Today View and tapping the minus or plus symbol to the left of the app name. You can also reorganize your widgets by tapping and holding the three horizontal lines to the right of an app name, then shifting the app up or down the list.

iOS 12 Today View

iTunes Going Away?

iTunes Library

What You Need to Know About Backing Up iTunes and What’s Next for Apple Music and Other Media

Many iTunes users were shocked on June 3 when Apple announced that iTunes would be phased out. First things first: the iTunes store won’t be going away. All of the music people have bought from the store will still be there.

iTunes Library

What is Apple actually doing with iTunes?

Because people are increasingly streaming, not downloading, Apple is breaking the iTunes store up into separate segments for music, podcasts, and video/television. Each of the media will have its own app on the Catalina Mac OS.

What iTunes apps will be affected?

The iTunes store will still be available as a music store. The other media, including video/TV and podcasts are being spun off.

The new iTunes store will be more closely aligned with Apple’s streaming music service. Apple is looking to rebrand itself as a streaming entertainment service. Other streaming content Apple is either developing or currently offering include Apple Music (streaming), a new TV streaming service, and a magazine subscription service.

What will I do to save my iTunes library?

First, the change affects desktop computers only. If you’re using iTunes on any other device, it won’t change. Second, the change will only affect you if you’re upgrading to macOS 10.15 Catalina.

Apple’s iTunes change is intended to conform the way digital media is stored on desktops with all other devices. If you are upgrading to macOS 10.15 Catalina, after the change, you will locate your iTunes library using Finder.

If you look at one of your mobile devices, you can see what will happen – the format on your desktop in macOS 10.15 Catalina will be similar to the format for media libraries on the iPhone or iPad. Mobile IOS devices have apps for Music, Videos, and Podcasts.

What if I can’t find the iTunes store?

The iTunes store on a desktop or laptop will be located in a sidebar within Apple Music. You can use the sidebar the same way you have always used it. Individual songs and albums will continue to be available for purchase and download.

How can I make sure my iTunes library is backed up?

You can back up your Mac using Time Machine. Your iTunes library will be backed up automatically as long as the library is included and it’s a full Mac backup.

If you want to use Time Machine to store a copy of the library outside Apple storage, connect a storage device to your Mac. When Time Machine prompts, choose the device as the backup disk.

If you only want to back up your iTunes music, not your whole computer, make sure that your iTunes music is on the local computer.

If there are any songs you’re concerned you may have missed, choose the Account menu at the top of your iTunes screen, then choose “Purchased” and “Music.” Re-download the songs you want to make sure you have saved.

Next, you need to organize and consolidate your library. Click “File” on the top of the iTunes screen. Choose “Library,” then “Organize Library.” At that point, pick the first option: “Consolidate files.”

This puts your files together and keeps them organized while also leaving originals in place.

You can then use the consolidated iTunes Media folder to make a backup onto any external drive or memory device.

Apple’s support page on how to back up and restore your iTunes library can also help guide you through the process.

ITunes isn’t really going away and neither will your downloaded and purchased music. Apple is just adding streaming capabilities for music, videos, podcasts, and television. Look for the changes this fall when Apple releases Mac OS Catalina. If you won’t be upgrading to the new operating system, you will not notice any changes at all on your Mac, MacBook, iMac or Mac Pro.