Protect Yourself From Ransomware In Windows 10

Windows 10 Security Tips

Protect Yourself From Ransomware In Windows 10

You may have been using Windows 10 for some time now, but it’s likely that you haven’t mastered all of its features just yet.

You’ve heard about ransomware, right?

It’s a type of malware that encrypts your data so you can’t access it and holds it for ransom. Usually, this malware makes its way into your systems by posing as a file or program you think you want. Even if you don’t end up having to pay the ransom, it’s a lot of trouble that you should try to avoid.

Did you know that you can enable Controlled Folder Access in Windows 10 to protect against ransomware?

Enabling Controlled Folder Access protects the default Windows data storage locations in your profile from access by unknown applications. When compared to identified and allowed programs, if the malware is determined to be unsafe, you’ll get a pop-up letting you know it was denied access to your storage.

The Complete Guide to Managing Popular Extensions Successfully

Browser Extensions

Protect Yourself from Potential Attacks Via Chrome Extensions

Learn two simple ways to set the privacy and activity settings for each Google Chrome extension on your browser and steps the company is taking to protect users.

Google’s Chrome web browser is a popular choice for businesses the world over. Managing the extensions gives you more control and faster results when using Chrome to its best. Here’s a closer look at Chrome add-ons and how to use them effectively.

And with emerging cyberthreats targeting browsers, now is an important time to know your way around the extensions.

Browser Extensions

What Is the History of Google Chrome Extensions?

Google introduced Chrome in 2008. By 2010, there were more than 10,000 extensions available in the Chrome Web Store. Today, the company does not release the number available, but it’s estimated to be in the hundreds of thousands.

That growth brings with it an increasing vulnerability to attacks via vectors embedded in extensions. The company does work to keep malicious extensions out of its store but mistakes are possible. Other extensions can invade users’ privacy.

Should I Uninstall All Chrome Extensions?

Deleting all extensions is not necessary. Instead, use these two helpful tools to manage your extensions better and control permissions you provide to the add-in.

1. Use Extension Icons

To the right of the address bar, you’ll find icons representing the extensions you’ve installed. If you right-click on an icon, you’ll see an option titled “This can read and change site data” with three options:

  • When you click the extension
  • On [the site you’re on]
  • On all sites

The default is the first option, which limits the use of the extension to user-activated times. If an extension is “loud,” meaning it uses a lot of bandwidth, these settings can provide more control.

2. Use Extension Settings

If you click on the hamburger menu icon to the far right of your address bar, you can click on the option “More tools” and click on “Extensions.” This will bring up a screen with a box for each installed extension. Click on the Details button for any extension you want to modify. You’ll see the three options again, but also an option to add the URLs of specific sites on which you want the extension activated.

What Can Go Wrong with Browser Extensions?

There are several risks to installing browser extensions. Here are a few of the ways extensions can do harm:

  • Malicious intent. Malware can be installed unknowingly that uses your computer for other purposes. Kaspersky, for example, noted a recent example of extensions that made money for the hacker by clicking on pay-per-click ads.
  • Hijacking. If a hacker steals a designer’s credentials, an extension can be compromised by changing the functionality or inserting malware.
  • Purchases. Extensions are hard for designers to monetize. That’s why many are eager to sell their code if approached by a buyer. Users are usually unaware if extensions change hands, meaning a previously well-intentioned add-on can be repurposed.

Is Google Addressing Extension Security?

Google recently announced steps it’s taking to combat the security issues with extensions. Among its changes:

  • More granular user permission options
  • A requirement that extensions only request access to the minimum amount of user data needed to operate
  • Expanding privacy rules for extensions. Those that carry user communications and user content will join those that handle personal or sensitive user data and need to post privacy policies

Proactive steps combined with Google’s efforts are critical to keeping your browsing and data safe and secure.

Watch Out for Hidden Malware on Your Phone

Malware Smartphone

What You Need to Know About Android Malware

Hackers are devising new ways to infect phones with malware. Learn about the latest attack on Android phones and how to minimize your risk of getting malware. 

Malware Smartphone

Since the first computer operating systems hit the market, malware has been a serious security concern. Today, malware can infect not only desktop and laptop computers, but devices that are connected to nearly everything we do: our phones. In July 2019, cybersecurity experts found that up to 25 million Android phones were infected with malware masquerading as trusted apps like WhatsApp. Here’s what you need to know.

Imposter Apps

The latest malware threat was able to breach Google’s Android OS and replace legitimate apps with “zombified” versions that bombard users with unwanted ads. The outbreak affected approximately 15 million phones in India, 300,000 in the U.S., and nearly 140,000 in the U.K., making it one of the most devastating cyberattacks of the decade.

The malware was traced back to 9apps.com, a third-party app store owned by Chinese company Alibaba. Hackers that plant malware on these sites usually target users in developing nations, though this particular attack hit a significant number of phones in the states and the U.K.

Research thus far into the imposter apps found no threat apart from malicious ads. However, hackers that employ this type of attack can potentially do much more evil such as stealing user data, tracking user locations, and even accessing private messages.

How Does the Malware Work?

The malware is programed into a variety of apps such as photo editors, games, and messaging apps and made available for download. Once downloaded, the app runs the malware, which is often disguised as a harmless app update. The malware then corrupts popular apps such as WhatsApp, turning them into zombie apps that launch unwanted ads. In this case, the hacker’s end goal appears to be to trick users into tapping the ads and generating revenue via a pay-per-click scheme. Fortunately, the malware does not appear to affect other data stored on the phone.

Who’s Behind the Malware?

Experts have linked the malware to a Guangzhou company involved in developing and marketing apps for Android phones. While most of the carrier apps were made available on third-party storefronts, the hackers may have considered sneaking the apps onto Google Play. Researchers at Check Point are working closely with Google to identify and take down potential malware installers.

How to Protect Your Android Phone from Malware

A good first step in minimizing your risk of malware is to update your phone to the latest version of Android OS. Be wary of downloading apps on third-party stores, which typically have fewer security measures in place than the official Google Play store. Even after taking these precautions, you should still be proactive in recognizing red flags. For example, if an app suddenly starts displaying ads or behaving differently than before, it’s likely infected. To fix this, navigate to your phone’s app info list and uninstall ones you don’t recognize.

No matter how many security updates Google releases, hackers will find and exploit loopholes. You can help stop hackers by being aware and reporting suspicious activity on your Android phone to Google.

Secrets to Searching Tabs on Chrome (It’s Time to Get Organized!)

Searching Browser Tabs

Save Time and Headaches by Searching Your Open Tabs Instantly

It is easy to lose track of which open tab contains the information you need when you are researching.

Use this Chrome tool to instantly find the right tab.  

Searching Browser Tabs

Do you do a lot of research online for work or school? Then you know that It isn’t uncommon to have 6, 7, or even more tabs open on your internet browser at the same when you are working on a large project. But with that many tabs open, you can easily forget which tab contains the information now. But don’t worry, Google Chrome has your back.

With Google Chrome, you will never again have to feel frustrated or waste your time clicking randomly on multiple tabs trying to find the one you want. You can just use the URL box, or what Google Chrome calls it’s Omnibox, to search your open tabs for the one you need. You may already be aware of some of the most useful tasks you can access directly from Chrome’s Omnibox such as solving mathematical calculations, checking the local weather or even finding files on your Google Drive, but did you know you can use it to search through your open tabs?

How to Use the Omnibox to Search Open Tabs

  1. Enable the Omnibox search mode. The ability to search your open tabs is disabled by default. Before you can use it, you will need to enable the capability. You can do this by opening a new tab in your Chrome browser. Then in the Omnibox at the top of the page, type or paste Chrome://flags/#omnibox-tab-switch-suggestions. Hit enter on your keyboard. This will take you to a long list of options with Omnibox tab switch suggestions highlighted in yellowSelect Enabled from the dropdown menu just to the right.
  2. Restart your browser. You will need to restart your browser to complete the process. If you are in the middle of a project, you may want to use the Relaunch Now button to remember your open tabs after restarting. Otherwise, close and restart your browser in the normal way.
  3. Conduct your first search. After Chrome restarts, and you have at least two tabs open, it is time for a quick test. Enter text from the title of any of your open tabs into the Omnibox. As you type, you will see several suggestions popup under the Omnibox. If you want to jump to one of the open tabs, click on the Switch to this tab button next to the suggestion. This will open the tab immediately in the browser.

Everyone is looking for ways to streamline their workflow. This small tip will definitely save you a few seconds several times throughout your day, and significantly add to your productivity.

How to Leverage iOS12 Enhancements to Boost Productivity

IOS 12 Quick Tips

How to Use iOS12 to Instantly Share Information With Colleagues

Want an easier way to communicate with your colleagues? Save time and reduce errors by learning how to instantly exchange information using iOS12’s share feature. 

Beginning with Apple’s release of iOS8, it has been easier to share information, files and apps with others, including colleagues. The feature continues to be available in iOS12 as either an icon or a share link within apps. Individuals can share information within a message, an email, or by using AirDrop. The share feature also integrates with social media apps, such as Twitter and LinkedIn. iOS users can also share information with themselves through apps such as Notes and Reminders. The ability to seamlessly and instantaneously share information with others can boost productivity regardless of whether everyone is in the same office. By learning how to share files, images and media, employees can keep exchanging important and relevant content when urgency is a factor.

Using the Share Icon

With built-in iOS apps such as Photos or Safari, the share feature is available through the share icon, which is usually located at the bottom. In iOS12, the share icon resembles a single document or piece of paper with an arrow extending from the top. To share an image, a web page or link, or information within the News app, tap the share icon. In some of the built-in apps, the share icon will be located at the top instead of the bottom.

Besides news stories, articles, useful internet links, and images, location information from the Maps app can be shared with others. Venue information for meetings, conferences, and events that occur outside of the office can be exchanged without having to type all of the information within a separate email. Likewise, if one individual has written notes from an interview or something similar, the share icon is available within the Notes app to send it to the person that needs it. The act of retyping the information in an email or trying to describe it in a voicemail is no longer necessary.

Using the Share Feature

Some of the apps within iOS12 allow sharing, but do not display the share icon. The Contacts app is one of them. Employees can still share contact information, including name, phone number and email address using the “Share Contact” link.

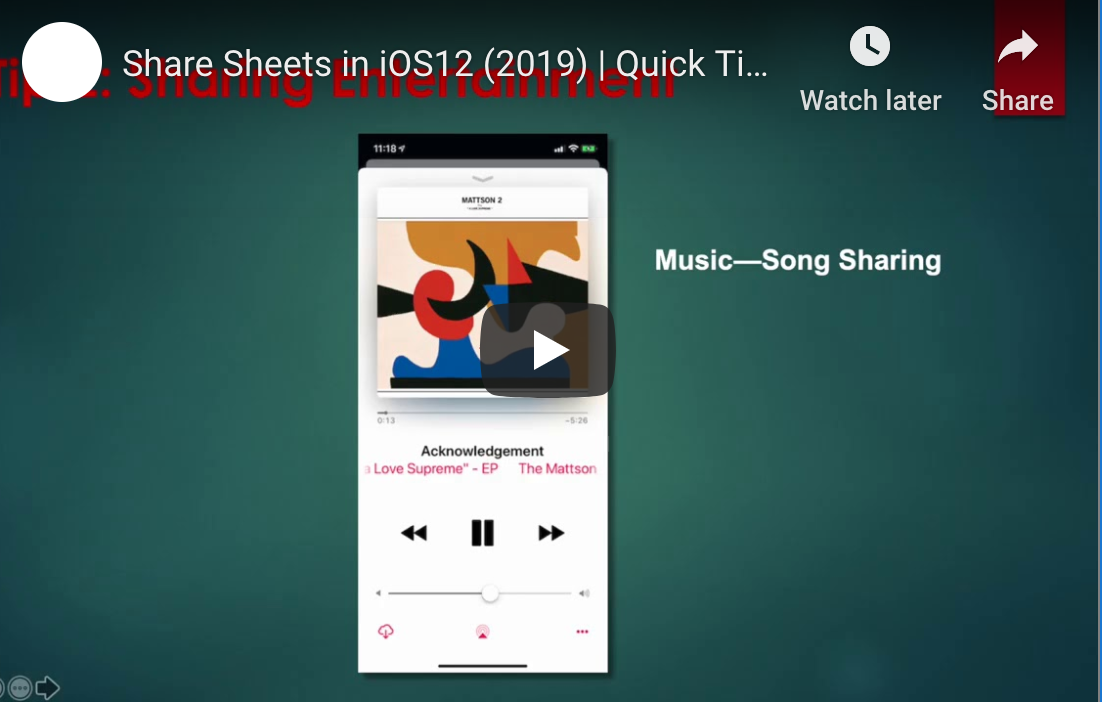
Apple’s iOS12 also displays its share feature with three dots within apps that contain music and videos. The three dots represent a menu that brings up a series of options, including the ability to share. Depending on the app and the media, one could see a “Share Song,” “Share Album,” or “Share Episode” link. Podcasts with useful tips and information related to one’s industry, discipline, and particular role can be shared this way.

The need to share information with colleagues is not new, but the ability to instantly share pertinent information and files in digital form is. Learning how to leverage built-in mobile tools can make the process easier, more efficient, and more accurate. Apple’s iOS12 share feature is one of those tools that can become critical to productivity while traveling or working remotely. With modern smartphone capabilities, waiting to share information or taking extra steps to ensure colleagues are kept in the loop no longer have to be part of employees’ normal routines.

IOS 12 Quick Tips

Get More Out Of The Clipboard In Windows 10

Windows 10 Tips

Get More Out Of The Clipboard In Windows 10

You may have been using Windows 10 for some time now, but it’s likely that you haven’t mastered all of its features just yet.

Copy/Paste was a revolutionary feature when it came out years ago. However, operating systems have been slow to adopt the next logical step in its evolution – the clipboard.

Did you know that you can save 10 or more items to your clipboard on a long-term basis?

It’s simple – hit the Windows key + V to bring up your clipboard history. It’ll show you the many things you’ve Copy/Pasted, any of which you can choose to delete (for security purposes, if it were, say, a password) or pin for later use.

That way, you don’t have to always go back and Copy/Paste that same info from the same note or .doc file – you can have it ready for use on your clipboard for as long as you need it.

Enjoying our Windows 10 Tips and Tricks emails over the past few weeks?

How to Use Your Computer to Install Apps on Your Android Device

Installing Android Phone

Downloading Apps on Your Android Device: How to Use Your Computer

Installing apps to your Android phone via your desktop computer (or other “unofficial sources”) is fast and easy. Learn the simple process right here.  

Installing Android Phone

One of the best things about Android devices is the fact that you can access and execute unique commands on your Android from other devices, such as your computer. Of course, if you own and use an iOS (Apple) device, you know that there are certain commands you perform from your computer as well. But Androids allow for even more flexibility, and in particular, the ability to bypass the official “Google Play Store” for downloading apps.

Instead of being forced to use “Google Play Store,” you can instead opt to retrieve apps for your Android device from nearly any source. Without restrictions, you can download and install these apps onto your Android with just a few clicks.

Here’s how to do it.

Steps to Installing Android Apps From Your Desktop

Before diving into the specific steps, let’s talk about the utility you’ll need to use for this procedure. It’s called Android Debug Bridge or ADB, and it can be used on any operating system, from Windows to Linux and Mac.

This utility is what will allow you to transfer the installation of any app from your computer to your Android device. You can even remove apps that already exist on your Android device — all with Android Debug Bridge and all from your computer.

Ready to download some Android apps? Let’s get started!

Step 1: Download Android Debug Bridge.

Naturally, the first step in this process is to download Android Debug Bridge to your desktop computer. You can do this by going here. You’ll see the package called “SDK Platform-Tools.” Download the package for your appropriate operating system. Do not do anything with the download just yet.

Step 2: Enable your Android device to be recognized on your computer.

  • Head to the “Settings” app on your Android.
  • Navigate to “About phone,” and from them, tap on “Build number.” Do this approximately seven or eight times until it states you are a developer.
  • Go back to the “Settings” app.
  • Now, you’ll see an option labeled “Developer options.” Tap here.
  • Tap “USB debugging” to turn it on.

You’re all set to try installing an app!

Step 3: Get set up to download an Android app from your desktop.

Grab a USB cable, and use it to attach your desktop and Android. At this point, you may be asked to select your mode of connection. In this case, you should select “data transfer.”

Mac users:

1. Open Terminal

2. Enter: cd

3. Press “Spacebar”

4. Drag the folder labeled ADB from your “Downloads” folder (or wherever you receive downloads) and drop it into Terminal

5. Press “Enter”

PC users:

1. Open the downloaded ADB folder

2. Hold “Shift” down and right-click (doesn’t matter where)

3. From the pop-up menu, select “Open a command window here”

Step 4: Start the download process.

In the Terminal window at your disposal, type in the following: ./adb devices. Press “Enter.”

From here, you’ll see your Android phone listed (along with any other attached devices).

Keep in mind that at this point, you should already have the Android app APK file at-the-ready for installation. Keeping Terminal open, type in the following: ./adb install. Please “Spacebar.”

Now, navigate to the Android app APK file you’ve chosen as your first installation, and click and drag it into Terminal. Drop it into Terminal, and finally, press “Enter” to begin the installation process.

Head to your Android device and double-check that your new app has been downloaded.

And there you have it!

Not Interested in Downloading Apps This Way? ADB Can Still Be Highly Useful

Advanced Debug Bridge is a popular utility, most notably because of its ability to let you download apps to your Android device from basically any sources.

But even if you don’t plan on downloading and installing apps to your Android device with Android Debug Bridge, it’s a great utility to have on your computer. That’s because it allows you to perform numerous other useful tasks.

The most notable benefits you may receive from downloading and using ADB include the ability to create complete backups of your Android devices, the ability to reboot your device in recovery mode, and the ability to record your screen.

Whether you’re a professional developer or an average Android user, Advanced Debug Bridge is an excellent utility to consider. Again, you can find it here for immediate download.

Auto-Lock Your Computer In Windows 10

Windows 10 Tech Tips

Windows 10 Tech Tips

Auto-Lock Your Computer In Windows 10

You may have been using Windows 10 for some time now, but it’s likely that you haven’t mastered all of its features just yet.

Do you know how to get your computer to automatically lock while you’re away from it?

It’s a feature included with Windows Hello. While you may already be using Windows Hello to unlock your computer with face recognition, you may not know about Dynamic Lock.

Here’s how it works – you configure Dynamic Lock to recognize a Bluetooth enabled device you keep on your person, such as your phone. After starting up, if that device goes out of range for longer than 30 seconds, your computer will automatically lock itself.

This feature allows you to get up and leave your computer unattended for short periods without having to worry about someone else snooping around your data.

Liking our weekly Windows 10 tips?  Let us know by replying to this email.

8 Essential Reasons to Outsource Your IT Services

Outsource IT Services

8 Essential Reasons to Outsource Your IT Services

Technology moves fast and furiously. In this modern world, you need IT services for your business to run as smoothly as possible. The last thing any well-run company wants is for their IT issues to trip up working conditions so your employees are frustrated, and not being as productive as they should be. Ideally having the right technology in place can help your business to be more profitable in the long run. The question then becomes, is it better to have your IT department in-house or outsource those services? There are actually many terrific benefits to outsourcing your IT services to the right qualified professionals.

Outsource IT Services

Here are 8 essential reasons to leave it to the pros at a managed IT service company for all your technology needs.

Reason #8: Increased Productivity

When companies have their IT services in-house, this can take up time and reduce productivity among the staff. It’s been shown that Managed Service Providers (MSP) who have all the right credentials can implement IT solutions for you in a much faster way. The speed and efficiency an outsourced IT company can give you will allow your business to operate at full capacity much faster in the long run. Less IT distractions equal a better working environment for your staff.

Reason #7: Focus on Core Operations

If you and your employees have to worry about IT glitches and struggles, it’s going to carry over into your daily working environment. That takes away the focus on your core operations. Your managers and employees have limited time to do their job. There are only so many work hours in a day. They can do their jobs better without having to get sidelined by IT problems they shouldn’t have to deal with.

Reason #6: Smaller Business Can Compete

Smaller companies sometimes can’t afford the kind of IT services that larger, more established companies use. By having an MSP who can give you the kind of technological advance that larger companies can afford, will make it easier to compete with the “big guys” on a global scale.

Reason #5: Risks and Threats Are Handled

Most outsourced IT companies are available for risks and threats 24 hours a day, 7 days a week. It’s something they monitor all the time. They will be able to handle and manage these threats for you seamlessly to keep your company operationally rock solid.

Reason #4: More Security

Security and compliance issues are less of a problem with experienced IT professionals. Hardware crashes, viruses, data corruption, and backup failures are less of an issue when outsourced IT people are constantly looking out for your company’s security.

Reason #3: Implement New Technology Faster

When you outsource your IT and need updates to be made to your technology, the professionals are going to be able to put that new technology in place much faster. They can also do these updates in off-hours that won’t interfere with your working day.

Reason #2: More Experienced IT Professionals

A company that focuses solely on IT is going to have all the right credentials and certifications in place that will allow you to have the most experienced professionals in your back pocket. A highly qualified MSP also has the most up-to-date training and ongoing education of everything involved in the technology sphere.

Reason #1: Less Expensive IT Costs

This is by far the most important reason in the minds of most companies, the bottom line. By not having your IT department in-house, you are going to be saving serious monetary resources. It’s just less expensive to outsource your IT costs with an MSP that works efficiently and allows you to pay only for the services your company needs from them.

How To Download Audio From Facebook Messenger

Young Business Person Downloading Facebook Messenger Audio

Young Business Person Downloading Facebook Messenger Audio

How To Download Audio From Facebook Messenger

Facebook Messenger is one of the most popular chat and messaging services in the world. Increasingly, Facebook Messenger is increasingly being used to communicate using text, audio, and video.

However, a common question asked by users of Facebook Messenger is how audio files can be saved from within the messages app.

As it currently stands, the ability to save audio messages is not an integrated feature built into Facebook Messenger itself. Fortunately, there are a few reasonably easy ways to save audio messages to your desktop or laptop.

Method one: Open Web Inspector in your browser

The first method may seem a bit tricky, but it’s actually pretty easy once you get the hang of it.

First, find the audio message that you want to save within Messenger. Next, select “Develop” then “Show Web Inspector”. After that, you’ll want to select the “Network” tab and look for a file that starts with “audioclip-” followed by letters and numbers, and ending in “.aac”. Right-click or double-click on the file and it will download to your Download folder.

Once you’ve done that, the audio file will be saved to your computer, and can be shared or moved like any other file.

Method two: Mobile site hack

An alternate method involves using the mobile version of Facebook on your desktop computer. To do this, simply type “m.facebook.com” instead of facebook.com” as the URL. Once there, click on messages and find the audio file you want to save. Once you find it, click the down-facing arrow in next to the audio clip. As in Method one, you should see the file download to the Download folder on your desktop.

Hopefully, Facebook will eventually integrate the ability to save audio files in a streamlined and user-friendly way. For now, rest assured that the two methods described above will allow you to save audio files quickly and easily.