Out of all of Microsoft’s Office programs, Excel is one of the most universally used. What started out as a fairly basic spreadsheet program has evolved into a must-have business tool. However, the more you use Excel, the more data your workbooks will accumulate.
Keeping these workbooks organized and easy to navigate can be a challenge. We can help with that. Check out our short Excel: Tips and Techniques for Managing Workbooks training video, available to you free and on-demand.
How Can You Encrypt Files and Folders in Windows 10, 8 or 7?
You can encrypt files and folders in Windows (vers. 7-10) using BitLocker. This Vista operating system extension has on-disk encryption as well as key management capability. It’s protected by two-factor authentication, so anyone who wants to crack the code needs a hardware key and your specified long passphrase.
Through its trusted platform module (TPM) hardware, BitLocker provides advanced security features. For instance, when encryption is only at the software level, access may be vulnerable to dictionary attacks. Hardware-level protection safeguards your system from guessing or automated attacks.
What Steps Let You Check For a TPM Chip?
Follow these steps to see if your computer has a TPM chip:
Select the Windows key + X and choose Device Manager.
Expand on Security devices.
One of the devices should read Trusted Platform Module and contain a version number.
BitLocker is typically available on these platforms:
Windows 10 on Enterprise, Pro, and Education
Windows Vista and Windows 7 on Ultimate and Enterprise
Windows 8 and 8.1 on Enterprise and Pro
Windows Server 2008 and later
How Can You Encrypt Files and Folders in Windows 10, 8, or 7?
Follow this procedure to encrypt folders and files:
In Windows Explorer, right-click on a folder or file.
From the context-menu, choose Properties.
In the dialogue box, click Advanced.
The Advanced Attributes dialogue box appears. Look for the Compress or Encrypt Attributes section.
Check Encrypt contents to secure data.
Click OK then Apply.
For folders, a Confirm Attribute Change dialogue box appears to confirm whether you want everything in the folder encrypted. Select your preference and click OK.
You can also choose to Back up your file encryption key. If you miss the message, you can access it in Notification Area for your operating system.
Make sure to plug in a USB flash drive.
Choose Back up now (recommended).
Click Next to create your certificate.
You can accept the default file format for the export.
on the next screen, select the Password: box to enter and re-enter your password.
Go to the USB drive, enter a name for the key and certificate you’re exporting and click Save. (It’s saved with as a .pfx)
Click Next, Finish, and OK.
Remove the USB drive and store it in a secure spot.
How Can You Decrypt a Folder or File?
To decrypt your file or folder:
Follow steps 1-6 above. However, uncheck the Encrypt contents to secure data box for step 4.
Now, you can unlock your drive at startup by entering a password or inserting the USB drive.
You can encrypt the whole hard drive, but the process is time-consuming. If you have a lot of data, expect to wait a long time. You’ll want to leave your computer connected to an uninterrupted power source throughout the process. You have to reboot for the changes to take place. However, you can work throughout the process.
Now you can secure your files to keep out prying eyes and hackers.
Have you ever wanted to put access to certain apps on your phone or tablet under an extra layer of security? There are all sorts of reasons people might want this. Maybe you want to share your phone with a child, but you don’t want little Johnny messing with work apps or your grown-up Netflix account. As another example, maybe you want to let a fellow salesperson review a presentation on your phone without having access to your contacts and sales leads. Some people may have sensitive chats that they want to keep safe from inquisitive eyes, too.
Whatever your reason for wanting to protect certain specific apps, we have good news and bad. First, the good: On Android, there’s an app (or 3) for that! The bad news: there really isn’t any kind of equivalent function on Apple beyond the content restrictions found in Screen Time. If this is something you want to do, you’ll need an Android Device.
How to Password Protect Individual Apps on Android Devices
Password protecting individual apps isn’t something that you can do natively on Android phones. In other words, the functionality is not a standard feature that’s part of the operating system. That said, there is a way to add this functionality. You just need to download the right app.
Step 1: Download AppLock by SuperTools
The first step is to download an effective app-locking app from the Google Play store. There are several to choose from. We recommend AppLock – fingerprint lock & phone cleaner, by SuperTools.
Remember that the Google Play store has plenty of lookalike and copycat apps. If you search for an app protector app, make sure you select this one or another that has very strong reviews.
Install the app, then click OPEN once it’s installed.
Step 2: Set an AppLock Passcode
Once you open AppLock, you’ll be greeted with a landing screen with a big START button. Tap it. The next screen prompts you to create a new password. Don’t be fooled if this screen looks like your Android login screen! It’s something different entirely. This is where you create the password you want to use to access your password-locked apps.
Pick something you can remember but that’s different from your phone’s main lock code. Otherwise, you’re more or less defeating the purpose of this added security. If your kid or your coworker knows your main password, he or she can just guess that same password when trying to access a sensitive app and bingo, they’re in.
When you finish setting up your passcode, you’ll get a couple screens asking if you want to give AppLocker permission to draw over other apps. Set this to Allow/enable/permit, whatever your version of Android calls it. You may need to do this in 2 consecutive screens.
Step 3: More Configuration
Once you’ve taken care of your permissions settings, head back over to the AppLocker app. You should see a list of other apps. Find the ones that you want to lock and click the icon on the right that looks like an open padlock. It will change to a colored, closed padlock when you tap it.
Once you’ve selected all the apps that you intend to lock, click the LOCK button at the bottom.
Step 4: Test It Out
Now that you’ve configured your AppLocker app, it’s time to test it out. Exit to your main screen and open an app that you’ve locked. You should see a secondary login screen with the app’s icon at the top. Enter the passcode you created earlier, and you’re good to go.
Wrap-Up
Adding an app locker to your Android device is a simple way to add an extra layer of security. You’ll gain the freedom to share your device with more people knowing that your sensitive apps are protected.
This article covers the definition of metadata and how to view, manage and delete it in Microsoft applications.
What is Metadata?
Metadata is information about your data. It contains facts that can’t be disputed, the same way data does.
Here is an example from Microsoft Word. Let’s say you’re writing a letter to a co-worker. The letter consists of characters that form words and sentences. To the computer, this is translated as a series of ones and zeroes that make up the data associated with your letter. Other information about the letter includes when it was typed, who wrote it, when it was saved, and what version of Word you used. These facts are metadata.
How Can You View Office Metadata in the File?
You can view the metadata associated with your Excel, Word and PowerPoint files. (Metadata for Outlook email is more complicated and isn’t covered here.)
Open the workbook, document or presentation you wish to check.
Click on the File menu in the top-left of the screen.
On the Info screen, you’ll see the Pages, Size, Total Editing Time, Words, Created, Last Modified, and Related People options.
At the bottom of the list, click Show All Properties for more information.
NOTE: Look at the Template data. Keep in mind that a template with your name or company name can be used to trace the file back to you.
How Can You View Office Metadata in Windows Explorer?
You don’t have to open the file to view the metadata. Here’s how to view it in Windows Explorer:
Open Windows Explorer and go to your saved file.
Right-click on for filename or icon and click Properties.
Click on the Details tab of the Properties window. The metadata appears in a list.
What’s the Best Way to View Metadata for All Your Microsoft Files?
You can use Extensible Markup Language (XML) to view the metadata for all your presentations, documents and workbooks. XML is used to store metadata in computing, including Microsoft Office files.
Let’s use a Word document as an example of how to use XML to view metadata:
In Windows Explorer, go to your saved file.
Make a copy to protect the original file.
Select the copied and either click the F2 button or right-click to select Rename.
Change the file extension to .zip. (NOTE: Each Office filetype ending in x contains compressed XML documents.) Click Yes on the warning that appears.
Right-click the file to choose Extract All…
You will be asked where to save the extracted files and whether to show them when finished. Leave the default values and click Extract.
The extraction produces three folders as well as an XML file. You can examine the files to view the stored information. When you double-click an XML file, it usually opens in Internet Explorer.
You should be able to piece together what the information means. These XML files may include your name: core.xml under the docProps folder, and document.xml and people.xml in the word folder.
How Can You Delete Metadata from Microsoft Files?
Here are the steps to follow to delete your information from these files in Excel, Word or PowerPoint:
Click on the File menu in the top-left corner.
On the Info page, select Check for Issues near the middle of the page.
Select Inspect Document and the Document Inspector opens.
Ensure that all the Document Inspector checkboxes are checked, then select the Inspect button.
Once the Document Inspector finishes, you can see the information it found. If you see a green checkmark in a circle, it found no data for that category. A red exclamation mark indicates it found data of that type.
There’s a Remove All button next to the data type’s description. Click it to remove all data of a certain type. Scroll down to ensure you clear all the desired data.
To double-check, click the Reinspect button to see if you missed anything.
Save your document so that the data isn’t re-entered.
What are the Steps to Ensure the Metadata was Deleted?
First, repeat the steps under “How Can You View Office Metadata in the File?” When you inspect the document.xml, people.xml and core.xml files, there shouldn’t be any personal data. Change the extension from .zip to .docx, to open the file in Word.
How Can You Delete Metadata using Windows Explorer?
This method strips metadata from several files at the same time.
Open Windows Explorer and go to the file with the metadata you want to take out. Right-click it to select Properties.
Under Properties, click the Details tab then select both Remove Properties and Personal Information.
There are two ways to remove information. Remove the metadata from the original file or a copy.
How Do I Remove Metadata from Original File?
Select Remove the following properties from this file:
Check the boxes you want to remove or choose Select All button.
Click OK.
Can You Make a Copy with No Metadata?
This makes a copy of your file with the “Copy” appended to the filename. This copy will have no associated metadata.
Under the Remove Properties window, click Create a copy with all possible properties removed
Click OK.
Compare the properties of the original and copy to view the changes.
Are You in the Clear Now?
What you do next with the document determines whether your metadata stays gone. Digital processing, such as emailing it, may add metadata. The best option is to print and mail the document to avoid add metadata that could be traced back to you.
Did you know you can use just about any Amazon Echo device to make phone calls for free? You can do the same in the Alexa app on iOS or Android, whether or not you have an Echo device. You can also call others in your contacts on their Echo devices instead of their phones. These services can be convenient, and they are real money savers for people paying per minute for their cell or landline phone. In today’s tech tip we’ll show you how to make calls with Amazon Alexa.
Step 1: Open the Alexa App on Your Phone
Making phone calls using Alexa is an opt-in service, meaning you’ll need to enable it and set it up before it will work. Open the Amazon Alexa app on your phone, and tap on the menu bars (likely in the upper left). Choose “Things to Try”. On that page, choose “Calling”. This area reveals several videos and explainers on how to get calling with Alexa set up.
Alternatively, you can simply ask your Echo device, “Alexa, how do I set up calling?” for verbal instructions. Those are nice, but you’ll end up needing to work in the app anyways. For that reason, we think it’s easiest to start in the app.
Step 2: Give Alexa Access to Your Contacts
In the Amazon Alexa app, open the Communicate tab by tapping on the Communicate button in the bottom row. If you’ve not done this before, the app will ask for access to your contacts. Tap OK to grant access.
If you want to use the Alexa app to make calls directly from your phone, you can do it from this screen. Simply select the contact you want to call, choose the right number (cell, work, or home), and the call should begin.
Step 3: Talk to Your Echo Device
If what you really want to do is make calls using your Echo device, you should be able to do so after following steps 1 and 2. You have to know the right lingo, however. You can start with a simple phrase like “Alexa, make a call.” Your Echo device will respond with a question of its own, asking who you want to talk to.
Some of your contacts can be reached multiple ways, so you’ll need to be specific with Alexa. Alexa should understand commands like “Call mom’s cell phone” or “call Shawna at work.” You can also call numbers not in your contacts list with “Alexa, call (555) 356-4321.”
To call another Echo device, simply say “Alexa, call Leslie’s Echo.” If Leslie has calling enabled on her echo, you’ll get patched right through.
If you want to explore phrases in more detail, look back at the “Things to Try” area in the app.
Note: Alexa Can’t Do Everything
One thing to note before diving into the world of phone calls with Alexa: Alexa and her associated devices do have some limitations. There are a few types of phone calls that Alexa can’t make. First, and most importantly, Alexa can’t call 911 or other emergency service numbers. These services need to know where you are, and even though you might think Alexa knows that, the functionality isn’t foolproof enough to support emergency calls.
Alexa also can’t (or won’t) call those pricey 1-900 numbers. (Yes, that’s still a thing.) Similarly, directory assistance and information lines of the 211, 411, or “star-88 on any cell phone” variety aren’t compatible with Alexa’s calling technology. For now, Alexa also won’t call internationally, nor will it respond to “call 1-800 CONTACTS” or other letter-to-number prompts.
Conclusion
Making phone calls through Amazon Alexa is a great way to save if you’re still counting minutes on your landline or cell phone plan. Follow the steps above to enable the feature and give it a try today.
Nearly every site or service we use online requires a username and password. Remembering hundreds of unique passwords is just about impossible, and reusing passwords across multiple sites can be dangerous. If one account is compromised in a data breach (and this is likely: check out IdentityForce’s list of all the breaches so far this year), any other account using that same password is now at risk.
Today’s username and password convention is a difficult system to manage well, but it remains important to create strong, unique passwords for your various accounts. We’re here to help today by sharing a few ways to create unique passwords that are strong and memorable.
Base Your Password on a Familiar Phrase
One way to make a password easier to remember is to base it on a phrase or term that’s familiar to you. Notice we didn’t say to use a term that’s familiar to you: “ilovesarah”, “sparky”, and “gocowboys” are all terrible passwords because they’re easy to guess. Anyone who knows that your wife’s name is Sarah, that your dog’s name is Sparky, or that you love the Cowboys might guess these easily.
Instead, come up with something creative, but that still has a connection to something you won’t forget. Something like “R3dsk1nsRool!” would be hard to guess since it runs counter to your actual interests, and it would be hard to crack due to the character variations. You’ll have an easier time remembering it, though, since it connects to one of your true passions.
Another variation on this theme is to take a poem or song lyric that’s meaningful to you and turn it into an acronym. “Row, row, row your boat gently down the stream” could turn into “RrrybGdtS”, for example. Easy to remember; hard to guess.
Use Long Passwords
Long passwords are hard to guess, but they’re even harder to crack using hacker tools. Use a memorable phrase in its entirety, or choose a series of seemingly unrelated words that mean something to you. You’ll create a password that’s easier to remember than the previous method and that’s even harder for a computer to crack. Check out this Xkcd comic, which illustrates this principle with an added dose of humor.
Use Two-Factor Authentication Wherever Possible
You should enable two-factor authentication (2FA) on any site that offers it. 2FA adds a second method of authenticating that you’re who you say you are. Most 2FA methods involve sending a numeric or alphanumeric code to the account owner (that’s you). This code can be sent via email, text message, or even be displayed on a physical key fob. The code is only good for a short window (usually 1, 2, or 5 minutes). After supplying your username and password, you’ll be asked for this code.
Most consumer applications of 2FA involve sending the code via text message. Unless a hacker has stolen or cloned your phone, he or she won’t be able to view this code and thus won’t be able to log in to your accounts—even with your username and password.
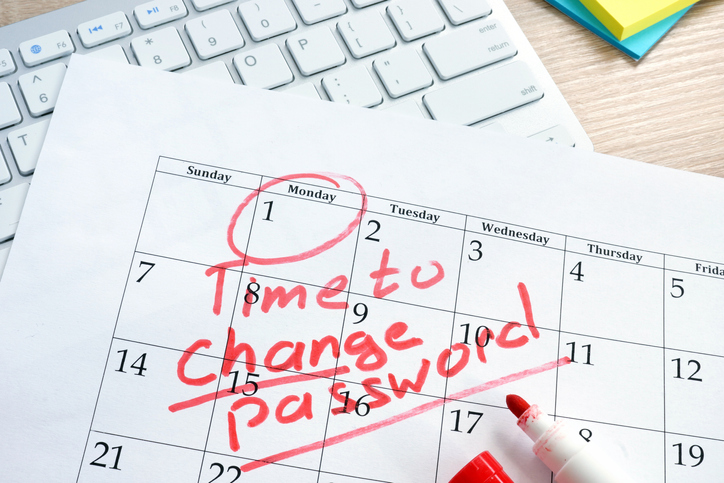
Change Your Password Frequently
Changing your password frequently is another way to stay ahead of information thieves. A stolen password is only useful until you change that password to something else. It’s good practice to change your passwords frequently, such as every 3 to 6 months. We realize that can be a lot of work. Changing only your most sensitive passwords (financial, social, and email) is better than changing none.
Use a Password Manager
All this sounds like a lot of work, and it is. Thankfully, there’s a better way. Using a password manager, you can create long, unique, complex passwords for each account — but you don’t have to worry about remembering them! All your passwords are stored in the password manager. All you need to remember is the strong master password you create for this utility.
Email is a great system when it works well, but it has some frustrating limitations. You have to know someone’s email address to be able to reach them via email, and there’s no central database for finding email addresses. You can often use the internet to find people’s mailing addresses via directory searches, but not such parallel exists for email. If you need to get in touch with someone but don’t have their email address, here are a few tips for finding someone’s email address.
Within Your Organization
If you’re looking for someone within your organization, you can use Outlook to find the person. Simply create a new email, then click the button next to the “To:” field. This will bring up an address book search. Try searching last name first.
You can also use a keyboard shortcut: click in the “To:” field, then start typing the person’s last name. Press ctrl + K, and Outlook will narrow your list. Click the right one, and you’re done.
Outside Your Organization
It gets a little tougher outside your organization. Here are a few tips.
Google It
You can always try a good old-fashioned internet search. Search for the person’s name and the word “email”. Maybe include the person’s job title as well. For all examples below we’ll be searching for Frank Johnson, accountant at Awesome Accounting, Inc.
Get creative with your Googling. Other search ideas include searching [“Frank Johnson” “contact me” “Awesome Accounting”] or [“Frank Johnson” “Accountant”]. If you’re looking for a personal account, you could also search for [“Frank Johnson” AND “@gmail.com”]. Keep trying other popular email services.
Mine Social Media
Many people have an email address associated with their Facebook or LinkedIn accounts, and sometimes they make this public. Be sure to search social media for the person you’re trying to contact. Even if you can’t find an email address, you will likely find a way to contact the person. If it’s a personal contact, a Facebook message might be most appropriate. If it’s a business connection, stick to LinkedIn.
Check for a Website
Does the person you’re looking for have a website? If so, there is likely a “contact me” page there. These often route directly to an email inbox. You don’t get to see the address unless the person replies, but it’s a place to start. Some people also include an email address directly on their websites. This is less common, but it’s worth checking.
Use a Search Tool Like Pipl
There is no universal directory for email addresses, but services like Pipl are doing what they can. Pipl maintains a database of known contact information for many people, and it’s free to use. If your other methods don’t yield results, check here.
In today’s tech tip, learn how to make the most out of your Microsoft Teams meetings by showing PowerPoint slides directly in the virtual meeting window.
Microsoft Teams is a powerful collaboration tool with a deep, rich feature set. One of the great features in Microsoft Teams is the ability to turn calendar appointments into virtual video or audio meetings directly in the app. We’ve covered how to do this before, but did you know you can show Microsoft PowerPoint slides right inside your Teams meeting? We’ll show you how in today’s tech tip.
Step 1: Launch or Join a Teams Meeting
To launch or join a meeting in Teams, click on the Meetings tab (on the desktop app, this is on the left side of the app). If your organization uses the Outlook calendar, Teams will pull that data into the Meetings tab. You should see a list of meetings here.
If you’re joining someone else’s meeting, you should see it in the list. Simply click “Join”. If you’re launching your own, click “Schedule a meeting” at the bottom of the column. Fill in the relevant details and pick a time. (It can be right now, if you need.)
Bonus tip: If you’re the one scheduling the meeting, make sure to invite the relevant teams or people. Use the Scheduling Assistant to see when your participants are free.
Step 2: Find and Click the Share Button
Once you’ve joined a Teams meeting (either as host or participant), you’ll see a set of buttons whenever you move the mouse. The video camera and microphone are fairly self-explanatory, but the button that comes next is a little less obvious. It looks like a rectangle with an up arrow in it. This is the Share button. Click it to bring up the Share menu.
You can share all sorts of things, but PowerPoints are what we’re after here. You’ll see a section with some suggested PowerPoints. Microsoft attempts to guess which OneDrive or SharePoint files you might want, but if it fails to suggest the right ones, you can always navigate yourself by clicking “Browse”. Click on the file you want, and it will launch into the Teams meeting.
How Presenting Works
Now that you’ve launched your PowerPoint presentation, be sure to understand how presenting works. You can toggle through your slides as you move through your presentation, just like you would in an in-person meeting. If you’re not the presenter, you can even toggle backward or forward through the slide deck without disturbing the presenter. This is handy if you need to move back to a previous slide and copy down information (or see what’s coming up if you need to time a restroom break!).
Sharing PowerPoints within Teams is a great way to keep up engagement in virtual meetings. Use this tip in your next Teams meeting and increase the value to all participants.
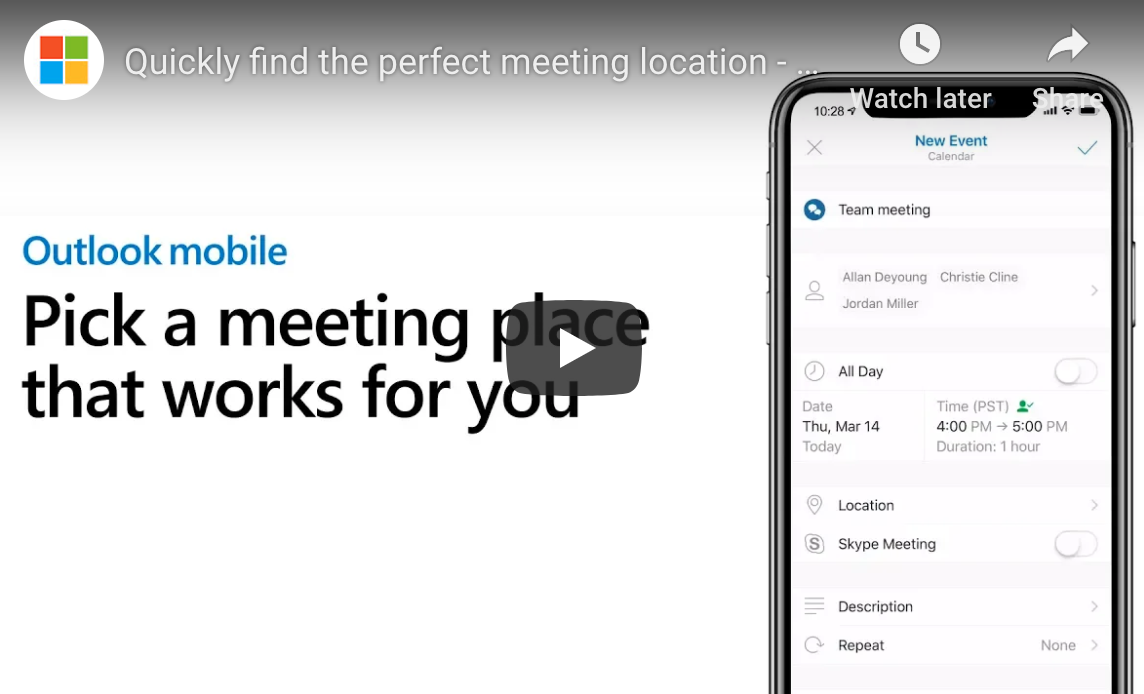
Microsoft’s Office suite makes it easy to schedule meetings, reserving the right room and inviting all the right people. Many people think they can only use these powerful features from their office computer, because Exchange calendar integration in iOS doesn’t support these features. In reality, mobile users can still access these powerful scheduling features using Outlook Mobile. Here’s how.
Step 1: Create a New Event
Open your Outlook Mobile and create a new event. To do this, tap on the calendar tab along the bottom of the app. Next, press the big plus sign in the lower right corner. (As always, locations can change over time and depending on device. You’re likely to find a calendar page and a plus sign somewhere, though—use them.)
Step 2: Name Event, Add Attendees, and Set Date and Time
Choose a name for your meeting in the first field, and add all the people you want to attend the meeting in the second one. For the latter, just start typing names. Outlook Mobile will pull up relevant contact information. Click on the contacts you want to include.
Note: Depending on your configuration settings, Outlook Mobile may offer you multiple options for some contacts. If you have a personal and a work version of a contact, for example, be sure you choose the right one. Do the same if you have a single contact with multiple email addresses associated.
Before moving to step 3, check that the date and time information is set correctly. You can change this later, but setting it up now allows the magic below to work properly.
Step 3: Click Location
Next, tap the “location” field a little bit lower on the screen. This is where the magic happens. Outlook Mobile will intelligently suggest connected meeting rooms that you use frequently and that are free for your selected time. It will also suggest places nearby, which is useful if you’re calling an off-site meeting. Outlook Mobile learns from you, too: the more you use it, the smarter its suggestions become.
If you don’t see a suitable location listed, you can search for a better one. This can be an on-site meeting room or any mappable location.
If you and your meeting attendees have “Time to Leave” enabled in settings, Outlook Mobile will even notify you a few minutes before you need to leave your current location to get to the meeting on time. One-touch directions are available directly in the calendar event, too.
Wrap Up
This is just one of many powerful yet overlooked features in Outlook Mobile. To learn more or for help with other IT questions, contact us today.
Data security becomes more important with each passing year. It’s important to have a good understanding of the terms that both governments and the information security industry use. Understanding these terms will help you lead your organization to comply with today’s regulations as well as whatever new regulations are coming down the pike. Today we’ll define three major terms: personally identifiable information, non-personally identifiable information, and personal data.
Personally Identifiable Information (PII)
Personally identifiable information, or PII, is information that organizations may hold on individuals that can be tied to the individuals’ identities. The National Institute of Standards and Technology provides a legal definition for the USA:
PII is any information about an individual maintained by an agency, including (1) any information that can be used to distinguish or trace an individual‘s identity, such as name, social security number, date and place of birth, mother‘s maiden name, or biometric records; and (2) any other information that is linked or linkable to an individual, such as medical, educational, financial, and employment information.
PII comes in two varieties. Linked information is the more sensitive variety. Anything that can by itself be used as an identifier is considered linked information. Social security numbers, driver’s license numbers, full names, and physical addresses are all examples of linked information.
Linkable information is the second category. Linkable information can’t do much on its own, but it becomes powerful when linked with other pieces of information. ZIP code, race, age range, and job information are all examples of linkable information.
Non-Personally Identifiable Information (Non-PII)
Non-personally identifiable information, or non-PII, is information that doesn’t fall into the above categories. All sorts of information falls into this category. In the digital world, IP addresses, cookies, and device IDs are considered non-PII, since (unlike what you see on TV) these pieces of information can’t be used to identify an individual.
Personal Data
Personal data sounds like a casual way to describe the above, but it’s more than that. Personal data is a term used in Europe that is roughly equivalent to PII. Euro-centric publications won’t tend to use the term PII unless discussing something explicitly American. Many of the same principles of PII apply to personal data, but there are some further ramifications that are important to know.
As the USA does with PII, the EU has a specific definition for personal data, defined in GDPR as this:
Article 4(1): ‘personal data’ means any information relating to an identified or identifiable natural person (‘data subject’); an identifiable natural person is one who can be identified, directly or indirectly, in particular by reference to an identifier such as a name, an identification number, location data, an online identifier or to one or more factors specific to the physical, physiological, genetic, mental, economic, cultural or social identity of that natural person.
A Crucial Difference Between PII and Personal Data
One of the most crucial differences between the NIST’s definition of PII and GPDR’s definition of personal data is this: GPDR concludes that even cookies, IP addresses, and “other identifiers such as radio frequency identification tags” can be personal data, especially when combined with other unique identifiers.
In short, the EU’s GPDR guidelines are more restrictive than their USA equivalents. This is the explanation for the rash of “cookie notices” that’s spread around the web, and it could have implications for your business.
Wrap Up
If you need more information about PII, non-PII, and personal data, don’t hesitate to reach out. We’re here to serve you and meet your IT needs.